background image


18/59 

Version 23.05 

Silent electrical system 

Item number: -2195


The Silent electrical system comprises 5 components: display, button unit, battery, motor 
and bottom bracket. How the first 3 parts are used is explained in this user manual. 

Operation of the display  

The display provides you with cycling information, which will be explained in more detail 
later. The display is mounted onto the handlebars by means of a bracket. The display 
cannot and does not have to be removed when leaving the bike.


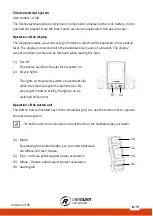
(1)


On/off 
This button switches the electrical system on. 

(2)


Bicycle lights 

The lights on the bicycle switch on automatically 
when the electrical system is switched on. By 
pressing this button briefly, the lights can be 
switched off (and on). 

Operation of the button unit


The button unit is mounted next to the handlebar grip. You use the button unit to operate 
the electrical system.  

The button unit can be mounted on the other side of the handlebars by your dealer. 


(3)


Mode  
By pressing this button briefly, you can switch between 
the different Screen modes. 

(4)


Plus - Increase pedal support power assistance 

(5)


Minus - Reduce pedal support power assistance 

(6)


starting aid 


(1)    (2) 

(3) 

(4) 

(5) 

(6) 

Summary of Contents for Fun2Go 2

Page 1: ...Version 23 05 Van Raam Guldenweg 23 7051 HT Varsseveld The Netherlands 31 0 315 25 73 70 info vanraam com www vanraam com User Manual Combination Fun2Go 2 and FunTrain 2 Fun2Go 2 FunTrain 2...

Page 2: ...e first use 13 Silent electrical system 18 Silent Electrical System options 28 Van Raam e bike app 31 Accessories 33 Technical specifications 42 Maintenance and adjustments to be done by owner 43 Repa...

Page 3: ...ements The signed declaration of conformity can be found on the Van Raam website UK UKCA Van Raam Reha Bikes B V as manufacturer declares that the Fun2Go 2 FunTrain 2 as described in this user manual...

Page 4: ...st be made understandable by a responsible supervisory person Item number Fun2Go item number 387 FunTrain item number 389 Delivery The delivery should include the following Tricycle with packaging Use...

Page 5: ...the Fun2Go 2 that allows 1 able bodied person to cycle with 3 co riders Intended usage The tricycle has been designed for normal use on a flat solid surface In general tricycle caution should always b...

Page 6: ...fted Are you rolling backwards on a slope Then brake densely to prevent the front wheel from losing contact with the road surface Avoid riding on steep slopes when your bike is fitted with one of the...

Page 7: ...ns the Fun2Go with pedal assistance is limited to a maximum of 20 km per hour Extra attention is essential if a child is using the tricycle Never leave a child alone with the tricycle without supervis...

Page 8: ...working correctly The brakes should work and you should feel pressure on the brake lever Make sure there is enough air in the tires The tires may be inflated to the maximum pressure indicated on the s...

Page 9: ...ket and what is carried on the carrier rack Make sure that the permitted weight of the basket is not exceeded maximum 20 kg No people are allowed to be carried in the basket Damaged or worn parts The...

Page 10: ...during regular maintenance Make sure that fingers and other limbs do not get caught when adjusting the bicycle Seat position To adjust the seat position correctly the main rider must place one foot o...

Page 11: ...has been removed the seat frame can be adjusted in relation to the backrest To do this loosen the 4 socket head screws B a few turns 3 Slide the seat frame forwards or backwards 4 Tighten the 4 socke...

Page 12: ...and then tighten the hex key firmly again Do not pull out the handlebar stem further than the mark Otherwise the tube will not stick into the shaft deep enough and there is a risk of it breaking off w...

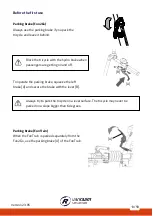
Page 13: ...e when passengers are getting on and off To operate the parking brake squeeze the left brake A and secure the brake with the lever B Always try to park the tricycle on a level surface The tricycle may...

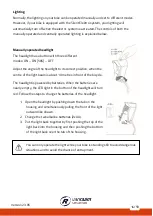
Page 14: ...e of the light beam is about 10 metres in front of the bicycle The headlight is powered by batteries When the batteries are nearly empty the LED light in the button of the headlight will turn red Foll...

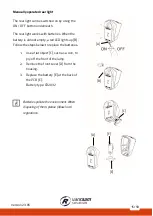
Page 15: ...y is almost empty a red LED lights up B Follow the steps below to replace the batteries 1 Use a flat object C such as a coin to pry off the front of the lamp 2 Remove the front cover D from the housin...

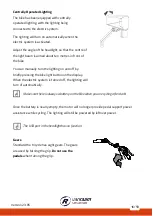
Page 16: ...rn the lighting on and off by briefly pressing the bike light button on the display When the electric system is turned off the lighting will turn of automatically Make sure there is always a battery o...

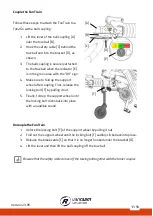
Page 17: ...ort wheel after coupling First release the locking bolt F by pulling it out 5 Finally fold up the support wheel until the locking bolt clicks back into place with an audible sound Uncouple the FunTrai...

Page 18: ...ng the bike 1 On off This button switches the electrical system on 2 Bicycle lights The lights on the bicycle switch on automatically when the electrical system is switched on By pressing this button...

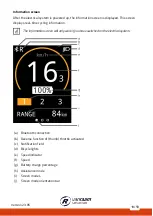
Page 19: ...real time cycling information The information screen will only work if you have switched on the electrical system a Bluetooth connection b Reverse function of thumb throttle activated c Notification f...

Page 20: ...er weight and load and the environment 2 Trip distance TRIP This is the distance travelled since the trip odometer was last reset By holding down the mode button for one second the trip odometer can b...

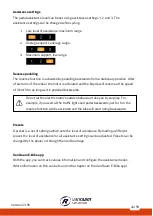
Page 21: ...Silent electrical system provides assistance while cycling Starting aid With the starting aid pedal assistance is activated up to a speed of 6 km h without having to pedal yourself To do this press a...

Page 22: ...long as it is pedalled backwards Do not let the electric motor s sudden behaviour take you by surprise For example if you wait at the traffic lights and pedal backwards just for fun the reverse funct...

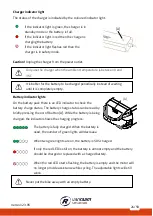
Page 23: ...e battery is not properly connected then the green LED will be on standby mode In case of an unsatisfactory connection unplug the charger from the power outlet and clean its connector with a dry cloth...

Page 24: ...ged the indicator shows the charging progress The battery is fully charged When the battery is used the number of green lights will decrease When two green lights are on the battery is 50 charged If o...

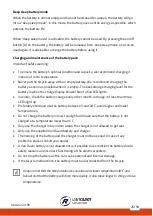
Page 25: ...to five LED lights In winter check the battery charge every other month recharge it if less than three LEDs light up Preferably store and use the battery between 5 and 20 C avoid higher and lower tem...

Page 26: ...of the battery If it is empty charge the battery 3 If the above does not provide a solution please contact your dealer If a red LED flashes on the charger unplug the charger from the power outlet and...

Page 27: ...se disconnect it from the power outlet and the power plug from the battery The charger may only be used by persons who have read the information in this manual and are familiar with the correct use of...

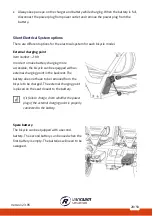
Page 28: ...der to make battery charging more accessible the bicycle can be equipped with an external charging point in the backrest The battery does not have to be removed from the bicycle to be charged The exte...

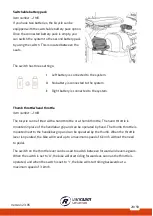
Page 29: ...nd throttle Item number 2183 The bicycle can be fitted with a hand throttle or a thumb throttle The hand throttle is mounted in place of the handlebar grip and can be operated by hand The thumb thrott...

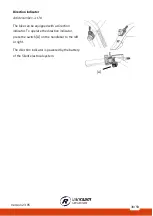
Page 30: ...cle number 4170 The bike can be equipped with a direction indicator To operate the direction indicator press the switch A on the handlebar to the left or right The direction indicator is powered by th...

Page 31: ...ke settings Send SOS messages with GPS location to a number of your choice View cycled routes View information about the bike I have a battery with a yellow GPS sticker If you have a battery with yell...

Page 32: ...rip meter battery capacity and power consumption during the bike ride For more cycling data there is a details screen including average speed maximum speed total distance battery voltage pedaling powe...

Page 33: ...he bike separately Separate gears 2x 8v optional Item number 1200 This gear shift option allows both the main rider and co rider to select his her own gears This gear shift option allows both the main...

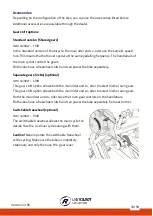
Page 34: ...ve This means that the co rider can cycle freely without resistance and does not actively join in with cycling B In this setting the pedals rotate automatically when cycling This forces the co rider t...

Page 35: ...aration Caution The maximum allowable weight of these options is 20kg Caution In case of a combined weight of 40 kg of luggage both front and rear 20 kg the maximum combined weight of two users must n...

Page 36: ...stick holder can be mounted left or right The depth of the stick holder can also be adjusted Please note The depth setting of the stick holder can affect the adjustable range and swivel range of the s...

Page 37: ...able in the longitudinal direction This allows you to pedal with the ball of your foot for better thrust 1 Slightly loosen the four nuts with a socket wrench 2 Slide the plate included the foot suppor...

Page 38: ...is suitable from shoe size 37 up to size 48 The width of the range of this foot support is min 8 5 cm to max 13 cm The foot support returns to its neutral position when it is not used The neutral posi...

Page 39: ...leg fixation 1 Loosen the bolt A several turns using a nut spanner Adjust the height of the lower leg fixation to the lower leg of the rider Now tighten the bolt again 2 Loosen the two nuts B several...

Page 40: ...he seat is rotated 90 degrees the seat will lock into place 3 Let the co rider get on the bike 4 Pull up the lever A and rotate the seat in the opposite direction until it locks into place Hipbelt co...

Page 41: ...ing 50 kg Footplate optional Item number 0025 0026 When cycling you can rest your feet on the footplate A pneumatic spring locks the footplate into place under the seat It can be unfolded manually by...

Page 42: ...cm 117 incl armrest 117 incl armrest Height cm 109 109 Front wheel 20 Rear wheel 20 20 Weight kg configuration without electrics 76 76 Total max user weight kg 120 p p 120 p p Max load basket kg 20 2...

Page 43: ...ic hairs not a wire brush The grips seats and upholstery of the seat and back can be cleaned with a damp cloth and mild detergent Do not use a pressure washer or a steam cleaner The right lubricant Th...

Page 44: ...information on repair and maintenance available Repairs and maintenance to be done by dealer Check the brakes the rims lighting the chain tension and the spokes Also check the tyre tread depth This s...

Page 45: ...To access the long chain it is necessary to remove the left side of the middle cover In most cases the right side of the middle cover does not need to be removed as it is screwed onto the frame Follow...

Page 46: ...Then loosen the screws C and D 3 The chain guard is now loose and can be removed Removing Crank Cover To access the crank chain covers only the top of the chain guard needs to be removed The bottom re...

Page 47: ...h freehub function To tension the crank chain follow these steps 1 First loosen the Allen bolt A 2 Use the two holes B next to the Allen bolt to turn the eccentric bracket with a pin wrench C 3 Turn r...

Page 48: ...in has an automatic chain tensioner that ensures the chain always has the correct tension It does not need to be adjusted Please note that the chain tensioner cannot indicate when the chain is worn Ge...

Page 49: ...Loosen bolt A 2 Pull the fork backwards to increase the tension on the chain 3 Tighten bolt A again Adjusting the seat post Over time the seat post may develop some play which can be audible To elimin...

Page 50: ...cycle safely Guarantee The guarantee is valid for all faults in the product which are proven to be caused by material or manufacturing error We give a guarantee of five years on the frame and the fron...

Page 51: ...mber is printed on the sticker This sticker is located on the frame see the image below Example sticker The decal is located on the back of the frame tube for both the Fun2Go 2 and the FunTrain 2 On t...

Page 52: ...months 2 000 km 12 months 1 000 km 30 90 min Dealer Monthly inspection Every month Every month 15 min User Annual inspection Every 12 months Every 12 months 60 min User This is advised to extend your...

Page 53: ...om service moment 1 and Inspection of the pedals and bottom bracket Grease and tighten the lock Grease and tighten the steering stem Check the steering ball joints Run all tests in the dealer tool E B...

Page 54: ...rsion 23 05 Service plan 1st Service moment o Yes No Date o Dealer o Mechanic Remarks 2nd Service moment o Yes No Date o Dealer o Mechanic Remarks 3rd Service moment o Yes No Date o Dealer o Mechanic...

Page 55: ...55 59 Version 23 05 Annual inspection Date Dealer Mechanic Remarks...

Page 56: ...56 59 Version 23 05 Here you have space to take notes or write down the maintenance on your bike...

Page 57: ...57 59 Version 23 05 Here you have space to take notes or write down the maintenance on your bike...

Page 58: ...58 59 Version 23 05 Here you have space to take notes or write down the maintenance on your bike...

Page 59: ...hen the instructions in the user manual are followed Pay special attention on the service intervals who specified in the manual of the bike To claim warranty and service you should always fill out thi...

Reviews: