Van der Ende Pompen B.V.
Maasambacht 4
2676CW Maasdijk
Nederland
Installation manual Envalve series VK, VKF and PVK
Page 12 of 23
4. Installation
4.1 Mechanical
For the correct installation of the Envalve, first fit all the piping without glue. When everything is correct
in size and properly aligned, loosen the bolts or the nut and take the actual valve from between the collars.
Be careful not to damage the seal while doing this. Put the valve aside and remove the collars from the
piping.
Glue the collars to the piping. Excess glue on the inside of the piping should be removed, this glue can get
between the seal and the paddle and cause serious damage or leaking.
Make sure you put the flanges or the nut over the piping behind the collars before the collars are
glued, the flanges or nut cannot be added later!
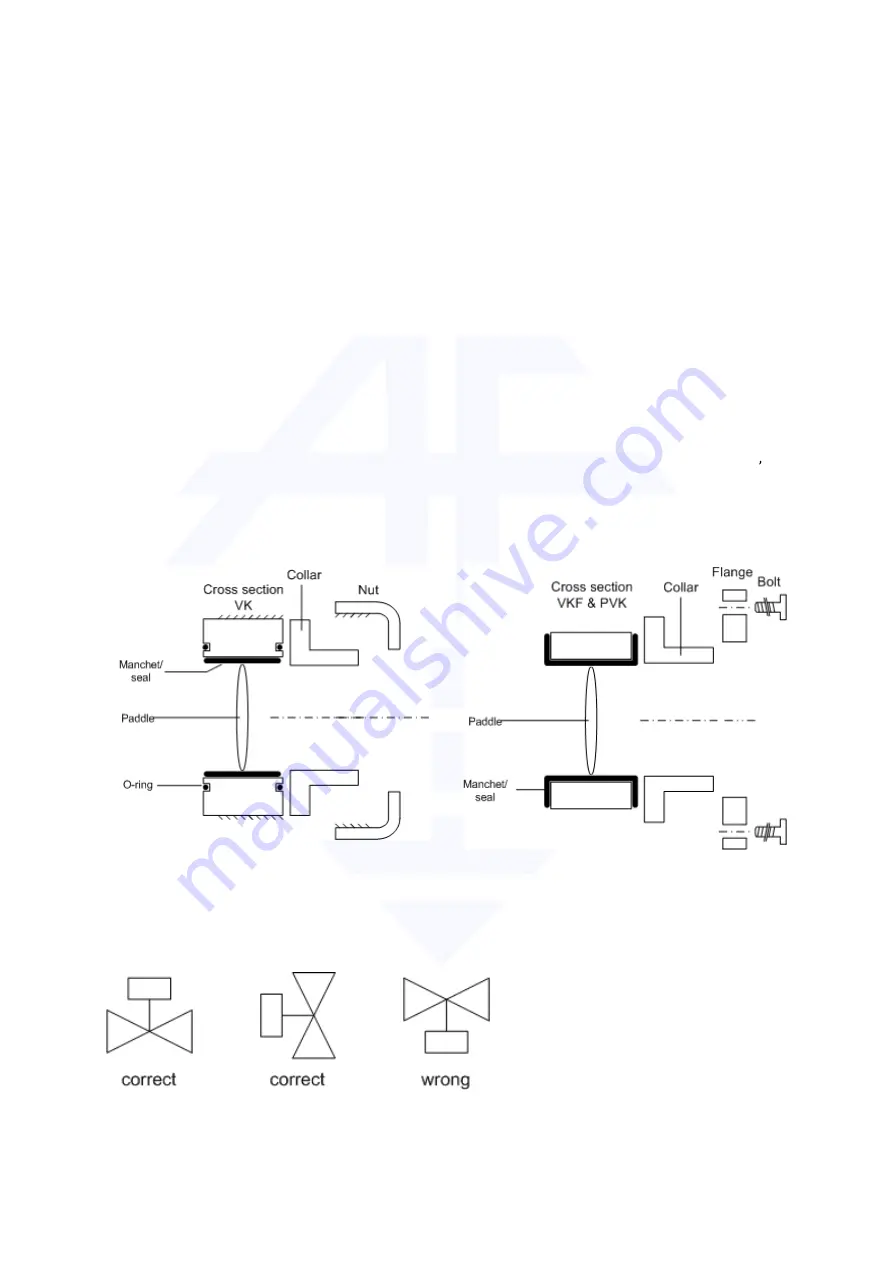
From NW75 and larger there is only one seal, serving as seal between the paddle and housing and as seal
between the collars and actual valve. NW63 and smaller have two separate O-rings as seal between collar
and valve and another seal between the housing and the paddle. It is important that for all the Envalve s
plain smooth collars are used, not the ones with a groove (for an O-ring), otherwise they will leak. The use
of additional seals is unnecessary and we strongly advise not to.
Picture 4. Seal Envalve NW63 and smaller (left) and NW75 and larger (right).
When the collars are glued and excess glue is removed, the actual valve can be put back between the
collars, again, be careful not to damage the seal. The valve can be installed in every position, except up side
down (drive under valve).
Picture 5. Installation positions Envalve.


