background image

R20 fitting instructions  

14

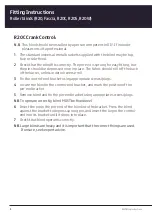
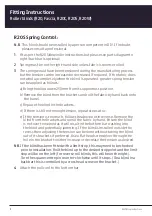
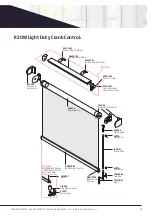
R20W Light Duty Crank Control:

N.B

This blind should be installed by a person competent in DIY. If in doubt 

please consult a professional. 

1

.


The standard universal metal brackets supplied with the blind may be top, 

face or side-fixed.

2

.


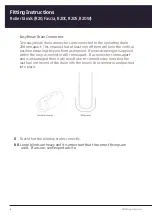
Check that the blind fits correctly.  The pin-end is sprung for easy fitting, but 

the pin should be depressed once in place. The fabric should roll off the back 

of the barrel, unless ordered reverse-roll.

3

.


Fix the control-end bracket using appropriate screws/plugs.

4

.


Locate the blind in the control-end bracket, and mark the position of the 

pin-end bracket.

5

.


Remove blind and fix pin-end bracket using appropriate screws/plugs.

NB.


To operate correctly, the blind MUST be fixed level.

6

Insert the pin in the pin-end of blind into bracket. Press the blind against 

the bracket to depress the sprung pin, and insert the lug on the control-end 

into its bracket until it drops into place.

7.


Check that the blind operates correctly.

NB.


Large blinds are heavy and it is important that the correct fixings are used.  

If unsure, seek expert advice.

Fitting Instructions

Roller blinds (R20, Fascia, R20C, R20S, R20W)

Summary of Contents for R20

Page 1: ...Fitting Instructions for roller blinds R20 Fascia R20C R20S R20W Fitting Instructions for rollerblinds R20 Fascia R20C R20S R20W...

Page 2: ...ulation 2 To avoid strangulation and entanglement keep cords out of the reach of young children Cords may become wrapped around a child s neck 3 Move beds cots and furniture away from window covering...

Page 3: ...Call 01949845399 Fax 08450090281 Email info valeblinds com Visit www valeblinds com 3...

Page 4: ...ff the back of the barrel unless ordered reverse roll 3 Fix the control end bracket using appropriate screws plugs 4 Locate the blind in the control end bracket and mark the position of the pin end br...

Page 5: ...or easy break chain connector also see page 8 11 Chain Tidy The chain tidy will be attached to the chain when the blind arrives The chain tidy should be at a maximum distance from the control mechani...

Page 6: ...ght is applied within the loop a connector will come apart If a connector comes apart and is undamaged then it will need to be re connected by inserting the last ball on the end of the chain into the...

Page 7: ...0W Bottom bar plastic ES 933015W G BL BR Universal end set 32mm 933025W Universal end set 40mm 933035W Universal end set 45mm ES available in black brown grey and white in 32mm 938170W Bottom bar end...

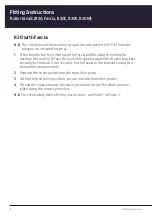
Page 8: ...ied to fix the brackets securely to the wall Once secured fix the fascia to the brackets using the threaded screw provided 2 Remove the chain guide from the transition plate 3 Lifting the blind into p...

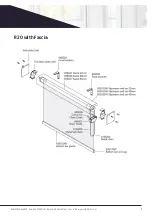
Page 9: ...Call 01949845399 Fax 08450090281 Email info valeblinds com Visit www valeblinds com 9 R20 with Fascia...

Page 10: ...nd bracket using appropriate screws plugs 4 Locate the blind in the control end bracket and mark the position of the pin end bracket 5 Remove blind and fix the pin end bracket using appropriate screws...

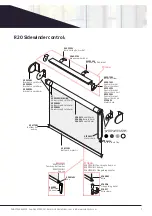
Page 11: ...le Clip 911770 Fixing Clip 911771 Joint Fixing Clip 70723 Magnetic Adaptor 70722 Magnetic Universal Joint 146B W Control Rod 70421B W Crank 911770 Fixing Clip 70946 Bracket adaptor 933401 Crank suppor...

Page 12: ...eat steps a to c e If the tension is too much follow the above but in reverse Remove the blind from the brackets and unroll the fabric by hand Ensure the blind is not over tensioned as it will result...

Page 13: ...raked Spring Control End 941003 Braked Spring Short 941004 Braked Spring Medium 941005 Braked Spring Long 938312W B S Bottom Bar End Cap 941010 Spring limit stop 962499 10mm Plastic Strip with double...

Page 14: ...rol end bracket using appropriate screws plugs 4 Locate the blind in the control end bracket and mark the position of the pin end bracket 5 Remove blind and fix pin end bracket using appropriate screw...

Page 15: ...ic Hook 938024 40mm Barrel 942004 Crank and bracket set 926325W Back bar top fix bracket 933026W Control bracket 40mm back bar 933010W Back bar screw 926325W Back bar top fix bracket 938031W Aluminium...

Page 16: ...ted Mulberry House Station Road Bottesford Nottinghamshire NG13 0EN Call 01949 845399 Fax 0845 0090281 Email info valeblinds com Visit www valeblinds com For more information on all products please ca...

Reviews: