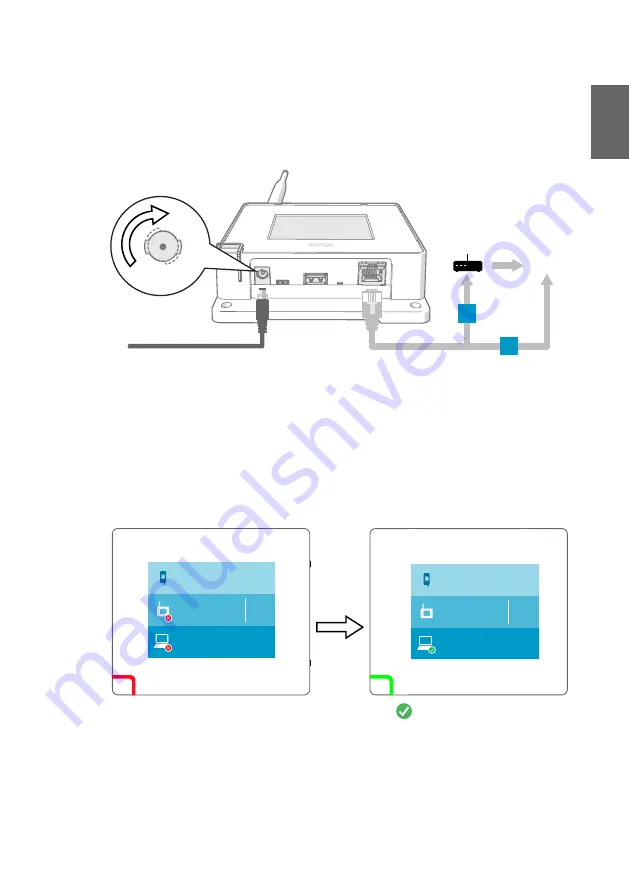
3. Connect CA10 to the network using an Ethernet cable.
4. If the Ethernet cable does not provide power, connect the DC power supply:
a. Connect the plug to the power supply connector of CA10. Make sure the plug is
oriented correctly and goes in all the way.
b. Rotate the power plug slightly to lock it to the connector.
c. Connect the power supply to the wall socket.
10–30 V
d
Ethernet
Internet
4G
A
B
5. If necessary, secure the power supply so it does not fall or hang on its cable.
6. Wait for the access point to start up.
7. Make sure the power LED is green and the lower part of the display shows the text
Connected to cloud
.
Red LED indicates that CA10 has a connectivity problem and has turned off its radio. No
data loggers can be connected until CA10 establishes an Internet connection and the LED
is green again.
CA10 IP address
192.168.137.184
Connected data loggers
3
Connected to cloud
o
ipsum
o
ipsum
CA10 IP address
No connection
Not connected to NTP
Connected data loggers
0
Not connected to cloud
m ipsum
10 ... 20 min
8. CA10 is now ready to connect CWL100 data loggers to Jade Smart Cloud. Data loggers
that do not already have a connection will connect to this access point, up to the
maximum capacity of 32 data loggers. It will take at least a few minutes for a data logger
to be connected. If a data logger is in power save mode, the connection will take up to an
hour.
7
ENGLISH
Summary of Contents for CA10
Page 1: ...EN FI M212461EN B Quick Guide Cloud Access Point CA10...
Page 3: ...Table of contents English 5 Suomi 9 Regulatory compliance 13 3...
Page 4: ...4 M212461EN B...
Page 16: ......
Page 17: ...www vaisala com...


