


Installation 5
0020235300_03 uniSTOR Installation and maintenance instructions
9
19
2-port motorised valve
(Not included in the
scope of delivery for the
product)
20
Destratification pump
(Not included in the
scope of delivery for the
product)
21
Destratification circuit
(anti-legionella function)
22
Cold water inlet
23
Cylinder heating return
5.2.1
Connecting the product to the primary circuit
1.
Connect the primary circuit to the cylinder's heating inlet
(16)
and the cylinder's heating outlet
(23)
.
–
Minimum diameter of the copper pipe:
≥
28 mm
Note
Ensure that the distance between the heat
generator and the product is as small as pos-
sible in order to prevent heat losses.
Installing a 3-port motorised valve for heat pump
systems
AUT
O
MAIN
OPEN
AB
B
A
2.
Connect AB to the heating flow on the heat pump
(15)
,
B to the flow on the heating circuit
(12)
, and A to the
heating inlet on the cylinder
(16)
.
3.
The 3-port motorised valve can be installed vertically or
horizontally. For horizontal installation, align the valve
head so that it is facing upwards.
Installing the 2-port motorised valve for installa-
tions that have a floor-standing boiler
AUT
O
MAIN
OPEN
4.
Install the 2-port motorised valve at the heating coil's
inlet or outlet.
5.
For the 2-port motorised valve, follow the installation
direction that is marked by an arrow.
6.
The 2-port motorised valve can be installed vertically or
horizontally. For horizontal installation, align the valve
head so that it is facing upwards.
5.2.2
Installing the drain valve
The drain valve must be supplied by the customer.
Install the drain valve at the height of the cold water supply
or further below this level.
5.2.3
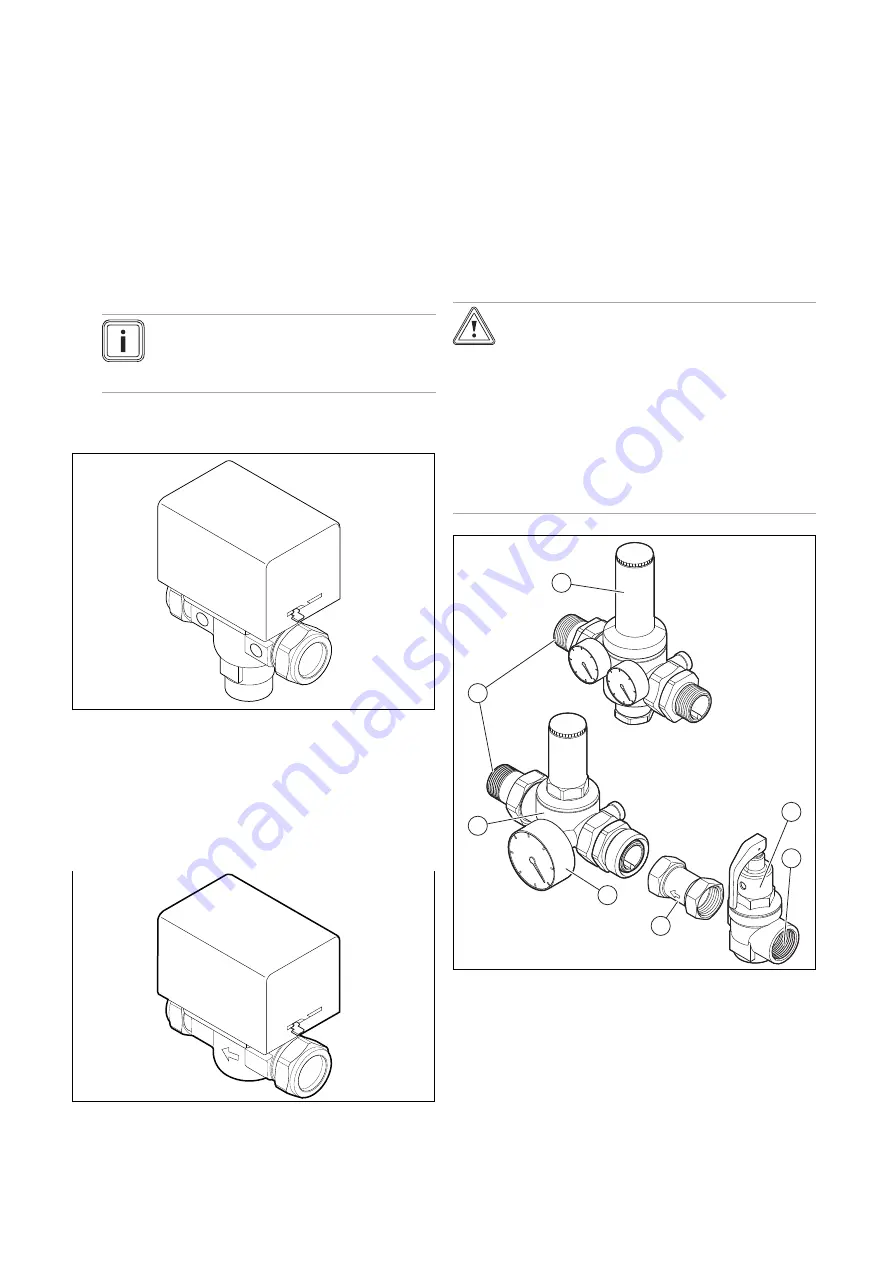
Installing the safety group
Caution.
Excessive pressure in the domestic hot
water cylinder
Excessive pressure in the domestic hot water
cylinder may cause the cylinder to burst.
▶
Ensure that the expansion relief valves
are not blocked.
▶
Ensure that there is no isolation valve
between the safety group and the cylin-
der.
1
4
5
6
7
3
2
1
Pressure reducer set
(1", 1.25", 1.5")
2
Cold water inlet
3
Pressure reducer (op-
tional)
(only 2")
4
Expansion relief valve
5
Expansion relief valve
drain
6
Non-return valve
7
Manometer (optional)
1.
Before installation, flush the pipes in order to clear any
contamination and prevent the build up of dirt.
2.
Install the safety group horizontally and install the ex-
pansion relief valve so that it is facing upwards.
Summary of Contents for uniSTOR VIH SW GB 500 BES
Page 23: ......


