


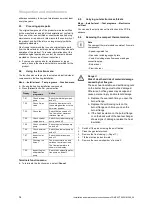


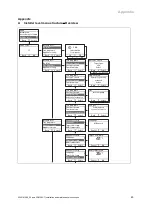


10 Troubleshooting
40
Installation and maintenance instructions auroCOMPACT 0020181589_04
1
2
3
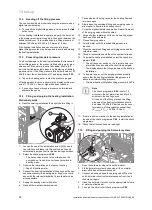
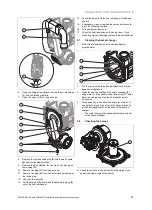
7.
Remove the assembly (which is made up of the fan,
Venturi jet and gas valve) from the unit.
8.
Loosen the gas valve's fixing screw
(3)
from the
bracket.
9.
Remove the gas valve from the retainer.
10. Remove the Venturi jet
(2)
and the gas connection pipe
(1)
from the fan by turning the bayonet fitting on the
Venturi jet as far as it will go anti-clockwise and then
pulling the Venturi jet out of the fan.
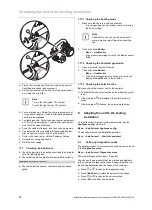
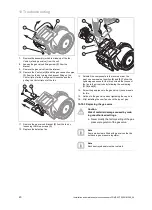
1
2
11. Remove the gas valve's bracket
(2)
from the fan by
loosening the three screws
(1)
.
12. Replace the defective fan.
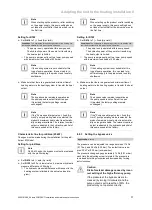
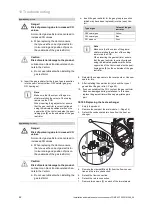
1
2
3
5
4
13. Reinstall the components in the reverse order. You
must use new seals at position
(4)
and
(5)
. Follow the
tightening sequence for the three screws that connect
the fan to the mixer tube by following the numbering
(1)
,
(2)
and
(3)
.
14. Screw the gas pipe onto the gas valve. Use new seals
for this.
15. Hold on to the gas valve when tightening the cap nuts.
16. After installing the new fan, check the type of gas.
10.10.3 Replacing the gas valve
Caution.
Risk of material damage caused by mak-
ing unauthorised settings.
▶
Never modify the factory setting of the gas
pressure regulator of the gas valve.
Note
Some products are fitted with gas valves that do
not have a gas pressure regulator.
Note
Each destroyed seal must be restored.


