background image


COMMISSIONING

21


5.2.2

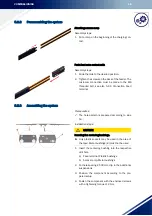
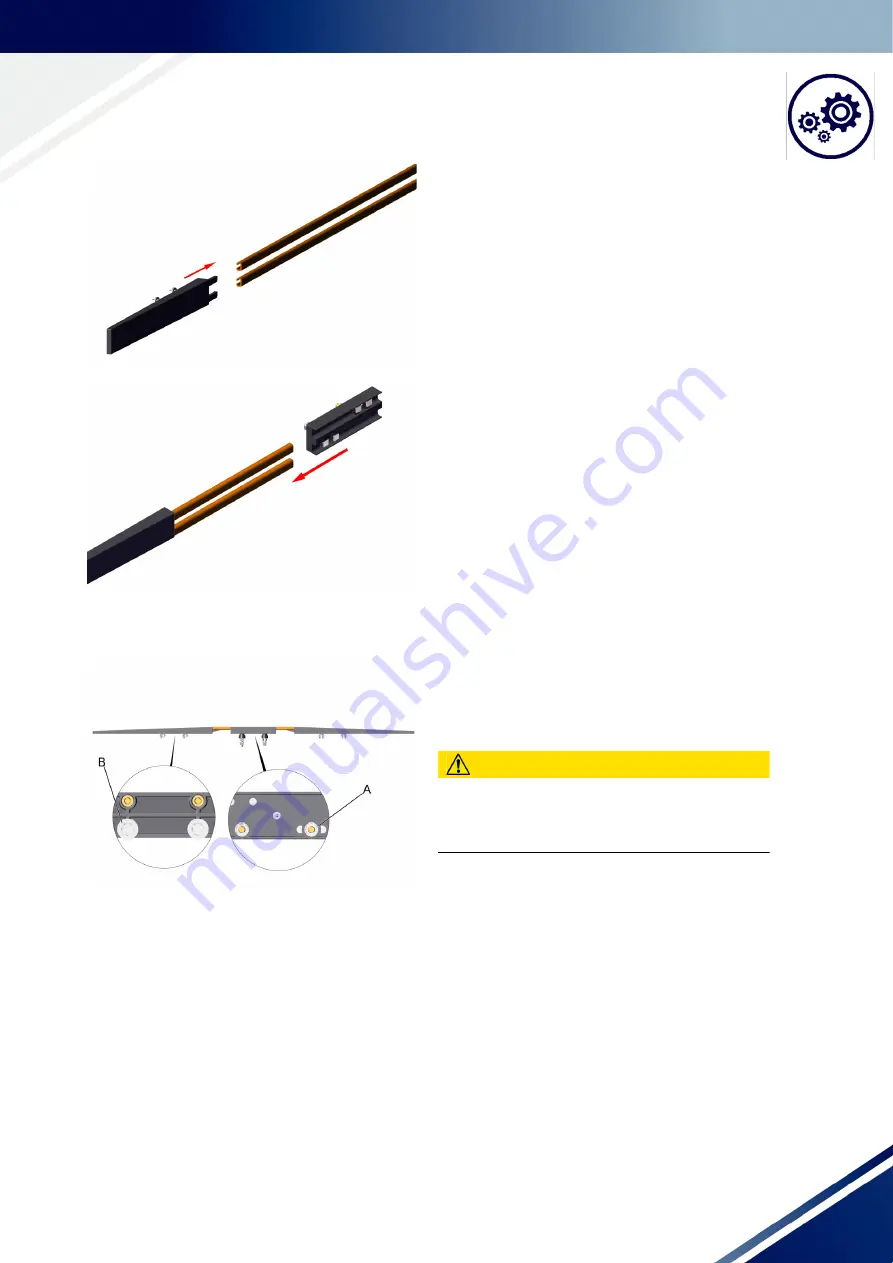
Preassembling the system

Attaching access ramp

Assembly steps:

1. Put a ramp on the beginning of the charging con-

tact.

Push feed onto contact rails

Assembly steps:

1. Slide the rails to the desired position.

2. Tighten the screws on the back of the feeder. The

customer connection must be made to the MS
threaded bolt, see also 5.2.6 Connection Feed
terminal.

5.2.3

Assembling the system

Prerequisites:

The hole pattern is prepared according to side
19. 

Installation steps:

CAUTION!

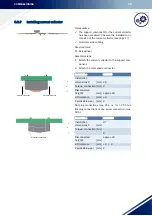
Inserting the centering bushings.

Only plastic sockets may be used in the area of
the feed. Metal bushings (B) must not be used.

1. Insert the centering bushing into the respective

drill hole.

a) Feed terminal: Plastic bushings
b) Access ramp: Metal bushings

2. For hole spacing 

500 mm,clip in the additional

suspensions. 

3. Position the component according to the pre-

pared setup.

4. Fasten the component with the enclosed screws

with a tightening torque of 2 Nm.

Summary of Contents for SLS

Page 1: ...TRANSLATION OF THE ORIGINAL GERMAN OPERATING INSTRUCTIONS SLS BATTERY CHARGING CONTACTS INSTALLATION MANUAL MAINTENANCE MANUAL SYSTEM MANUAL EN V 1 01...

Page 2: ...onduct in case of danger or accident 12 2 9 Signage 13 3 Technical data 14 4 Layout and function 15 4 1 Brief system description 15 4 2 Assembly overview 16 5 Commissioning 18 5 1 Safety instructions...

Page 3: ...TABLE OF CONTENTS 1 7 3 Storage 30 8 Disassembly and disposal 31 8 1 Disassembly 31 8 2 Disposal 32 Index 33...

Page 4: ...on related to electricity that will result in death or serious injury unless avoided The actions to prevent the hazard are identified here WARNING The source of the hazard is described here This combi...

Page 5: ...ndations from our long years of experience are provided here 1 3 Copyright protection The contents of this manual are protected by copyright Their use is permitted within the scope of the use of the i...

Page 6: ...ries The actual scope of delivery may vary from the descriptions and images in this document in case of custom versions the selection of additional order options or due to latest technical changes The...

Page 7: ...ges modifications or accessories Changes or modifications to the delivered product require the permission of the man ufacturer Genuine spare parts and manufacturer approved accessories provide safe ty...

Page 8: ...e intended for charging moving shuttles which travel over the bar with the built in cur rent collector Ambient temperature 30 C to 55 C Air humidity r F 95 non condensing Travel speed max 4 0 m s Volt...

Page 9: ...nstructions to reduce the risk of injuries or dam age to property and equipment and to avoid dangerous situations Do not change or modify the system inappropriately WARNING Risk of death from improper...

Page 10: ...e of voltage must be checked with a voltage tester immediately before and after use Grounding and short circuiting Parts on which work will be performed at the work place must first be grounded and th...

Page 11: ...em Over the entire time the owner has to verify that the instructions drafted by him for the operation of the system conform to the current state of applicable regulations and adapt the instructions a...

Page 12: ...ask Electrically qualified person see VDE 0105 100 Due to their professional training knowledge experience and knowledge of the relevant standards and regu lations professional electricians are able t...

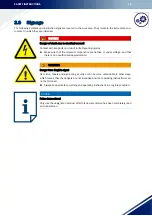
Page 13: ...gainst flying particles and liquid sprays Helmet Helmets protect against falling or flying parts and materials Gloves Gloves protect hands against chafing and abrasion cuts and punctures as well as ag...

Page 14: ...ety regulations the following safety instructions must be observed The following accident prevention regulations UVV Germany and the new Accident Prevention Regulations Principles of Prevention DGUV R...

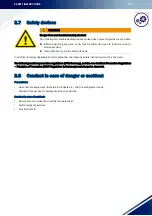
Page 15: ...ant components are not live or under voltage and that there is no unauthorized approximation WARNING Danger from illegible signs Over time labels and signs can get dirty or can become unreadable in ot...

Page 16: ...ICAL DATA 14 3 TECHNICAL DATA Technical data Single power supply 2 pin V DC 48 Charging current A 100 140 peak ED 100 50 Max speed m s 4 Operating temperature C 30 to 55 Application area Indoor facili...

Page 17: ...pact design 15 mm x 34 mm Ideal for mounting in the guide rail Modular structure for variable system lengths High advance rates for optimal utilization of system efficiency Extremely wear resistant ra...

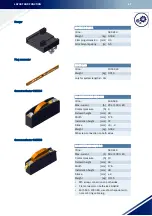
Page 18: ...s Access ramp 100 mm for 2 m s SS PCU140A 35 S4000 ID no 101 1880 Weight kg 1 248 Length m 4 ES SLS 2 100 ID no 590 592 Weight kg 0 162 AFR 265 SLS 2 100 ID no 590 593 Weight kg 0 087 Length mm 265 p...

Page 19: ...66 546 Max current A 20 at 100 ED Contact pressure N 4 Relaxed height mm 43 Width mm 17 5 Installation height mm 37 Stroke mm 5 2 Weight kg 0 092 M5 screw connection on both sides SA ONST50 20 38 0 0...

Page 20: ...sons Unauthorized persons who do not meet the requirements described here do not know the dangers in the respective work area Keep unauthorized persons away from the work area If in doubt speak to peo...

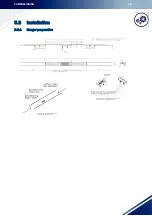
Page 21: ...COMMISSIONING 19 5 2 Installation 5 2 1 Hanger preparation...

Page 22: ...ps 1 Prepare the holes for mounting the system with D 10 5 mm For the positions refer to the sys tem sketch or the figures Access ramp 265 mm for 4 m s Access ramp 100 mm for 2 m s Hanger For hole spa...

Page 23: ...nal 5 2 3 Assembling the system Prerequisites The hole pattern is prepared according to side 19 Installation steps CAUTION Inserting the centering bushings Only plastic sockets may be used in the area...

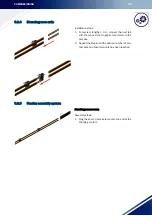
Page 24: ...next rail with the connectors No gap should remain in the process 2 Repeat the steps until the desired number of con tact bars and feed terminals has been reached 5 2 5 Finalize assembly system Attac...

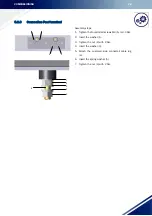
Page 25: ...steps 1 Tighten the four slotted screws M4 A to 3 0 Nm 2 Insert the washer 1 3 Tighten the nut 2 with 2 Nm 4 Insert the washer 3 5 Attach the customer side connector cable lug 4 6 Insert the spring wa...

Page 26: ...onent 2 Attach the male spade connector Flat plug connections max 25 A i e for 25 A two flat plug connections or one screw connection max 50 A Electrical connection Electrical connection X Installatio...

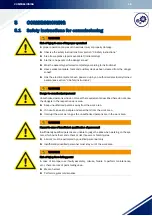
Page 27: ...ons must be observed DANGER Danger of death due to electrical current Contact with live parts can result in life threating injuries Make sure that the relevant components are not live or under voltage...

Page 28: ...s the risks involved in operating the sys tem and expose themselves and others to the risk of serious or fatal injuries Have all work performed only by persons qualified for the task Inadequately qual...

Page 29: ...xpansion of the con ductor rails and of burn marks Replace damaged burnt parts Check mechanical and electrical con nections particularly on the feeds and tighten if necessary in doing so observ ing th...

Page 30: ...e entire cur rent collector unit must be replaced Interval Service monitoring tasks Personnel Daily Check safety equipment and operating behavior of the system Operator Monthly Mechanical checks Check...

Page 31: ...ites The system is switched off and the power supply is disconnected Work steps 1 Pull out the connecting cable 2 Remove the current collector 3 Mount the new current collector 4 Install the connectin...

Page 32: ...ivery or during transport on the facilities 7 2 Transport inspection Check the delivery for completeness and transport damage upon receipt If any external damage is found Refuse delivery or accept del...

Page 33: ...uations or significant property damage Observe the safety instructions before beginning any removal work CAUTION All accessories must be checked for wear Only parts in a perfect condition may be used...

Page 34: ...the system must be dismantled and disposed of in an en vironmentally sound manner in accordance with the valid local regulations and laws NOTICE Electronic scrap is hazardous waste For its disposal pl...

Page 35: ...2 E Electrically qualified person 10 G Grounding and short circuiting 8 I Installation 8 O Operating company 9 Owner obligations 9 Q Qualifications 10 R Requirements of personnel 10 S safety aspects 6...

Page 36: ...CE Technical Documentation...

Reviews: