J. SC Turn On Time = Time compensation for seed
transportation (switch on)
Example: If it takes 4 seconds for seeds to reach the
application point after the motor has begun to rotate,
then the setting in this field will be 4 seconds. This
means that the motor begins rotating 4 seconds before
expected switch on.
K. SC Turn Off Time = Time compensation for seed
transportation (switch off)
Example: If it takes 4 seconds after the motor stops
rotating before the seeds are emptied into the system
and stop feeding out through the application point, the
setting in this field will be 4 seconds. This means that
the motor stops rotating 4 seconds before expected
shut off.
6.3.4
Väderstad Universal Control
Väderstad Universal Control enables control of selected
machine functions, such as giving variables, via an
external contractor. For information about what is
communicated via Väderstad Universal Control, please
contact your supplier.
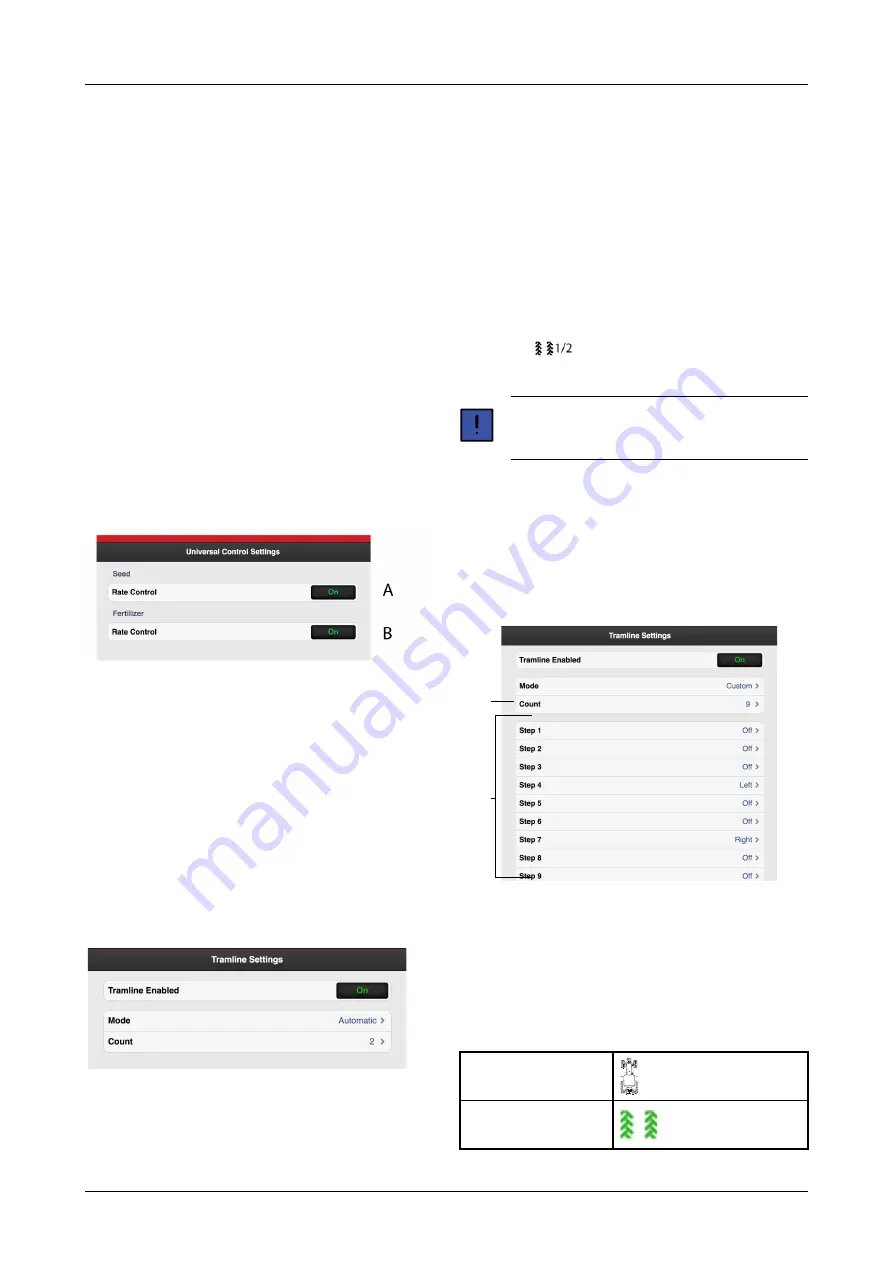
Figure 6.7 Universal Control settings
A. Variable sown amount for seed, OFF/ON
B. Variable sown amount for fertiliser. OFF/ON
6.4
Tramlining
In the tramlining menu select the bout in which you want
to lay drive tracks. The symbol on the home screen shows
the tramlining cycle. The first number shows which phase
you are in and the second number shows the number of
tramlining cycles selected in the tramlining program. It is
also possible to design a tramlining program in which
every bout included in the tramlining cycle is
programmed individually.
Figure 6.8
A detailed description of how to lay tramlining tracks and
change track width, as well as how row shut-off works,
can be found in the machine manual.
A. Select whether or not to enable tramlining.
B. Select “Automatic” for normal tramlining with both
wheel tracks in the bout. Select the interval in field
‘C’.
Select “Adapt” for more advanced programming of
drive tracks, see
“6.4.1 Creating a custom tramlining
.
C. Select the number of cycles (bouts) to be included in
the tramlining program. For example, if you select 2,
tramlines are laid on alternate bouts; if you select 5,
tramlines are laid every 5th bout.
Select the start value in the tramlining program by
pressing the
button on the home screen and
adjusting the start value with the (+) and (-) buttons.
For successful tramlining, it is very important to
carefully consider furrow plans before starting
the work.
6.4.1
Creating a custom tramlining program
When you select the “Adapt” tramlining program, it is
possible to program the tramlining individually for each
bout. Select to lay tramlining tracks in both wheel tracks
in the bout, in the left or right wheel track or no
tramlining at all. It is possible to program up to 30 cycles.
Figure 6.9
A. Select number of cycles (bouts) to be included in the
tramlining program. If the screen cannot show all
rows, scroll through the list by moving your finger up
or down on the touch screen.
B. Select tramlining settings for each bout included in
the tramlining program. Press the field for the bout
that is to be changed and select a tramlining option.
Both
A
B
C
A
B
14
903099-en-gb; 19.01.2021


