

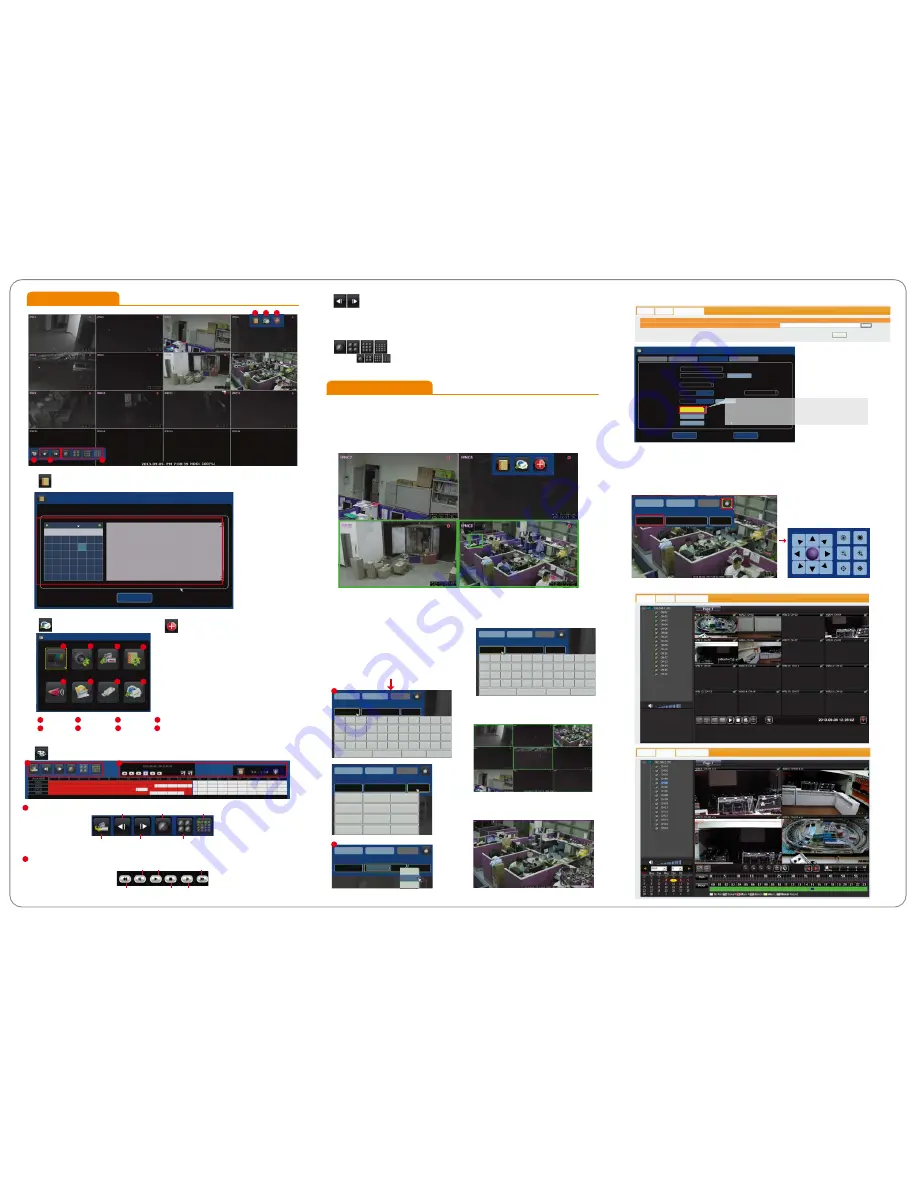
DISPLAY CAMERA RECORD EVENT
AUDIO STORAGE BACKUP SYSTEM
SETUP
Operation Setup
Advanced Features
A) Log
A
B
C
D
B) Setup
C) Manual Record (One Step Quick Recording)
1. Right click then click on [Emergency] at
quick launch bar to record video streaming
sent from all IP cameras.
2. Click it again to stop recording.
3. After emergency recording, all manual
recording channels will be blocked with blue
squares.
4.The data is indicated in black color on time
bar in playback.
E
F
D) Playback
E) Previous and Next and Previous Page
1. Click to go to previous / next four channel viewing.
2. Click the yellow arrows on center point of left and right side of screen to go to previous/next four
channel viewing.
F) Display Mode
1. Click for 1, 4, 9, or 16 channel viewing
2
1
3
4
5
6
7
8
Operations of Playback
1
1
2
1. Quick Adjustment Viewing Channel Layout.
1) The viewing channels are displayed in the order of IP address (e.g. xxx.xxx.xxx.001 is displayed
before xxx.xxx.xxx.002).
2) Two viewing channels may be swapped viewing squares.
3) Click, hold, (the edge of the viewing channel turns green), drag and drop the channel to the
desired position.
2. Quick Camera Info Display and
Modification
3. Quick Search for IP Address and
Name Change
4. Quick Selection of Viewing Channels
5. Zoom-In on Single Channel Display
6. Firmware Upgrade
8. Remote Monitoring and Playback
7. PTZ
live viewing
Pre page
Next page
4 CH
Arbitrary choice 4 CH
Single CH
2
Search
Play
Forward (max. 32X)
Reverse Playback by Frame
Forward Playback by Frame
Stop
Revere (max. 32X)
1) Click the viewing channel for on-screen
keyboard.
2) Right click on the cell to change parameter
of the camera including camera name, IP
address, and port. It also allows you to copy,
paste, and delete.
1) Click top-left corner of a camera to bring up parameter ofcamera info.
2) Click PTZ icon on top-right corner for on-screen directional control panel.
3) On-screen PTZ directional control panel stays on screen during live viewing.
2
1
5
6
3
4
7
8
LOG
September 2013
S
M T W T F
S
25 26 27 28 29 30 31
1
2 3 4
5
6
7
8
9 10 11 12 13
14
15
16 17 18 19 20
21
22
23 24 25 26 27
28
29
30
1 2 3 4 5
EXIT
18:47:47-Motion Recording Stop for IPNC7
18:47:55-Motion Recording Stop for IPNC11
18:48:17-Motion Recording Stop for IPNC5
18:48:32-Motion Recording Stop for IPNC3
18:48:53-Motion Recording Stop for IPNC7
18:49:23-Motion Recording Stop for IPNC5
18:49:59-Motion Recording Stop for IPNC7
18:50:03-Motion Recording Stop for IPNC8
18:50:08-Motion Recording Stop for IPNC3
18:50:48-Motion Recording Stop for IPNC5
18:51:06-Motion Recording Stop for IPNC7
18:51:21-Motion Recording Stop for IPNC8
18:51:39-System reboot
DISPLAY CAMERA RECORD EVENT
AUDIO STORAGE BACKUP SYSTEM
LiveView
PlayBack
Firmware Upgrade
LiveView
PlayBack Firmware Upgrade
CONNECT DISPLAY
APPLY
NAME IP PORT
IPNC8 192.168.1.29 80
Shift Caps Backspace
IPNC3
192.168.1.23 80
1
2
3
4
5
6
7
8
9
0
-
q
w
e
r
t
y
u
i
o
p
=
a
s
d
f
g
h
j
k
l
;
‘
z
x
c
v
b
n
m
,
.
[
]
CONNECT DISPLAY
APPLY
NAME IP PORT
Shift Caps Backspace
IPNC3
192.168.1.23 80
1
2
3
4
5
6
7
8
9
0
-
q
w
e
r
t
y
u
i
o
p
=
a
s
d
f
g
h
j
k
l
;
‘
z
x
c
v
b
n
m
,
.
[
]
CONNECT DISPLAY
APPLY
NAME IP PORT
CONNECT DISPLAY
APPLY
NAME IP PORT
IPNC3 192.168.1.23
80
1
2
3
4
5
6
7
.
8
9
0
Backspace
IPNC3
192.168.1.23
8C
COPY
PASTE
DELETE
192.168.1.23
CONNECT DISPLAY
APPLY
NAME IP PORT
1
2
LiveView PlayBack
Firmware Upgrade
Please select upgrade file
Upgrade Server
upgrade
瀏覽
INFORMATION NETWORK
SETUP
PASSWORD
SYSTEM
CURRENT DATE / TIME
:
CONFIG DATE / TIME
:
LANGUAGE
:
SYNC IPCAM PARA
:
IPCAM FLOOR PLAN
:
FIRMWARE UPDATE
:
CONFIG INITIALIZE
:
SYSTEM REBOOT
:
APPLY TIME
LOAD IMAGE
SYNC PARA TIME
:
SAVE
EXIT
ENGLISH
2013.09.05. PM 06:47:51
2013.09.05. PM 06:47:52
ENABLE
DISABLE
ENABLE
DISABLE
05 MIN
USB UPDATE
CONFIG INIT
REBOOT
OAD IMAGE
If new firmware is saved on a USB flash memory,
click [USB UPDATE] to begin firmware upgrade.