9
GB
ASSEMBLY
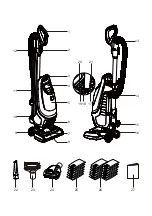
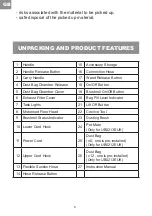
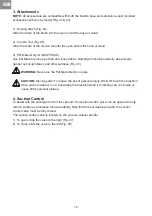
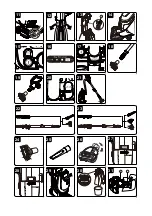
1. Remove all the contents from the packaging; make sure you have all contents as listed on page 8.
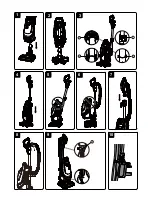
2. To connect the vacuum cleaner body to the motorised floor head align the floor head neck with
the guides on the body and lower into place until a ‘click’ is heard (Fig. 1 & 2).
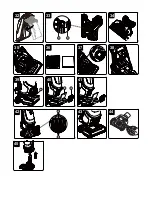
3. Install the wand onto the vacuum body. Align the base of the wand ( ) into the guides located
at the bottom of the vacuum cleaner body ( ). Ensure the upper wand release button ( ) is
located above the guides located on the main body ( ) and then insert downwards. A ‘click’ can
be heard once secured (Fig. 3 & 4).
NOTE:
DO NOT tilt the wand to insert it into the nozzle neck (Fig. 5).
DO NOT insert the wand before placing the body onto the nozzle (Fig. 6).
4. Insert the handle into the wand until you hear a ‘click’ (Fig. 7).
5. Insert the hose into body until you hear a ‘click’ (Fig. 8).
6. Wrap the power cord around the upper and lower cord hooks (Fig. 9).
NOTE:
Make sure to wrap the power cord around the upper cord hook first, secure the power cord
into the guide ( ).
7. Secure the plug to the power cord (Fig. 10).
WARNING:
Wrapping the power cord too tightly with excessive stress on the cord may
cause damage. A damaged cord is an electrical shock hazard and could cause personal
injury or damage.
1
2
3
4
5
Summary of Contents for UB0212EUK
Page 1: ......
Page 2: ......
Page 3: ...20 21 22 1 2 3 4 5 6 7 8 9 10 11 12 13 14 15 16 17 18 19 23 24 25 26 27...
Page 4: ...2 1 3 4 5 6 7 8 9 10 5 1 2 3 4...
Page 22: ...11 23 24 22 14 6 12 25 26 28 30 31 13 15 16 17 18 19 20 21 27 29 5 6 7...
Page 23: ...32 43 45 42 34 6 33 35 36 37 38 39 40 41 44 9 10 11 12 13 14 8...
Page 24: ......
Page 25: ......


