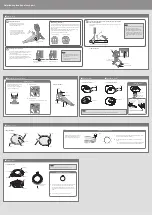
Detailed explanation of each part
9
KD-10 (Kick)
9
PDX-12 (Snare)
9
FD-9 (Hi-hat control pedal)
Adjusting the feeling
9
CY-5 (Hi-hat)
9
CY-8 (Ride/Crash)
NOTE
Continuous playing may cause dis-coloration of the pad, but this will not affect the Pad’s function.
Fixing the cables
(CY-12C/CY-12C)
CY-8 component names
CY-5 component names
Pad face
Bow
Edge
OUTPUT jack
Pad face
Bow
Edge
OUTPUT jack
9
PDX-8 (Tom)
Component names
Suitable position
for rim shots
Player
Knob bolt
Head
Tuning bolts
OUTPUT jack
Hoop rubber
Head
sensor
Shell
Rim sensor
Holder
NOTE
Be sure to adjust the head tension of the pad before use.
Beater
Install the kick pedal
securely.
Position the beater so that it strikes the
center of the head, then secure the kick
pedal and KD-10 firmly in place.
* A variety of commercially available
beaters can be used, including felt,
plastic, or wood types. However if a felt
beater is used, the felt may leave marks
on the striking surface.
01
Correct positioning
Incorrect positioning
02
Check to be sure they’re making contact with the floor
03
When using on the V-Drums mat, noise
eater, or carpet
When using on the floor
NOTE
* Attach the KD-10 and the kick pedal securely.
* Take care not to pinch your fingers.
* Depending on how you’re using the unit,
the bolts that attach the pedal to the plate
could become loose, causing the pedal to
rattle during performance. In such cases, use
commercially available tools to tighten the
bolts.
Adjusting the Anchor Bolts.
If you’re using this unit on a V-Drums mat, on a noise eater
(NE-10), or on carpet, extending the anchor bolts will
secure the unit in place.
However, if that’s not enough to keep the KD-10 in a fixed
position, you can adjust things so that the tips of the
anchor bolts protrude through the base. That should keep
it in place and make it easier for you to play.
When Using a Twin Pedal
Position the two beaters equally apart from the center of the pad as shown in
the figure at left. If one of the beater is further away from the center than the
other, the sound from the further beater will be lower in volume, or will not
sound as desired.
If you’re using twin pedals, the sensitivity will be lower than when a single
pedal is used. Raise the sensitivity on the sound module.
For details, refer to the TD’s owner’s manual.
NOTE
* When used on flooring, the anchor bolts
may damage the floor. Adjust the anchor
bolts correctly.
* The tips of the anchor bolts are sharp.
Handle with care.
Component names
Attach the kick pedal.
Step on the kick pedal and make sure that it’s properly attached
and in a stable position.
Check to make sure that the base of the KD-10 and the kick pedal both make contact
with the floor.
Remove one or the other.
You can lighten the feeling by removing
either the left or the right spring.
Take care not to pinch your finger when
removing or installing a spring.
Spring
Toe stopper
Sensor
OUTPUT jack
Anchor bolt
Link
Component names
1.
Detach lower hook.
2.
Detach upper hook.
To reinstall the spring, attach the upper hook first.
Fixing the cables
(CY-8)
Adjusting the head tension
1.
Adjust each tuning bolt a little at a time, moving in order from
one side to the opposite side as shown in the illustration.
The appropriate amount of tension is one that will provide
approximately the same striking response as on an acoustic
drum.
2.
Use the drum key to adjust the tension as needed.
OUTPUT jack
Tuning bolts
Knob bolt
Hoop rubber
Head sensor
Rim sensor
Head
Holder
Shell
Adjusting the head tension
When the unit is shipped from the factory,
this is adjusted fairly loosely. Before use,
adjust the head to a fairly high tension.
1
8
7
2
3
6
5
4
Tighten
Loosen
1.
Adjust each tuning bolt a little at a time, moving in order from one side to
the opposite side as shown in the illustration.
2.
Fine-tune the adjustment while continuing to check the pad feel and
response.
* Do not firmly tighten a single tuning bolt by itself. Doing so will make it
impossible to tension the head evenly, and will cause malfunctions.
Component names
Head
OUTPUT jack
Anchor bolts
Slip-prevention tape
Mounting plate for
the kick pedal
Secure the cable
in place with the
cable tie
Leave some slack in
the cables
Be sure to make this
small plastic hook
visible from you.
Wind a cable tie
around the pipe and
tighten it in order to
not to slip.
Wind a cable tie around
a cable.
Insert the small plastic hook to a hole
to secure the cable to the cymbal arm.
4
3
2
5
6
1


