background image

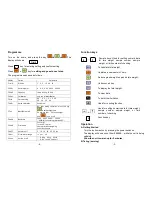
Programme


Turn  on  the  scale,  and  press  the  key 

.The 

display will shows 
 
 
Press              key for entering setting and confirm setting.


Press 

  or 


key for 

setting and goes to next step

.   

The programme


sequence as follows: 


Display 

Option 

Parameter 

F1-dIU 

Division 

1    2    5    10    20    50 

F2-PNt 

Decimal point 

0.0    0.00    0.000    0.0000     

F3-CAP 

Capacity 

If cap is 30kg, 30.000 

F4-CAL 

Calibration 

only use for 

distributor


F5-trA 

Zero-tracking 

0.0 

  0.5    1.0    1.5    2.0 

2.5    3.0    3.5    4.0 

F6-USr 

Quick calibration 

See below 

F7-LIt 

Backlight switch 

Au:  light  during  operation;  press  the  key 

to set backlight time. 

On: always light      Off: no backlight. 

Use 

  to on or off.


F8-bUd 

Baud rate 

2400      4800    9600*      19200   

9600,for connect to printer and PC


F9-odE 

Print mode 

0 not print 
1 press “P” to print 
2 auto print when weighing 
3 continuous print 

FA-oFF 

Auto turn off   

5    10    15    20    25    30 dis 

Fb-ALr 

Hi-low alarm range 

In    our      off 

FC-nus 

Unit on or off 

①:

U1=kg    U2=g      U3=lb 

②:

Def U1 on U2 on U3 off


-6- 

Function keys 


--- 

Numeric keys. Used for setting numeric data 
for  tare  weight.  sample  number,  sample 
weight, or limit number of checking. 


To calculate total weight. 


Captures a new center of zero. 


Reduce gross weight on pan as tare weight. 


Units convert key 


To display the total weight. 


To clear data 


To set hi-low limitation. 


Used for counting function. 


  & 


Used for setting numeric data for tare weight. 
sample  number,  sample  weight,  or  limit 
number of checking. 


Function key 


Operation 

A. Getting Started 

Turn the instrument on by pressing the power switch on. 
The display will down count from 999999… while the unit is being 
updated. 

Allow the unit to warm-up for 5 minutes. 

B. Taring (zeroing) 

-3- 

F1-dIU 

P


0

P


Summary of Contents for UWA-N

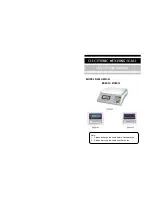
Page 1: ...MODEL NO UWA N BSW N BSW Q Note 1 Please recharge the scale before first operation 2 Please warm up the scale over 5 minutes ...

Page 2: ...nstrument Disclaimer Notice Calibrate your instrument using reference weights of the appropriate tolerance class An instrument can be no more accurate than the standard to which it has been compared For assistance in the selection of reference weights please contact the factory Caution Changes or modifications not expressly approved by the manufacturer could void the user s authority to operate th...

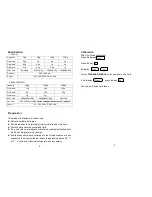
Page 3: ...paration This product is intended for indoor use Select a suitable work area Work area should be relatively free from drafts and vibrations Work surface should be level and rigid Do not locate near magnetic materials or equipment instruments which use magnets in their design Avoid areas which have variations in room temperatures or have excessive room temperatures Room temperatures above 40 C or 0...

Page 4: ... 0 not print 1 press P to print 2 auto print when weighing 3 continuous print FA oFF Auto turn off 5 10 15 20 25 30 dis Fb ALr Hi low alarm range In our off FC nus Unit on or off U1 kg U2 g U3 lb Def U1 on U2 on U3 off 6 Function keys Numeric keys Used for setting numeric data for tare weight sample number sample weight or limit number of checking To calculate total weight Captures a new center of...

Page 5: ... Use the key to enter the OVER UNDER limit settings 2 It will display L0 0000 Use numeric key and key to set the low limitation you need 4 3 It will display H0 0000 Use numeric key and key to set the low limitation you need 4 Please be sure that hi limitation must higher than lo limitation 5 Clear the Hi Lo setting D 2 BSW N BSW Q hi lo operation 1 Use the key to enter the OVER UNDER limit setting...

Reviews: