background image

Preparing to Fax 

OPERATION GUIDE

2-5

Entering Fax Information (Local Information)

Enter identifying information about your station (fax number, station name, 
and station ID) here to send this information to the other party 
automatically (it will be printed on the faxed documents).

Entering your fax number

1

Press 

System Menu/Counter

.

2

Press 

S

 or 

T

 to select 

FAX Setting

. Press 

Enter

.

3

Press 

S

 or 

T

 to select 

FAX TX Setting

. Press 

Enter

.

4

Press 

S

 or 

T

 to select 

Local FAX Number

. Press 

Enter

.

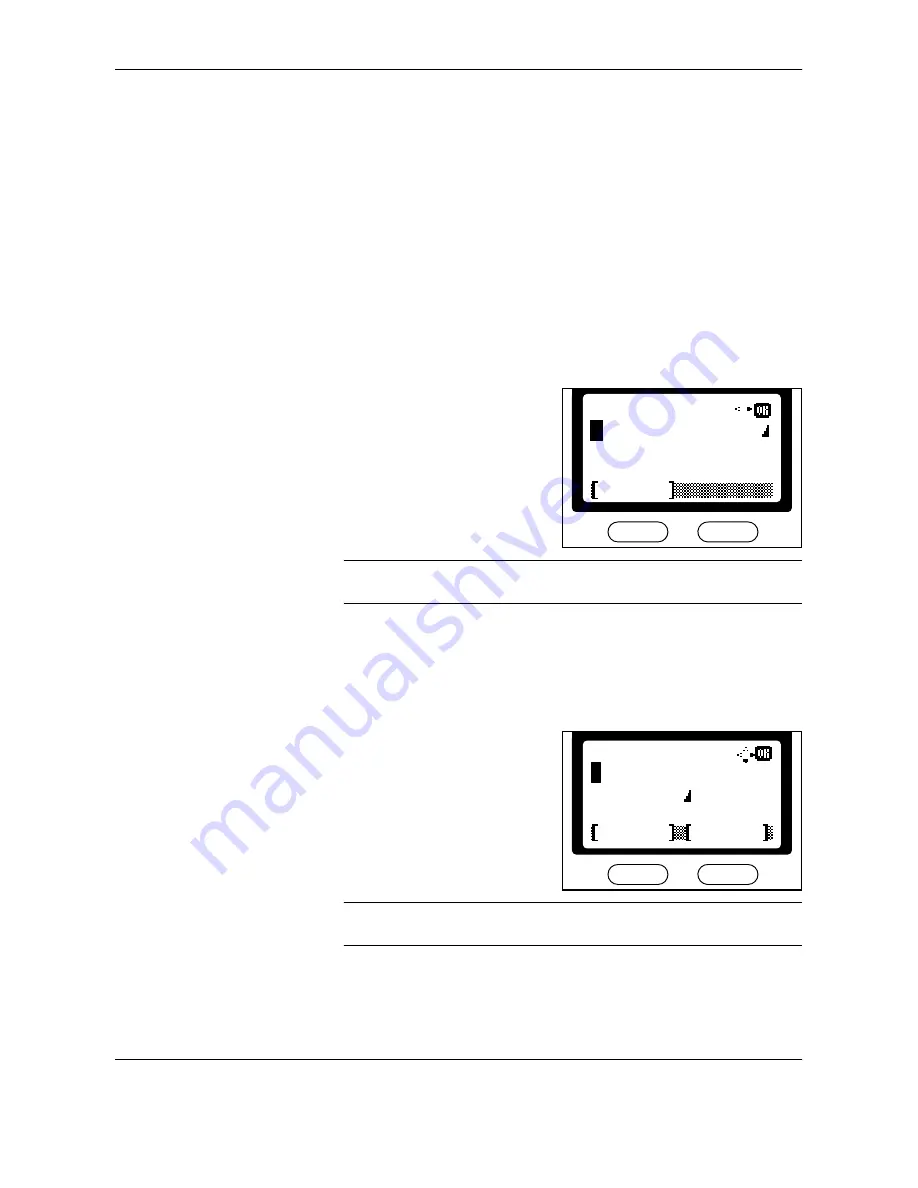
5

Use the numeric keys to enter the 
local station number. The 
maximum length of the local FAX 
number is 20 digits.

NOTE: 

You can enter [

+

] by pressing the asterisk key for an international 

telephone number.

6

Press 

Enter

 to complete the fax number setting.

Entering your station name

1

Press 

S

 or 

T

 to select 

Local FAX Name

. Press 

Enter

.

2

Enter your station name. The 
maximum length of the local FAX 
name is 32 characters.

NOTE: 

For detailed information on entering characters, refer to 

Entering 

Characters 

on page 

3-20

.

3

Press 

Enter

 to complete the station name setting.

Local FAX Number

Cancel

:

Cancel

Local FAX Name

Text

ABC

:

Summary of Contents for FAX SYSTEM (K)

Page 1: ...INSTRUCTION HANDBOOK FAX SYSTEM FAX SYSTEM K ...

Page 2: ......

Page 3: ...2 4 Entering Fax Information Local Information 2 5 Setting the Current Date and Time Date Time Setting 2 7 3 Basic Operation Menu Table 3 2 Sending Documents 3 4 Select the Original Size 3 13 Select the Size for Fax 3 14 Zoom Transmission 3 15 Continuous Scanning 3 16 Automatic Fax Reception 3 17 Canceling Communications 3 18 Entering Characters 3 20 Address Book 3 24 Redialing 3 39 4 Basic Functi...

Page 4: ...anagement Reports 5 53 User Login 5 55 Job Accounting 5 56 6 Network Fax Overview of Network Fax 6 2 Initial FAX System Settings 6 4 7 FAX System Settings Menu Table 7 2 Printing Reports 7 4 Volume 7 8 Redial 7 10 Fax Media Type 7 11 Number of Rings 7 12 Fax Reception Mode 7 14 Reception Date and Time 7 18 2in1 Reception 7 19 Bulk Printing 7 20 Remote Diagnosis 7 21 Remote Diagnosis ID 7 22 8 Trou...

Page 5: ...trademarks of Microsoft Corporation Ethernet is a registered trademark of Xerox Corporation IBM and IBM PC AT are trademarks of International Business Machines Corporation Adobe and Acrobat are registered trademarks of Adobe Systems Incorporated All other company and product names in this Operation Guide are trademarks or registered trademarks of their respective companies The designations and are...

Page 6: ...equipment EN55022 Class B Limits for harmonic currents emissions for equipment input current 16A per phase EN61000 3 2 Limitation of voltage fluctuations and flicker in low voltage supply systems for equipment with rated current 16A EN61000 3 3 Safety of information technology equipment including electrical business equipment EN60950 The common technical regulation for the attachment requirements ...

Page 7: ... TBR21 DE 08R00 National AN for D AN 01R00 AN for P DE 09R00 National AN for D AN 02R01 AN for CH and N DE 12R00 National AN for D AN 05R01 AN for D E GR P and N DE 14R00 National AN for D AN 06R00 AN for D GR and P ES 01R01 National AN for E AN 07R01 AN for D E P and N GR 01R00 National AN for GR AN 09R00 AN for D GR 03R00 National AN for GR AN 10R00 AN for D GR 04R00 National AN for GR AN 11R00 ...

Page 8: ...vi OPERATION GUIDE This page intentionally left blank ...

Page 9: ...or easy reference The sections of this handbook and parts of the facsimile marked with symbols are safety warnings meant to protect the user other individuals and surrounding objects and ensure correct and safe usage of the facsimile The symbols and their meanings are indicated below DANGER Indicates that serious injury or even death will very possibly result from insufficient attention to or inco...

Page 10: ... be performed Specifics of the required action are indicated inside the symbol Please contact your service representative to order a replacement if the safety warnings in the guide are illegible or if the guide itself is missing fee required Note Due to performance updating information in this Operation Guide is subject to change without notice General warning Warning of danger of electrical shock...

Page 11: ...Be sure to read the Operation Guide as well Keep both guides near the machine for ready reference During use refer to the Operation Guide for your machine to obtain the following information Caution Labels Installation Precautions Precautions for Use Loading Paper Cleaning the Machine Toner Container Replacement Troubleshooting Paper Jam ...

Page 12: ...cation between countries possible This product may be inoperable in areas with poor telephone lines or communication conditions CALL WAITING or other telephone company optional services that produce audible tones or clicks on the line can disrupt or cause termination of facsimile communications Be sure that the size of the paper loaded in the paper source matches the size of the paper configured w...

Page 13: ...eiving documents Chapter 4 Basic Functions Describes basic functions provided by the FAX System Chapter 5 Advanced Functions Describes more advanced fax functions Chapter 6 Network Fax Describes the setup procedure and how to prepare the FAX System for network fax Chapter 7 FAX System Settings Describes mechanical and functional settings and usage reports Chapter 8 Troubleshooting Describes how to...

Page 14: ... useful information about a function or feature May contain references to other manuals NOTE For information on storing the pin refer to step 10 Important Important information IMPORTANT Make sure the paper is not folded curled or otherwise damaged Caution Indicates the potential for mechanical damage resulting from a specific action CAUTION Do not hold the front of the machine when pulling out th...

Page 15: ...OPERATION GUIDE 1 1 1 FAX System Parts This chapter identifies and describes FAX System parts and Operation Panel keys FAX System 1 2 Operation Panel 1 3 ...

Page 16: ...k 3 LINE jack Connect modular phone cables to this jack 4 Main power switch Turn on this switch to send faxes or make copies The message display will light when the FAX System is ready for use 5 Document output or stack area Received fax documents are stored here 6 Document Processor Option Automatically feeds and scans multiple sheet documents IMPORTANT Keep in mind that documents cannot be recei...

Page 17: ...s mode to send documents confidentially using subaddress communication and for polling transmission The Document Box indicator remains on while in Document Box mode 4 One touch Keys 1 to 8 Each one touch key can store a fax destination or chain dial number The keys can also be used to recall programmed sequences 5 Program Key and Indicator Press this key to use a program 6 Scan Resolution Key and ...

Page 18: ...Power Key Press this key to cancel the setting and return to the basic screen Hold the key for more than 2 seconds to turn the FAX System into Auto Sleep 15 Original Quality Key and Indicator Press this key to set the document image quality 16 Original Size Key and Indicator Press this key to select the document size 17 Exposure Key and Indicator Press this key to adjust the document exposure leve...

Page 19: ...g another party s number 25 X Address Book Key Press this key to move the cursor to the right on the message display or to launch the Address Book when selecting the fax destination 26 Enter Key Press this key to confirm your selection 27 Stop Clear Key Press this key to cancel the job during scanning or clear entered characters or numbers On basic screen press this key to delete all the registere...

Page 20: ...FAX System Parts 1 6 OPERATION GUIDE ...

Page 21: ...is chapter before sending a fax for the first time This chapter discusses the following topics Menu Table 2 2 Selecting the Line Type Inch Model Only 2 3 Configuring TTI Settings 2 4 Entering Fax Information Local Information 2 5 Setting the Current Date and Time Date Time Setting 2 7 ...

Page 22: ...ne Setting Tone DTMF Pulse 10pps Set up the FAX System for the line type corresponding to the telephone service page 2 3 TTI Off Outside Inside Set up printing details for the Transmit Terminal Identifier TTI page 2 4 Local FAX Number Numerical Entry of Fax No Enter this fax number page 2 5 Local FAX Name Text Entry of the Fax Name Enter this fax name Local FAX ID 0000 9999 Enter this fax ID Date ...

Page 23: ...axes if this setting is incorrect 1 Press System Menu Counter 2 Press S or T to select FAX Setting Press Enter 3 Press S or T to select FAX TX Setting Press Enter 4 Press S or T to select FAX Line Setting Press Enter 5 Press S or T to select the line type Press Enter to complete the setting 6 Press right Select to return to the basic screen FAX Line Setting Tone DTMF Pulse 10pps Cancel ...

Page 24: ...inted inside or outside the border of the transmitted page 1 Press System Menu Counter 2 Press S or T to select FAX Setting Press Enter 3 Press S or T to select FAX TX Setting Press Enter 4 Press S or T to select TTI Press Enter 5 Press S or T to select to print or not print TTI information and the position if printed Next press Enter to complete the TTI setting NOTE Select Outside to print TTI in...

Page 25: ...select Local FAX Number Press Enter 5 Use the numeric keys to enter the local station number The maximum length of the local FAX number is 20 digits NOTE You can enter by pressing the asterisk key for an international telephone number 6 Press Enter to complete the fax number setting Entering your station name 1 Press S or T to select Local FAX Name Press Enter 2 Enter your station name The maximum...

Page 26: ...ving passwords For more information refer to Password based Communications on page 5 31 1 Press S or T to select Local FAX ID Press Enter 2 Use the numeric keys to enter a four digit station ID 3 Press Enter to complete the station ID setting 4 Press right Select to return to the basic screen Local FAX ID 1409 0000 9999 Cancel ...

Page 27: ...re setting the date and time Setting the time zone 1 Press System Menu Counter 2 Press S or T to select Date Timer Set Press Enter 3 Press S or T to select Time Zone Press Enter 4 Press S or T to select the desired time zone Press Enter to complete the time zone setting Setting date and time 1 Press S or T to select Year Time Press Enter 2 Press S or T to set the current year Press X 3 Press S or ...

Page 28: ...rrent hour Press X 6 Press S or T to set the current minute Press X 7 Press S or Tto set the current second Press Enter to complete the time setting 8 Press right Select to return to the basic screen c 11 09 10 Time Setting Hour Min Second Cancel Time Zone Estn Time ...

Page 29: ...wing topics Menu Table 3 2 Sending Documents 3 4 Select the Original Size 3 13 Select the Size for Fax 3 14 Zoom Transmission 3 15 Continuous Scanning 3 16 Automatic Fax Reception 3 17 Canceling Communications 3 18 Entering Characters 3 20 Address Book 3 24 Redialing 3 39 ...

Page 30: ...cal Entry Enter destination fax numbers page 3 25 001 120 Assign addresses page 3 25 Numerical Entry Enter subaddresses page 3 25 Numerical Entry Enter subaddress passwords page 3 25 On Off Set up encrypted communication page 3 25 Key01 Key20 Select the encryption key page 3 25 On Off Set up an encryption box page 3 25 0000 9999 Select an encryption box page 3 25 33600bps 14400bps 9600bps Select a...

Page 31: ...gning Members Assign group members page 3 33 001 120 Assign addresses page 3 33 Edit Address book Group Selection Detail Text Entry Edit group names page 3 37 Editing Members Edit group member names page 3 37 Group Selection Menu Delete a group from the Address Book page 3 37 Press right Select Main Menu Sub Menu1 Sub Menu2 Options Description Reference Page ...

Page 32: ...ow the procedure given in Direct Transmission on page 4 7 Memory transmission mode The FAX System scans the original document into memory before dialing the other party s fax number You can choose multiple recipients in this convenient mode When the FAX System finishes scanning the original document into memory the document is ejected while transmission is underway Direct transmission mode The FAX...

Page 33: ...e Original Size on page 3 13 4 Press Original Quality 5 Press S or T to select the document image quality Press Enter Cancel Original Quality Photo Text Text Photo Item Description Photo Select this mode if the original contains mainly photographs The scan resolution is set to 200 200 Fine Document exposure must be set manually Text Select this mode if the original contains mainly text Text Photo ...

Page 34: ...ion is automatically changed to lower resolution e g 300 300 is changed to 200 400 Sup Fine when you select fax as a destination In addition if you choose Photo in original quality setting the resolution is fixed to 200 200 Fine 8 Press Exposure 9 Press S or T to select Auto or Manual Press Enter If you selected Manual go to step 10 If you selected Auto skip to step 11 Cancel Scan Resolution 200x4...

Page 35: ... the numeric keys The maximum length of the fax number is 64 digits Press Stop Clear to delete the entire number Pressing T pause inserts a 3 second pause when dialing the fax number Use this function to set a waiting time for automatic response sequences Mode Description Auto If you select this mode the optimal document exposure is set automatically for the particular document You cannot select A...

Page 36: ... to continue scanning the original document after you press Start To continue scanning change original document and press Start If you are finished scanning press right Select Detailed Transmission Settings After entering the other party s fax number you can complete settings for the subaddress encrypted communication transmission speed and ECM communication Entering the Subaddress Enter the subad...

Page 37: ...ut screen Setting encrypted communications Enter the encryption key and encryption box for encrypted communication For details on encrypted communication refer to chapter 5 Advanced Functions 1 Press right Select on the destination fax input screen 2 Press S or T to display Encryption Press right Select Cancel Sub Address FAX Detail Edit 1 4 Sub Address 1234567890123 Cancel Password Cancel Cancel ...

Page 38: ...ption box On the next screen use the numeric keys to enter the box number Press Enter NOTE When sending the documents to the same model as the FAX System in encrypted communication be sure the encryption box setting is set to Off 6 Press Enter to return to the destination fax input screen Setting the communication speed Enter the initial transmission speed Encryption Cancel Off On Cancel Encrypt K...

Page 39: ...tination fax input screen Selecting ECM communication Select whether to use ECM Error Correction Mode when sending documents 1 Press right Select on the destination fax input screen 2 Press S or T to display ECM Press right Select 3 Press S or T to select On or Off Press Enter Select On to enable ECM communication Cancel TX Start Speed FAX Detail Edit 3 4 33600bps TX Start Speed 14400bps 9600bps C...

Page 40: ...Basic Operation 3 12 OPERATION GUIDE 4 Press Enter to return to the destination fax input screen ...

Page 41: ... Statement A4 A5 A6 B5 B6 Folio OficioII Executive ISO B5 16K Envelope 10 Envelope 9 Envelope Monarch Envelope 6 Envelope C5 Envelope DL Hagaki Oufukuhagaki Youkei 2 Youkei 4 and Custom 1 Press Send 2 Press Original Size 3 Press S or T to select the original size Press Enter to return to the basic screen NOTE Select Others to display the Others screen Here you can choose postcard envelope or regis...

Page 42: ...ope C5 Envelope DL Hagaki Oufukuhagaki Youkei 2 Youkei 4 and Custom NOTE When sending fax we recommend you to select Same as Original 1 Press Send 2 Press Function 3 Press S or T to select Send Size Press Enter 4 Press S or T to select the size to scan documents for transmission Press Enter NOTE Select Others to display the Others screen Here you can choose postcard envelope or registered custom s...

Page 43: ...the original document to transmit in the document processor or on the platen 2 Press Send 3 Press Function 4 Press S or T to select Zoom Press Enter 5 Press S or T to select 100 or Auto Press Enter 6 Press right Select to return to the basic screen Mode Description 100 Fax at original size Auto Automatically adjust the size as faxed to match the document size Zoom Auto 100 Cancel ...

Page 44: ...cing on the platen NOTE For instructions on using continuous scanning mode refer to Sending Documents on page 3 4 1 Press Send 2 Press Function 3 Press S or T to select Continuous Scan Press Enter 4 Press S or T to select On Press Enter 5 Press right Select to return to the basic screen Continuous Scan Cancel Off On ...

Page 45: ...AX System provides the following modes to receive a fax Automatic Fax Reception Manual Fax Reception page 4 14 Auto FAX TEL Switching page 7 14 Auto FAX Answering Machine Switching page 7 15 DRD Reception page 7 16 To change reception modes follow the procedure given in Fax Reception Mode on page 7 14 Delayed delivery If received documents cannot be output because the FAX System has run out of pap...

Page 46: ... following procedure to cancel the transmission 1 Press Status Job Cancel 2 Press S or T to select Send Job Status Press Enter 3 Press S or T to select the job to cancel Press left Select NOTE To check transmission details press right Select Refer to Send Job Status on page 5 47 for details 4 Press left Select to cancel transmission of that particular job Canceling Direct Transmission All transmis...

Page 47: ...BasicOperation OPERATION GUIDE 3 19 3 Press left Select or Stop Clear to stop transmission Any documents placed in the document processor are ejected Job No Scanning Cancel Job No 0007 ...

Page 48: ...Icon Indicates when you have entered the maximum number of characters You can continue to enter characters until this icon appears 3 Numeric Keys Use numeric keys to enter characters Refer to Character Input Modes on page 3 21 for a list of the characters available for each key 4 Reset Power Key Press this key to clear the entry and exit input mode 5 Left Select Key Press this key to access option...

Page 49: ...en position the character to the left of the cursor is deleted Character Input Modes Use one of these three character input modes to enter characters Press right Select to switch between character input modes List of Character Assignments The following characters can be entered using the numeric keys Mode Available characters Alphabetic Symbol Text Æ ABC Refer to List of Character Assignments on p...

Page 50: ... individual characters Repeat this operation until all characters have been entered Alphabetic Symbol a b c A B C 2 Numeric 2 Alphabetic Symbol d e f D E F 3 Numeric 3 Alphabetic Symbol g h i G H I 4 Numeric 4 Alphabetic Symbol j k l J K L 5 Numeric 5 Alphabetic Symbol m n o M N O 6 Numeric 6 Alphabetic Symbol p q r s P Q R S 7 Numeric 7 Alphabetic Symbol t u v T U V 8 Numeric 8 Alphabetic Symbol ...

Page 51: ...es o is displayed 5 Press the e key 3 times f is displayed 6 Press X The cursor moves one space to the right To enter the same character consecutively press X to move the cursor Enter the character once again 7 Press the e key 3 times f is displayed 8 Press the f key 3 times i is displayed 9 Press the d key 3 times c is displayed 10 Enter the rest of the characters in the same way and press Enter ...

Page 52: ...rnal address books are used with the FAX System a screen for address book selection is displayed Press S or T to select the desired address book Press Enter 3 Press S or T to select the destination party and press Enter NOTE To check the entered information select the party to review and press right Select Press S or T to select Detail Press Enter to display the details 4 After confirming the ente...

Page 53: ... 6 After confirming the information to be entered press Enter to add the party Entering Destinations in the Address Book To enter fax recipients in the Address Book perform the following procedure 1 Press System Menu Counter 2 Press S or T to select Edit Addressbook Press Enter 3 Press right Select 4 Press S or T to select Add Address Press Enter Cancel Menu Detail Search Name Select Search Name T...

Page 54: ...t Select 7 Enter the destination name Press Enter NOTE For detailed information on entering characters refer to Entering Characters on page 3 20 8 Press S or T to display FAX Number Press right Select Add Address Group Cancel Contact Cancel Contact Name Detail Edit 1 6 Contact Name Text ABC Cancel Cancel FAX Number Detail Edit 2 6 ...

Page 55: ...age 3 28 10 Press Enter 11 Press S or T to display Address Number Press right Select 12 Enter the address number to be registered using the numeric keys Press Enter NOTE If you enter a previously entered address number an error message is displayed In this case choose a different address number 13 Enter e mail addresses and the folder for saving documents sent to computers NOTE For detailed inform...

Page 56: ...can also configure settings for the subaddress encrypted communication transmission speed and ECM communication Setting the Subaddress Enter the subaddress and password required for subaddress confidential communication 1 Press right Select on the destination fax input screen 2 Press S or T to display Sub Address Press right Select Cancel FAX Number Edit 2 6 0123456789 Detail Cancel 0123456789 Fax...

Page 57: ...ax input screen Setting up encrypted communication Enter the encryption key and encryption box for use in encrypted communication 1 Press right Select on the destination fax input screen 2 Press S or T to display Encryption Press right Select Sub Address 1234567890123 Cancel Password Cancel Cancel 0123456789 Fax No Entry Detail Cancel Encryption FAX Detail Edit 2 4 Off ...

Page 58: ...tion box On the next screen use the numeric keys to enter the box number Press Enter NOTE When sending the documents to the same model as the FAX System in encrypted communication be sure the encryption box setting is set to Off 6 Press Enter to return to the destination fax input screen Setting the communication speed Set the initial fax transmission speed Encryption Cancel Off On Cancel Encrypt ...

Page 59: ...on speed Press Enter 4 Press Enter to return to the destination fax input screen Setting up ECM communication For fax communication enables or disables ECM Error Correction Mode 1 Press right Select on the destination fax input screen Cancel 0123456789 Fax No Entry Detail Cancel TX Start Speed FAX Detail Edit 3 4 33600bps TX Start Speed 14400bps 9600bps Cancel 33600bps Cancel 0123456789 Fax No Ent...

Page 60: ...ok as follows 1 Press System Menu Counter 2 Press S or T to select Edit Addressbook Press Enter 3 Press S or T to select the destination to edit Press Enter 4 Press S or T to select Detail Edit Press Enter 5 Press S or T to select the item to edit Press right Select NOTE For more information on editing each item refer to Entering Destinations in the Address Book on page 3 25 6 After editing the it...

Page 61: ...tination to delete Press right Select 4 Press S or T to select Delete Press Enter 5 Press left Select 6 To delete another destination repeat steps 3 to 5 7 Press Enter to finish the deletion and return to the Edit Addressbook screen Entering Group Destinations in the Address Book Enter a group of destinations in the Address Book as follows 1 Press System Menu Counter 2 Press S or T to select Edit ...

Page 62: ...ight Select 7 Enter a group name Press Enter NOTE For more information on entering characters refer to Entering Characters on page 3 20 8 Press S or T to select Group Member Press right Select Add Address Contact Group Cancel Cancel Group Name Detail Edit 1 3 Group Name Text ABC Cancel Cancel Group Member Detail Edit 2 3 30 ...

Page 63: ...the destination to register to the group Press Enter 12 Press Enter 13 To delete a registered member press S or T to select the member Press right Select Group Member Exit Menu Menu Delete Detail Cancel Add Member Contacts TTT ABCDE FGHIJ Cancel Menu ScanData ABCDE FGHIJ com 0123456789 Cancel Menu ABCDE Group Member Exit Menu ABCDE ...

Page 64: ... Select 16 Press S or T to display Address Number Press right Select 17 Enter the address number to register using the numeric keys Press Enter NOTE An error message is displayed if you enter a previously entered address number In this case choose a different address number Menu Delete Add Member Detail Cancel Group Member Exit Menu ABCDE Cancel Address Number Detail Edit 3 3 19 53 001 120 Cancel ...

Page 65: ...item to edit Press right Select NOTE For more information on editing each item refer to Entering Group Destinations in the Address Book on page 3 33 5 After editing the items press Enter 6 To edit another group destination repeat steps 3 to 5 7 Press Enter to save your changes and return to the Edit Addressbook screen Deleting Group Destinations from the Address Book Delete group destinations from...

Page 66: ...ete Press right Select 4 Press S or T to select Delete Press Enter 5 Press left Select 6 To delete another group destination repeat steps 3 to 5 Press left Select to confirm the deletions and return to the basic screen Menu Cancel Add Address Detail Edit Delete Delete No Yes Are you sure AAA ...

Page 67: ...ne is busy for extended periods NOTE Automatic Redialing is not available for direct transmission You can also adjust the number of redial attempts Refer to Redial on page 7 10 for more information Address Recall If the other party s fax machine fails to respond to a transmission or if you want to transmit another fax to the same party press S Address Recall to view the most recently dialed number...

Page 68: ...Basic Operation 3 40 OPERATION GUIDE ...

Page 69: ...g topics Menu Table 4 2 Standby Transmission 4 3 Broadcast Transmission 4 4 Direct Transmission 4 7 Interrupt Transmission 4 8 Timer based Transmission 4 9 Deleting a Job in Memory 4 11 Manual Fax Transmission 4 13 Manual Fax Reception 4 14 One Touch Keys 4 15 Programs 4 23 ...

Page 70: ... page 4 15 Selection of One Touch Key No Confirm information registered to a one touch key page 4 17 Clear a one touch key page 4 17 Common Setting One Touch Keys Selection of One Touch Key No 01 08 Assign a chain dial to a one touch key page 4 18 Selection of One Touch Key No Confirm information on the chain dial registered to a one touch key page 4 19 Clear chain dial details page 4 20 Common Se...

Page 71: ...tion mode Standby Transmission accepts and processes only one standby transmission task NOTE You can schedule up to 10 reserved jobs at any given time including Standby Transmission and Interrupt Transmission jobs 1 Place the original documents to transmit in the document processor or on the platen 2 Press Send 3 Enter the destination fax number You can use one touch dial Address Book or chain dia...

Page 72: ... automatically dials the fax numbers and transmits a copy to each destination NOTE Up to 100 destinations can be set for Broadcast Transmission Using the numeric keys to enter a destination fax number 1 Place the original documents to transmit in the document processor or on the platen 2 Press Send 3 Press W Destination 4 Press S or T to select FAX Press Enter 5 Enter the fax number using the nume...

Page 73: ... Book to specify group destinations refer to Searching for Destinations in the Address Book on page 3 24 1 Press X Address Book NOTE If the external address books are used with the FAX System a screen for address book selection is displayed Press S or T to select the desired address book Press Enter 2 Press S or T to select the destination party Press Enter 3 Press S or T to select the destination...

Page 74: ...Basic Functions 4 6 OPERATION GUIDE 5 Press Start to start fax ...

Page 75: ...the job has no other pages and ends the fax transmission NOTE Automatic Redialing is not available during Direct Transmission Direct Transmission cannot be used with Broadcast Transmission Timer based Transmission or Polling transmission 1 Place the original documents to transmit in the document processor or on the platen 2 Press Send 3 Press Function 4 Press S or T to select FAX Direct TX Press E...

Page 76: ...ion can be used for only one destination at a time 1 Place the original documents to transmit in the document processor or on the platen 2 Press Send 3 Press Function 4 Press S or T to select FAX Direct TX Press Enter 5 Press S or T to select On Press Enter 6 Press right Select 7 Enter the destination fax number You can use one touch dial Address Book or chain dial to enter the destination fax num...

Page 77: ...mode The fax memory can hold up to 30 jobs for timer based transmission at once Be sure that the correct time is set for the FAX System before sending faxes using this method To adjust the time refer to Setting the Current Date and Time Date Time Setting on page 2 7 1 Place the original documents to transmit in the document processor or on the platen 2 Press Send 3 Press Function 4 Press S or T to...

Page 78: ...right Select 9 Enter the destination fax number You can use one touch dial Address Book or chain dial to enter the destination fax number 10 Press Start to start loading the document and transmit the document at the time specified c 11 45 Start Time Hour Min Cancel Current Time 11 45 ...

Page 79: ...ress S or T to select the job whose transmission details to review Press right Select 4 Press S or T to select Detail Press Enter 5 Press S or T to display information on the jobs in memory one after the other 6 To finish reviewing the jobs press Enter 7 Press Reset to return to the basic screen Deleting a Job in Memory Delete jobs in memory 1 Press Status Job Cancel 2 Press S or T to select Sched...

Page 80: ... select the job to delete Press left Select 4 Press left Select once again The selected job is deleted 5 Press Reset to return to the basic screen Cancel 0011 Scheduled Job 0017 Menu 0018 0756545865 0324256345 Broadcast Cancel Job No Yes Are you sure 0017 ...

Page 81: ...rty 1 Place the original documents to transmit in the document processor or on the platen 2 Pick up the receiver 3 Enter the destination number 4 Perform the following procedure to talk to the other party before sending document 5 Press Send 6 Press T On Hook 7 Press Start to start fax Sending documents without talking to the other party 1 Place the original documents to transmit in the document p...

Page 82: ...ual as described in Fax Reception Mode on page 7 14 1 When an incoming call arrives the telephone connected to the FAX System will ring 2 Pick up the receiver 3 Confirm the connection with the other party If the calling machine is used to send faxes perform the following procedure If the calling machine is used as a telephone perform the following procedure after talking to start receiving the fax...

Page 83: ...ys to specific destinations or programs 1 Press System Menu Counter 2 Press S or T to select Common Setting Press Enter 3 Press S or T to select One Touch Set Press Enter 4 Press S or T to select Program or Destination Press Enter 5 Press right Select to return to the basic screen Destination You can assign destinations in the Address Book to one touch keys Assigning Destinations Perform the follo...

Page 84: ...Press Enter 7 Press S or T to select the destination fax number Press Enter If you try to assign a one touch key that s already assigned a dialogue will ask if you want to overwrite the one already assigned In this case press left Select 8 Press left Select to return to the basic screen One Touch Keys Key6 Key5 Exit Menu Register Address Book Chain Dial Cancel Address Book FGHIJ ABCDE AAA Cancel M...

Page 85: ...3 Press S or T to select Detail Press Enter 4 After checking the details press Enter 5 Press left Select to return to the basic screen Clearing Assigned Keys Perform the following procedure to clear destinations assigned to one touch keys 1 Follow steps 1 to 3 in Assigning Destinations on page 4 15 2 Press S or T to select the one touch key to clear 1 8 Press right Select One Touch Keys Key2 Key1 ...

Page 86: ...stination 2 Press Start to begin sending the fax Chain Dial Chain dial is a dialing function that adds a number the chain number for dialing before the destination fax numbers assigned to one touch keys For example if you assign 800 for chain dial to dial 800 XX XXXX simply press the one touch key assigned to 800 and enter the rest of the number on the numeric keys Assigning Chain Dial Perform the...

Page 87: ... numeric keys to enter the number Press Enter NOTE If you try to assign the one touch key that s already assigned a dialogue will ask if you want to overwrite the one already assigned In this case press left Select 7 Press left Select to return to the basic screen Checking Details of Assigned Keys Perform the following procedure to check numbers assigned for chain dialing with one touch keys 1 Fol...

Page 88: ...igned Keys Perform the following procedure to clear numbers assigned for chain dialing with one touch keys 1 Follow steps 1 to 3 in Assigning Chain Dial on page 4 18 2 Press S or T to select the one touch key to clear 1 8 Press right Select 3 Press S or T to select Delete Press Enter One Touch Keys Key2 Key1 Back Exit Menu Menu Cancel Delete Register Detail One Touch Keys Key2 Key1 Back Exit Menu ...

Page 89: ... procedure to dial using chain dial Chain dial key one touch dial key 1 Press the one touch key set up for chain dial 2 Press the one touch key assigned to a recipient 3 Press Start to begin sending the fax Chain dial key Address Book 1 Press a one touch key previously set up for chain dial 2 Press S or T to select Address Book Press Enter Delete No Yes Are you sure Key1 800 800 ...

Page 90: ...ending the fax Chain dial key numeric keys 1 Press a one touch key previously set up for chain dial 2 Press S or T to select FAX No Entry Press Enter 3 Use the numeric keys to enter the recipient s number Press Enter 4 Press Start to begin sending the fax Address Book KLMNO FGHIJ ABCDE Cancel Menu 0123456789 Cancel Menu ABCDE 800 Cancel FAX No Entry Detail 800 ...

Page 91: ... and functions to store as a program 2 Press System Menu Counter 3 Press S or T to select Program Setting Press Enter 4 Press S or T to select an unassigned number for a program number Press Enter The one touch key number is displayed as 5 Press S or T to select Copy or Send Press Enter 6 Press left Select NOTE If you try to assign the program number that s already assigned a dialogue will ask if ...

Page 92: ...ogram 6 Press left Select to return to the basic screen Recalling Programs Perform the following procedure to recall programs NOTE If you set up programs as described in Setting Up One Touch Keys on page 4 15 you can recall programs simply by pressing the one touch key of the program number 1 Press Program 2 Press S or T to select the program number Press Enter Menu Cancel Register Delete Delete N...

Page 93: ...ommunication 5 7 Subaddress Communications 5 11 Subaddress based Confidential Communications 5 12 Fax Forwarding 5 24 Password based Communications 5 31 Encrypted Communication 5 38 E mail Notification of Job Results 5 45 Displaying Job Status 5 46 Printing Communication Management Reports 5 53 User Login 5 55 Job Accounting 5 56 ...

Page 94: ...g number page 5 5 Doc Box Setting Polling Setting Remain File Delete File Keep or discard documents after polling transmission page 5 10 Sub Address Box Sub Address Box Entering Characters Enter subaddresses page 5 12 Entering Characters Enter box names page 5 12 01 20 Enter box numbers page 5 12 Subaddress Box Selection Entering Characters Change subaddresses page 5 13 Entering Characters Change ...

Page 95: ... Setting Forward Setting Destination Selection Specify forwarding destinations to store page 5 24 Destination Selection Change stored forwarding destinations page 5 26 All day Time Specificat Schedule the period for forwarding page 5 27 0 00 23 59 Schedule when forwarding starts page 5 27 0 00 23 59 Schedule when forwarding ends page 5 27 On Off Print from the FAX System during forwarding page 5 2...

Page 96: ... password based communication for fax page 5 36 User Permit List Off Specify password based communication for receiving faxes page 5 36 FAX Common Set Encryption Key Entering Characters Register encryption keys page 5 39 Entering Characters Change encryption keys page 5 40 Delete encryption keys page 5 40 FAX RX Setting Encryption RX On Off For receiving encrypted faxes On Off page 5 41 01 20 Spec...

Page 97: ... FAX System Changing the Remote Switching Number Change the remote switching number the default value is 55 1 Press System Menu Counter 2 Press S or T to select FAX Setting Press Enter 3 Press S or T to select FAX RX Setting Press Enter 4 Press S or T to select Remote SW Dial Press Enter 5 Use the numeric keys to enter the new remote switching number 2 digits Press Enter to register the number 6 P...

Page 98: ...UIDE 2 Pick up the receiver 3 If you hear a fax tone dial the two digit remote switching number NOTE The default remote switching number is 55 4 The incoming fax will be switched to the FAX System and reception will start automatically ...

Page 99: ...polling requests you can add documents to the documents already stored for polling All stored documents will be faxed together on request from the caller You can set the system to continue storing the documents stored for polling transmission or to delete them after polling For more information refer to Polling Transmission Settings on page 5 10 To check documents stored for polling transmission o...

Page 100: ...ess Start to print the selected file To print all documents in the box press right Select On the next screen press S or T to select Print All File Press Enter Press Start to print all documents in the box Editing the Documents Stored in Polling Box Perform the following procedure to check or rename documents stored in polling box 1 Press Document Box 2 Press S or T to select FAX Polling Box Press ...

Page 101: ...procedure to delete documents stored in polling box 1 Press Document Box 2 Press S or T to select FAX Polling Box Press Enter 3 Press S or T to select the file to delete Press right Select 4 Press S or T to select Delete Press Enter 5 Press left Select to delete the selected file 6 Press left Select to return to the document box basic screen Receiving Documents by Polling In polling reception call...

Page 102: ...s stored for polling transmission or to delete them after polling Keeping documents makes them available for multiple callers after you scan them once in preparation for polling transmission 1 Press System Menu Counter 2 Press S or T to select Doc Box Setting Press Enter 3 Press S or T to select Polling Setting Press Enter 4 Press S or T to select Remain File or Delete File Press Enter To keep doc...

Page 103: ...ing keys Subaddresses Used by the FAX System The FAX System uses subaddresses as well as passwords for subaddress communication Subaddresses When specifying a receiving party to receive a confidential fax you must enter their subaddress just as they must specify yours when sending to you Subaddresses must also be specified for subaddress boxes where confidential faxes are received The length of th...

Page 104: ...the stored documents NOTE Subaddress based confidential communications require that the other party s fax machine support subaddress and confidential communications Subaddress based confidential communications cannot be combined with encrypted communication Setting Up Subaddress Boxes Perform the following procedure to register new subaddress boxes NOTE You can print the list of registered subaddr...

Page 105: ...Enter 10 Press left Select to return to the basic screen NOTE For instructions on assigning subaddress box passwords or changing box settings refer to Modifying Subaddress Boxes on page 5 13 Modifying Subaddress Boxes Perform the following procedure to change settings for subaddress boxes 1 Follow steps 1 to 3 in Setting Up Subaddress Boxes on page 5 12 2 Press S or T to select the box to change P...

Page 106: ... or T to display Sub Add Entry Press right Select 2 Use the numeric keys to enter the new subaddress Press Enter Renaming Boxes Change box names as follows 1 Press S or T to display Box Name Press right Select 2 Enter the new box name Press Enter Cancel Sub Add Entry Detail Edit 1 4 1234 Sub Add Entry Cancel Cancel Box Name Detail Edit 2 4 Arlen box Box Name Entry Text ABC Cancel Arlen box ...

Page 107: ... Press S or T to display Password Press right Select 2 Use the numeric keys to enter the password Press Enter 3 Re enter the password for confirmation Press Enter Changing Box Numbers Change box numbers as follows 1 Press S or T to display Box Number Press right Select Cancel Password Detail Edit 3 4 Password Cancel Confirm Password Cancel Cancel Box Number Detail Edit 4 4 02 ...

Page 108: ...ified 1 Press S or T to display User Name Press right Select 2 Press S or T to select the user Press Enter Changing Usage Restrictions These boxes are displayed only when the user registered in User Name is logged in NOTE This setting is displayed only when user login is specified Box Number Entry 2 01 20 Cancel Cancel User Name Detail Edit 3 6 Arlen User List Richard Arlen Harold Cancel ...

Page 109: ...ss left Select to return to the basic screen Deleting Subaddress Boxes Perform the following procedure to delete subaddress boxes 1 Follow steps 1 to 3 in Setting Up Subaddress Boxes on page 5 12 2 Press S or T to select the box to delete Press right Select 3 Press S or T to select Delete Press Enter If the box is password protected use the numeric keys to enter the password Press Enter Cancel Per...

Page 110: ... cassette will be used for printing NOTE This setting is displayed only when the FAX System is equipped with an optional paper cassette 1 Press System Menu Counter 2 Press S or T to select Doc Box Setting Press Enter 3 Press S or T to select Box Media Type Press Enter 4 Press S or T to select the paper type Press Enter 5 Press right Select to return to the basic screen Confidential Fax Using Subad...

Page 111: ...estination NOTE You can specify the other party s number using one touch dial keys or from the Address Book If the required subaddress and password are registered in the one touch dial key or Address Book you do not need to enter them when sending 4 Press S or T to select FAX Press Enter 5 Use the numeric keys to enter the fax number Press right Select 6 Press S or T to display Sub Address Press r...

Page 112: ...ting Documents from Subaddress Boxes Perform the following procedure to print documents from subaddress boxes 1 Press Document Box 2 Press S or T to select Sub Address Box Press Enter 3 Press S or T to select the box in which the documents to print are stored Press Enter If the box is password protected use the numeric keys to enter the password Press Enter 4 Press S or T to select the document to...

Page 113: ...ents from subaddress boxes 1 Press Document Box 2 Press S or T to select Sub Address Box Press Enter 3 Press S or T to select the box in which the documents to check or rename are stored Press Enter If the box is password protected use the numeric keys to enter the password Press Enter 4 Press S or T to select the file to edit Press right Select 5 Press S or T to select Detail Edit Press Enter 6 P...

Page 114: ...password Press Enter 4 Press S or T to select the document to delete Press right Select 5 Press S or T to select Delete Press Enter 6 Press left Select 7 Press left Select to return to the document box basic screen Printing Lists of Subaddress Boxes Perform the following procedure to print a list of subaddress boxes 1 Press System Menu Counter 2 Press S or T to select Report Press Enter 3 Press S ...

Page 115: ...AdvancedFunctions OPERATION GUIDE 5 23 5 Press left Select to print the list ...

Page 116: ...in a specified folder on a computer NOTE If fax forwarding fails the received documents are printed from the FAX System and deleted from memory Fax forwarding may be unavailable when combined with other functions such as encrypted communication Fax forwarding must be activated in advance For more information refer to Activating Fax Forwarding on page 5 30 Registering Forwarding Destinations Perfor...

Page 117: ...ess Entry or Address Book Press Enter If you select Address Book specify the recipient from the Address Book NOTE For instructions on using the Address Book refer to Address Book on page 3 24 Forward Setting Forward Dest Forward Back Exit Forward Dest Cancel Confirmation Register Register Cancel Address Book Address Entry Address Book KLMNO FGHIJ ABCDE Cancel Menu ...

Page 118: ...ct after specifying the destination and returning to the Forward Setting screen 9 Press right Select to return to the basic screen Changing Forwarding Destinations Perform the following procedure to change various details registered for fax forwarding 1 Follow steps 1 to 5 in Registering Forwarding Destinations on page 5 24 2 Press S or T to select Confirmation Press Enter 3 After confirming that ...

Page 119: ... specifying the destination and returning to the Forward Dest screen 7 Press right Select to return to the basic screen Specifying the Fax Forwarding Period Perform the following procedure to schedule the forwarding timeframe 1 Follow steps 1 to 4 in Registering Forwarding Destinations on page 5 24 2 Press S or T to select Forward Time Press Enter 0123456789 Delete Cancel Edit Cancel FAX No Entry ...

Page 120: ...rn to the basic screen 4 Specify the start time Press S or T to set hour Press X 5 Press S or T to set minutes Press Enter 6 Specify the ending time Press S or T to specify the hour Press X 7 Press S or T to specify minutes Press Enter Forward Time Cancel All day Time Specificat Start Time 09 Cancel Current Time 45 Hour Min 11 45 Start Time 09 Cancel 45 Hour Min Current Time 11 45 End Time 11 Canc...

Page 121: ...ct On or Off Press Enter Specify On to both print and forward forwarded faxes 4 Press right Select to return to the basic screen Specifying the File Format of Forwarded Files When specifying settings to forward documents via e mail or to store them in a folder on a computer set either TIFF or PDF for the document file format 1 Follow steps 1 to 4 in Registering Forwarding Destinations on page 5 24...

Page 122: ...o activate fax forwarding 1 Follow steps 1 to 4 in Registering Forwarding Destinations on page 5 24 2 Press S or T to select Forward Press Enter 3 Press S or T to select On or Off Press Enter Choose On to activate fax forwarding Choose Off to disable it 4 Press right Select to return to the basic screen File Format Cancel PDF TIFF Forward Setting Forward Dest Forward Back Exit Forward Cancel Off O...

Page 123: ...d communications must be activated in advance Refer to Activating Password based Communications on page 5 36 Meeting Requirements for Password based Communications Authorized telephone numbers registered in the FAX System must match the telephone numbers of other parties Authorized IDs registered in the FAX System must match the IDs of other parties When you fax to recipients using the Address Boo...

Page 124: ...ter all authorized fax numbers 9 Press left Select to return to the basic screen Modifying Authorized Telephone Numbers Perform the following procedure to change authorized telephone numbers 1 Follow steps 1 to 5 in Registering New Authorized Telephone Numbers on page 5 31 TX RX Restrict Permit No List RX Restriction TX Restriction Exit Permit No List 6789012345 3456789012 0123456789 Exit Menu Men...

Page 125: ...rocedure to delete authorized telephone numbers 1 Follow steps 1 to 5 in Registering New Authorized Telephone Numbers on page 5 31 2 Press S or T to select the authorized telephone number to delete Press right Select 3 Press S or T to select Delete Press Enter 4 Press left Select Permit No List 6789012345 3456789012 0123456789 Exit Menu FAX No Entry 0123456789 Cancel Permit No List 6789012345 3456...

Page 126: ... Press System Menu Counter 2 Press S or T to select FAX Setting Press Enter 3 Press S or T to select FAX RX Setting Press Enter 4 Press S or T to select TX RX Restrict Press Enter 5 Press S or T to select Permit ID List Press Enter 6 Press right Select 7 Press S or T to select Add FAX ID Press Enter TX RX Restrict Permit ID List Permit No List RX Restriction Exit Permit ID List 0007 0004 Exit Menu...

Page 127: ... 1 Follow steps 1 to 5 in Registering New Authorized IDs on page 5 34 2 Press S or T to select the authorized ID number to change Press Enter 3 Re enter the ID number Press Enter 4 Press left Select to return to the basic screen Deleting Authorized IDs Perform the following procedure to delete authorized ID numbers 1 Follow steps 1 to 5 in Registering New Authorized IDs on page 5 34 Permit FAX ID ...

Page 128: ...mission or reception to authorized users You can restrict transmission reception or both NOTE Even if you activate this setting authorized telephone numbers or IDs must be registered in the FAX System in advance Otherwise the system will not verify passwords 1 Press System Menu Counter 2 Press S or T to select FAX Setting Press Enter 3 Press S or T to select FAX RX Setting Press Enter 4 Press S or...

Page 129: ...7 Press S or T to select RX Restriction Press Enter 8 Press S or T to select Use Permit List or Off Press Enter Choose Use Permit List to check passwords during reception 9 Press right Select to return to the basic screen TX RX Restrict RX Restriction TX Restriction Back Exit TX Restriction Cancel Off Use Permit List TX RX Restrict RX Restriction TX Restriction Back Exit RX Restriction Cancel Off ...

Page 130: ...t match encrypted communication is not possible The sender and recipient must determine encryption conditions beforehand and register the encryption key under a two digit encryption key ID Sender and Recipient Settings Use matching numbers for the settings above indicated by the same letters in parenthesis For example the same number must be used by the sender and recipient for the encryption key ...

Page 131: ...though the recipient assigned encryption key ID 09 to this encryption key in the encrypted reception setting Registering New Encryption Keys Encryption keys are necessary when the sender performs detailed transmission settings for encrypted transmission when the sender specifies encrypted communication for one touch dial keys or for Address Book entries and when a recipient performs detailed trans...

Page 132: ...owing characters 7 Press left Select to return to the basic screen Checking or Deleting Encryption Keys Perform the following procedure to check or delete encryption keys 1 Follow steps 1 to 4 in Registering New Encryption Keys on page 5 39 2 Press S or T to select the encryption key ID to be checked or deleted Press right Select Register Cancel Key Supported Characters Key Supported Characters 1 ...

Page 133: ...elect to return to the basic screen Setting Up Encrypted Reception To receive encrypted transmissions complete the encrypted reception setting and specify the encryption key 1 Press System Menu Counter 2 Press S or T to select FAX Setting Press Enter 3 Press S or T to select FAX RX Setting Press Enter 4 Press S or T to select Encryption RX Press Enter Menu Detail Register Cancel Delete 123456789AB...

Page 134: ...y ID For more information refer to Registering New Encryption Keys on page 5 39 1 Place the original documents into the document processor or on the platen 2 Press Send 3 Press W Destination NOTE You can specify the other party s number using one touch dial keys or from the Address Book If encrypted communications are specified for one touch dial keys or Address Book entries no special steps are r...

Page 135: ...s S or T to select On or Off Press Enter Choose Off if the recipient does not support encryption box Choose On if the recipient supports encryption box On the next screen use the numeric keys to enter the box number Press Enter Cancel Encryption FAX Detail Edit 2 4 Off Encryption Cancel Off On Cancel Encrypt Key No Key03 Key04 Key02 Encryption Box Cancel Off On Box Number Entry 0000 0000 9999 Canc...

Page 136: ...NOTE Before receiving encrypted communications you must determine an encryption key with the sender and register it under an encryption key ID For more information refer to Registering New Encryption Keys on page 5 39 1 Complete the encrypted reception setting specify encrypted reception and select the encryption key ID For more information refer to Setting Up Encrypted Reception on page 5 41 2 Th...

Page 137: ... T to select Address Book or Address Entry Press Enter To select e mail addresses from the Address Book select Address Book Choose the address on the next screen Press Enter To enter e mail addresses select Address Entry Enter the address on the next screen Press Enter 6 Press right Select to return to the basic screen 7 Fax the document as usual You will be notified of the transmission results by...

Page 138: ...hem as necessary Refer to Store Job Status on page 5 48 for more information Scheduled Job Status Displays jobs scheduled for fax You can check job details and delete jobs as necessary Refer to Scheduled Job Status on page 5 48 for more information Print Job Log Displays jobs that have been printed output from received faxes from the subaddress box from reports from copies or from print jobs when ...

Page 139: ... to check Press Enter NOTE To cancel jobs select the jobs to delete and press left Select On the next screen press left Select 4 Press S or T to select Detail Press Enter 5 Job details are displayed Press S or T to display details of each job sequentially 6 After reviewing the jobs press Reset to return to the Status Menu screen Send Job Status Perform the following procedure to display the Send J...

Page 140: ...o select the job to check Press Enter NOTE To cancel jobs select the jobs to delete and press left Select On the next screen press left Select 4 Press S or T to select Detail Press Enter 5 Job details are displayed Press S or T to display details of each job sequentially 6 After reviewing the jobs press Reset to return to the Status Menu screen Scheduled Job Status Perform the following procedure ...

Page 141: ... screen Print Job Log Perform the following procedure to display the Print Job Log screen 1 Press Status Job Cancel 2 Press S or T to select Print Job Log Press Enter 3 Press S or T to select the job to check Press Enter 4 Job details are displayed Press S or T to display details of each job sequentially 5 After reviewing the jobs press Reset to return to the Status Menu screen Send Job Log Perfor...

Page 142: ... Job Log screen 1 Press Status Job Cancel 2 Press S or T to select Store Job Log Press Enter 3 Press S or T to select the job to check Press Enter 4 Job details are displayed Press S or T to display details of each job sequentially 5 After reviewing the jobs press Reset to return to the Status Menu screen FAX TX Log Perform the following procedure to display the FAX TX Log screen 1 Press Status Jo...

Page 143: ...jobs press Reset to return to the Status Menu screen FAX RX Log Perform the following procedure to display the FAX RX Log screen 1 Press Status Job Cancel 2 Press S or T to select FAX Press Enter 3 Press right Select 4 Press S or T to select RX Log Press Enter Cancel Log RX Log TX Log FAX TX Report 0123456789 TX Log 1 50 Detail OK Log Cancel FAX TX Report TX Log RX Log ...

Page 144: ...d Functions 5 52 OPERATION GUIDE 5 Press S or T to display the record of faxes received sequentially 6 After reviewing the jobs press Reset to return to the Status Menu screen 0123456789 RX Log 1 50 Detail OK ...

Page 145: ...ss Status Job Cancel 2 Press S or T to select FAX Press Enter 3 Press right Select 4 Press S or T to select FAX TX Report Press Enter 5 Press left Select to print the report Printing FAX RX Reports Perform the following procedure to print details of the 50 most recent faxes received 1 Press Status Job Cancel 2 Press S or T to select FAX Press Enter 3 Press right Select Log RX Log TX Log Cancel FAX...

Page 146: ...d Functions 5 54 OPERATION GUIDE 4 Press S or T to select FAX RX Report Press Enter 5 Press left Select to print the report Log FAX TX Report RX Log FAX RX Report Cancel Print No Yes Are you sure FAX RX Report ...

Page 147: ...is 1118 NOTE For further information and instructions for Job Accounting refer to the Advanced Operation Guide User Login Screen Perform the following procedure to use the FAX System in User Login mode 1 Enter the user ID and the password using the numeric keys 2 Complete the fax job as usual NOTE Be sure to press Log Out after completing the fax job The message display returns to the user login s...

Page 148: ...to use the FAX System in Job Accounting mode 1 Enter the account ID using the numeric keys 2 Complete the fax job as usual NOTE Be sure to press Log Out after completing the fax job The message display returns to the Job Accounting screen Job Accounting Report Perform the following procedure to print the job accounting report 1 Press System Menu Counter 2 Press S or T to select User Job Account Pr...

Page 149: ...AdvancedFunctions OPERATION GUIDE 5 57 5 Press left Select The job accounting report is printed 6 Press right Select to return to the basic screen Print No Yes Are you sure All Accounts ...

Page 150: ...Advanced Functions 5 58 OPERATION GUIDE ...

Page 151: ...OPERATION GUIDE 6 1 6 Network Fax This chapter discusses the following topics Overview of Network Fax 6 2 Initial FAX System Settings 6 4 ...

Page 152: ...work fax FAX System Settings Specify the computer to receive fax data and the file format for reception For more information refer to Initial FAX System Settings on page 6 4 Computer Settings Install and configure the Network Fax driver For more information refer to the Network Fax Online Manual The driver and manual are provided on the CD ROM Online Manual The Online Manual provided on the CD ROM...

Page 153: ...om the included CD ROM Connection Connect the modular cord same as used for telephones to the Line jack on the FAX System Connect the network cable to the network interface port Network Fax Settings Report Check the Network Fax settings from the Status Page For instructions on printing the Status Page refer to the Advanced Operation Guide Modular Cord Network Cable ...

Page 154: ...or more information refer to Specifying the Fax Forwarding Period on page 5 27 FAX System Printing Settings Specify the FAX System to print faxes received even when these transmissions are set to be received using network fax reception For more information refer to Printing from the FAX System during Fax Forwarding on page 5 29 File Format for Faxes Received Select to receive faxes as TIFF or PDF ...

Page 155: ...ses the following topics Menu Table 7 2 Printing Reports 7 4 Volume 7 8 Redial 7 10 Fax Media Type 7 11 Number of Rings 7 12 Fax Reception Mode 7 14 Reception Date and Time 7 18 2in1 Reception 7 19 Bulk Printing 7 20 Remote Diagnosis 7 21 Remote Diagnosis ID 7 22 ...

Page 156: ...intouts of transmission results On Off page 7 5 FAX RX Result Off On On Conditions For printouts of reception results On Off page 7 5 Common Setting Sound Setting FAX Speaker Off Minimum Middle Maximum Adjust the speaker level and volume of the fax monitoring tone page 7 8 FAX Monitor Off Minimum Middle Maximum Adjust the volume of the built in speaker during auto transmission in off hook mode whe...

Page 157: ...uto Normal Auto FAX TEL Auto TAD Auto DRD Manual Specify the desired fax reception mode page 7 14 RX Date Time Off On Print the date time of reception sender identification and page number at the top of each document page received page 7 18 2in1 RX Off On Print two 5 1 2 8 1 2 A5 sized faxes received consecutively on a single 11 8 1 2 A4 sheet page 7 19 RX Bulk Print Off On Print all fax image dat...

Page 158: ... instructions on using this feature refer to Send Result Settings on page 7 5 NOTE You can set the FAX System to notify you of transmission results by e mail For more information refer to E mail Notification of Job Results on page 5 45 Fax RX Result Prints a report confirming reception success or failure after faxes are received If you prefer you can set the system to print only after errors or su...

Page 159: ...lect Send Result Press Enter 5 Press S or T to select Off On or On Conditions Press Enter Choose On Conditions to print the report of transmission result when an error occurs in transmission 6 Press right Select to return to the basic screen Fax RX Result Settings Perform the following procedure to set up printing of reception results 1 Press System Menu Counter 2 Press S or T to select Report Pre...

Page 160: ...rt Print or E mail Press Enter If you select Report Print skip to the step 8 7 Press S or T to select Address Entry or Address Book Press Enter If you select Address Book select the e mail address from the Address Book NOTE For instructions on using the Address Book refer to Address Book on page 3 24 FAX RX Result Cancel On Conditions Off On Report Output Cancel Report Print E mail Destination Can...

Page 161: ...7 If you select Address Entry enter the e mail address Press Enter NOTE For instructions on entering e mail addresses refer to Entering Characters on page 3 20 8 Press right Select to return to the basic screen Cancel Address Entry Text ABC ...

Page 162: ...ress System Menu Counter 2 Press S or T to select Common Setting Press Enter 3 Press S or T to select Sound Setting Press Enter 4 Press S or T to select FAX Speaker Press Enter 5 Press S or T to adjust the volume Press Enter 6 Press right Select to return to the basic screen Adjusting the Monitor Tone Volume Perform the following procedure to adjust the volume of the built in speaker during auto t...

Page 163: ...FAX System Settings OPERATION GUIDE 7 9 5 Press S or T to adjust the volume Press Enter 6 Press right Select to return to the basic screen FAX Monitor 2 Middle 1 Minimum Cancel 3 Maximum ...

Page 164: ...ansmission The available range varies depending on countries 1 Press System Menu Counter 2 Press S or T to select FAX Setting Press Enter 3 Press S or T to select FAX TX Setting Press Enter 4 Press S or T to select Retry Times Press Enter 5 Use the numeric keys to specify the number of redial attempts Press Enter 6 Press right Select to return to the basic screen Retry Times 0 14 3 Cancel times ...

Page 165: ...cassette will be used to print faxes NOTE This setting is displayed only when the FAX System is equipped with an optional paper cassette 1 Press System Menu Counter 2 Press S or T to select FAX Setting Press Enter 3 Press S or T to select FAX RX Setting Press Enter 4 Press S or T to select FAX Media Type Press Enter 5 Press S or T to select the paper type Press Enter 6 Press right Select to return...

Page 166: ... Press S or T to specify the number of rings Press Enter 6 Press right Select to return to the basic screen Setting the Number of Rings TAD Reception When automatic switching between fax answering machine is enabled and the FAX System is used with a regular telephone answering machine specify 1 15 rings until fax reception begins when the answering machine is off After the specified number of ring...

Page 167: ...ified number of rings reception of the faxed document will begin If the call is a telephone call rather than a fax transmission the FAX System will continue to ring For more information refer to Auto Fax Tel Switching on page 7 14 1 Press System Menu Counter 2 Press S or T to select FAX Setting Press Enter 3 Press S or T to select FAX RX Setting Press Enter 4 Press S or T to select Rings FAX TEL P...

Page 168: ...Reception In this mode you can confirm the connection with the other party before receiving faxes by pressing Start Choose this mode if you want to speak with the other party before receiving faxes For more information refer to Manual Fax Reception on page 4 14 NOTE You must connect a regular phone to the FAX System for manual fax reception Auto Fax Tel Switching This mode is convenient if you use...

Page 169: ...l or fax is received without the FAX System ringing audibly Calling charges are incurred from this point The FAX System rings twice Audible only to the sender The FAX System rings audibly Also audible to the sender Incoming calls can be answered using an external phone connected to the FAX System To receive faxes after speaking to the other party press Send GOn Hook and left Select to start recept...

Page 170: ...vice Contact your telephone company for more information You must connect a regular phone to the FAX System for DRD Reception Reception flow Fax Reception Mode Setting Perform the following procedure to select fax reception mode 1 Press System Menu Counter 2 Press S or T to select FAX Setting Press Enter 3 Press S or T to select FAX RX Setting Press Enter 4 Press S or T to select RX Setting Press ...

Page 171: ...vailable only for certain destination 6 Press right Select to return to the basic screen RX Setting AUTO TAD Auto Normal AUTO FAX TEL Cancel Option Fax Reception Mode Auto Normal Automatic Fax Reception Auto FAX TEL Auto Fax Tel Switching Auto TAD TAD Reception Auto DRD This option is available only for certain destination DRD Reception Manual Manual Fax Reception Auto DRD Pattern3 Pattern1 Patter...

Page 172: ...lets you see the local time at which the fax was received convenient when the fax is sent from a different time zone 1 Press System Menu Counter 2 Press S or T to select FAX Setting Press Enter 3 Press S or T to select FAX RX Setting Press Enter 4 Press S or T to select RX Date Time Press Enter 5 Press S or T to select On or Off Press Enter 6 Press right Select to return to the basic screen RX Dat...

Page 173: ... consecutively on a single 11 8 1 2 A4 sheet 1 Press System Menu Counter 2 Press S or T to select FAX Setting Press Enter 3 Press S or T to select FAX RX Setting Press Enter 4 Press S or T to select 2in1 RX Press Enter 5 Press S or T to select On or Off Press Enter 6 Press right Select to return to the basic screen 2in1 RX Cancel Off On ...

Page 174: ...completely received This frees the FAX System for copying and other functions during that time 1 Press System Menu Counter 2 Press S or T to select FAX Setting Press Enter 3 Press S or T to select FAX RX Setting Press Enter 4 Press S or T to select RX Bulk Print Press Enter 5 Press S or T to select On or Off Press Enter 6 Press right Select to return to the basic screen RX Bulk Print Cancel Off On...

Page 175: ...fore using remote diagnosis you must enter the unique ID into the FAX System this ID was provided by the service agent when you signed the service agreement For more information consult your service agent or dealer 1 Press System Menu Counter 2 Press S or T to select Service Setting Press Enter 3 Press S or T to select Remote Diag Set Press Enter 4 Press S or T to select On or Off Press Enter 5 Pr...

Page 176: ...on must also be enabled in the FAX System as described in Remote Diagnosis on page 7 21 1 Press System Menu Counter 2 Press S or T to select Service Setting Press Enter 3 Press S or T to select Remote Diag ID Press Enter 4 Use the numeric keys to enter the four digit unique ID Press Enter 5 Press right Select to return to the basic screen Remote Diag ID 0000 Cancel 0000 9999 ...

Page 177: ...OPERATION GUIDE 8 1 8 Troubleshooting This chapter discusses the following topics Memory Indicator 8 2 Warning and Maintenance Messages 8 3 Troubleshooting Table 8 5 ...

Page 178: ...dicator flashes while receiving documents or scanning documents into memory FAX Communicating Errors Fax communicating errors may trigger an audible alarm and cause the Error indicator to flash If the Error indicator remains lit check the message display for error details and perform the corrective action Refer to Warning and Maintenance Messages on page 8 3 and Troubleshooting Table on page 8 5 P...

Page 179: ...rrupt transmission Press right Select to cancel the scheduled job Phone is off hook Hang up The external phone is off the hook Hang up the receiver Unable to connect to the server Unable to access the external address book Press right Select and check the address book you are trying to access Enter FAX number You have not entered a fax number to dial Enter the other party s fax number Line is busy...

Page 180: ...n key is not registered No encryption key is specified for the destination set for encrypted communication Be sure the encryption key is entered correctly for the selected destination page 5 38 Message Description and Corrective Action Reference Page ...

Page 181: ...le Otherwise make memory available as necessary and try again page 3 18 page 5 20 page 5 22 Unable to fax using encrypted communication Are you using the correct encryption key Make sure the sender and recipient are using matching keys page 5 38 If the recipient must specify an encrypted communication box has it been set up correctly Make sure the sender and recipient are using matching keys page ...

Page 182: ...machine support the same features for confidential fax using subaddresses This communication mode cannot be used unless the other fax machine has compatible features Ask the other party to check their fax machine Has the other party set up boxes for sending and receiving confidential faxes subaddress confidential boxes Ask the other party to check their fax machine Was the correct subaddress enter...

Page 183: ...OPERATION GUIDE 9 1 9 Reference Information This chapter includes the following reference information Specifications 9 2 Menu Flowcharts 9 3 Error Code Table 9 7 ...

Page 184: ...2 14 5 1 2 8 1 2 Metric version A4R B5R A5R Folio Custom 80 to 216 148 to 356 mm Paper Dimensions Inch version 8 1 2 11 8 1 2 14 5 1 2 8 1 2 Metric version A4R A5R Folio Scanning Line Density Horizontal Vertical Normal 8 dots mm 3 85 lines mm Fine 8 dots mm 7 7 lines mm Super fine 8 dots mm 15 4 lines mm Ultra fine 16 dots mm 15 4 lines mm Recording Resolution 600 dpi 600 dpi Grayscale 256 levels ...

Page 185: ...l Size Function Send Size Zoom Continuous Scan Job End Report FAX Delayed TX FAX Direct TX FAX RX Polling Scan Resolution Exposure Destination Destination Confirmation FAX Address Book Address Book External Address Book Status Job Cancel Print Job Status Send Job Status Store Job Status Scheduled Job Send Job Log Store Job Log FAX Log TX Log RX Log FAX TX Report FAX RX Report ...

Page 186: ...x FAX Polling Box Program System Menu Counter Report Report Print Report Setting FAX TX Report FAX RX Report Result Report Setting Send Result FAX RX Result Subaddress Box List Date Timer Setting Year Time Time Zone Common Setting Sound Setting FAX Speaker FAX Monitor One Touch Setting One Touch Keys Continued ...

Page 187: ...evious page Local FAX ID Local FAX Number FAX Line Setting FAX RX Setting FAX Media Type Forward Setting Forward Forward Destination File Format Forward Time Print RX Date Time 2in1 Reception RX Bulk Print Remote Switching Dial TX RX Restriction TX Restriction RX Restriction Permit No List Permit ID List Retry Times Rings Normal Rings TAD Rings FAX TEL RX Setting Encryption RX ...

Page 188: ...6 OPERATION GUIDE Service Setting FAX Country Code Continued from previous page Remote Diagnosis Setting Remote Diagnosis ID Document Box Setting Box Media Type Sub Address Box Polling Setting Edit Addressbook Program Setting ...

Page 189: ...is out of paper Contact the recipient U00420 U00462 The sender established a connection but could not send the document because the FAX System are incompatible Transmission interrupted U00600 U00690 Communication was interrupted due to problems with the FAX System Try sending or receiving the transmission once again U00700 Communication was interrupted due to problems with the other party s FAX Sy...

Page 190: ... in the sender s FAX System Contact the sender U03300 The other party s FAX System is compatible with the FAX System but polling reception to receive their document failed because the required passwords failed to match during password based communication when password based communication was enabled on their FAX System U03400 Polling reception failed because the sender s password and recipient s s...

Page 191: ...em Contact the other party U09000 Communication failed because the other party s FAX System uses an incompatible communication protocol The other party is using a G2 FAX System U14000 Reception to a subaddress box failed because FAX System memory is full Print stored documents and try again or cancel subaddress based confidential reception U14100 The recipient s FAX System is compatible with the F...

Page 192: ...Reference Information 9 10 OPERATION GUIDE ...

Page 193: ... 4 Bulk Printing 7 20 C Canceling Direct Transmission 3 18 Canceling Memory Transmission 3 18 Chain Dial 4 18 Assigning Chain Dial 4 18 Checking Details of Assigned Keys 4 19 Clearing Assigned Keys 4 20 Dialing with Chain Dial 4 21 Communication Management Reports 5 53 Printing FAX RX Reports 5 53 Printing FAX TX Reports 5 53 Continuous Scanning 3 16 D Date Time Setting 2 7 Deleting a Job in Memor...

Page 194: ...56 Job Status 5 46 FAX RX Log 5 51 FAX TX Log 5 50 Print Job Log 5 49 Print Job Status 5 47 Scheduled Job Status 5 48 Send Job Log 5 49 Send Job Status 5 47 Store Job Log 5 50 Store Job Status 5 48 L Line Type Setting 2 3 M Manual Fax Reception 4 14 7 14 Manual Fax Transmission 4 13 Memory Indicator 8 2 Memory transmission mode 3 4 Menu Flowcharts 9 3 N Network Fax 6 1 Connection 6 3 Initial FAX S...

Page 195: ... 10 Remote Diagnosis 7 21 Remote Diagnosis ID 7 22 Remote Switching 5 5 Changing the Remote Switching Number 5 5 Receiving Faxes Remotely 5 5 S Scan Resolution Mode 3 6 Select the Original Size 3 13 Select the Size for Fax 3 14 Sending Documents 3 4 Setting the communication speed 3 10 Specifications 9 2 Standby Transmission 4 3 Subaddress Communications 5 11 Passwords 5 11 Subaddresses 5 11 Subad...

Page 196: ...Index 4 OPERATION GUIDE W Warning and Maintenance Messages 8 3 Z Zoom Transmission 3 15 ...

Page 197: ...MEMO ...

Page 198: ...MEMO E1 ...

Page 199: ......

Page 200: ...Network FAX Operation Guide ...

Page 201: ......

Page 202: ...of Microsoft Corporation Ethernet is a registered trademark of Xerox Corporation IBM and IBM PC AT are trademarks of International Business Machines Corporation Adobe and Acrobat are registered trademarks of Adobe Systems Incorporated All other company and product names contained in this Operation Guide are trademarks or registered trademarks of their respective companies The designations and will...

Page 203: ...is fax machine fax documents that you have prepared using the software applications on your computer The Network FAX driver must be installed in all computers that will be used to send fax documents Outline of the Network FAX Transmission Function 1 Documents are sent as image data from a network computer over the LAN network to this fax machine 2 Those documents are sent over the telephone line a...

Page 204: ...nstalling the Network FAX Driver 1 1 2 Sending a Fax Main Transmission Functions 2 2 Basic Transmission 2 5 Accessing the Printing Preferences Dialogue Box 2 7 FAX Setting Tab 2 8 Default Setting Dialogue Box 2 9 Various Settings in the Transmit Settings Dialogue Box 2 13 Transmission Control 2 19 3 Specifications Operating Environment 3 1 Network FAX Transmission 3 1 ...

Page 205: ...iv ...

Page 206: ... CD ROM drive of the computer in which to install the Network FAX Driver The set up screen will appear automatically NOTE If the set up screen does not appear start the appropriate software manually from the CD ROM 2 Read the Notice and then click on the button 3 Click on Install Software 4 Click on the Next button ...

Page 207: ...ng Software 1 2 5 Select Custom Mode and click on the Next button 6 Select Network Port and click on the Next button 7 Select Fax Driver and click on the Next button 8 Click on the Finish button 9 Click on the on the Next button ...

Page 208: ...ton and select Port Set Up Port from the Type drop down menu Click on the Next button 12 Click on the Network FAX radio button and click on the Next button 13 Enter the IP address or host name of the fax in the IP address or Host name field click on the Next button and proceed to step 15 If you do not know that information click on the Search button and proceed to the next step ...

Page 209: ...talling the Corresponding Software 1 4 14 Select your fax and click on the OK button 15 Click on the Next button 16 Follow the instructions in the installation wizard to continue the installation procedure ...

Page 210: ... the Task Bar and then select Control Panel Select Printers and Other Hardware and then Printers and Faxes in that order from the successive menus to access the Printers and Faxes dialogue box 2 Right click on the name for this fax normally XXXX NW FAX and then select Delete in the resulting menu 3 Click on Yes when the confirmation dialogue box appears and the driver will be deleted ...

Page 211: ...Installing the Corresponding Software 1 6 ...

Page 212: ...k computer directly from that computer to the other fax machine by using the Network FAX Driver IMPORTANT The Network FAX Driver must be installed on the computer from which you want to send the documents Refer to Installing the Network FAX Driver on page 1 1 for the procedure to install the software ...

Page 213: ...s This function enables you to send documents to an Sub address Box that is registered in a destination fax machine Because Sub address Boxes include a sub address and password highly confidential communication is ensured It will be necessary for you to enter the corresponding sub address and password of the destination Sub address Box if they have been designated for that box whenever you perform...

Page 214: ...r Page see page 2 10 for setting procedures This function enables you to add a cover page to your transmission that includes such TTI Transmitting Terminal Information data as your company name department name your own name your telephone or fax number in addition to whatever comment you d like to send The type of cover page you use can be selected from among several different templates ...

Page 215: ... the Account ID registered in the transmitting computer matches that registered in the fax If User Login is turned ON in the fax machine it is necessary to register your User ID and Password in the Network FAX driver settings and you will only be able to perform Network FAX Transmission if the User ID and Password registered in the transmitting computer match those registered in the fax Account ID...

Page 216: ...plication that you are using will appear NOTE The following screen shot is just an example and the actual dialogue box displayed on your computer may differ depending to the application that you are using 4 Enter the page numbers etc to be faxed NOTE Confirm that the number of copies is 1 5 Click on the Properties button in order to access the Properties window 6 Specify all of the desired setting...

Page 217: ...red 0 9 and a space a hyphen or space can NOT be entered as the first character 9 If you are using a cover page refer to 3 Registering the Destination Information to be Added to the Cover Page on page 2 15 10 Click on the Add to Destination List button The entered destination information will be displayed under the Destination List area To send the same documents to more than one destination repea...

Page 218: ...s to access the Printers and Faxes dialogue box 2 Right click on the name of the machine to be used as the Network FAX and select Printing Preferences from the resulting drop down menu The Printing Preferences dialogue box will appear NOTE To open the Properties dialogue box under Windows 98 and so on click on Start in the Windows Task Bar and then select Settings and Printers Right click on the n...

Page 219: ...plication will be changed to the size selected here for transmission purposes 2 Orientation radio buttons Be sure that the radio button for the desired orientation either Portrait or Landscape is selected 3 Resolution field Select the resolution quality of the original being transmitted from the drop down list in this field Available settings Normal Fine Ultra fine 4 FAX TX Setting button Click th...

Page 220: ...he Task Bar select Settings and then Printers in that order from the successive menus to access the Printers dialogue box Right click on the name of the machine to be used as the network fax and select Properties from the resulting drop down menu Then click on the Fax TX Settings button in the Properties window 1 Sending Options Tab 1 FAX Delayed Transmit checkbox Check the checkbox in order to ac...

Page 221: ...box Check the checkbox when you want to print out the documents at the fax machine same time as you send them by fax 2 Cover Page Tab 1 Attach Cover Page checkbox Check the checkbox when you want to add a cover page to your transmission Perform the following procedure to select the settings for the cover page 1 Select the desired template for the cover page from the Cover Page Templates drop down ...

Page 222: ...3 To add your message to the cover page click on the Edit Message button The Edit message dialogue box will be displayed Enter the message to be displayed on the cover page and click on the OK button The message can be up to 1000 characters long 3 Authentication Tab 1 User Login checkbox If User Login is turned ON in the fax machine check this checkbox and then select either the Use Specific User ...

Page 223: ...your own information into fields 1 5 explained below to send a cover page with your faxes 1 Company Your company name can be up to 64 characters long 2 Department Your department name can be up to 64 characters long 3 Name user name etc Your name can be up to 32 characters long 4 Telephone Number Your telephone number can be up to 20 characters long Available characters 0 9 and a blank space 5 FAX...

Page 224: ...stination it is necessary for that destination information to have been registered in the Address Book in advance Refer to the operation Guide for the Fax Kit 1 Click on the Select from Address Book button to access the Address Selection dialogue box 2 Select the desired Address Book To select the Address Book that is stored in the fax machine select Address Book XXXX model name from the drop down...

Page 225: ... for that destination will be displayed in the field below the list If you select a group the registered members of that group will be displayed in that field When you click on the Add button if multiple fax numbers are registered for any member of the group a window will appear enabling you to select the desired number s To delete any of the destinations from the Destination List select that dest...

Page 226: ...tered 0 9 and a space a space can NOT be entered as the first character 3 Click on the OK button The Transmit Settings dialogue box will be displayed once again 3 Registering the Destination Information to be Added to the Cover Page The type of cover page can be selected from among different templates Destination information such as that shown below can be added on the cover page Sample of English...

Page 227: ...long 2 Department The name of the destination department can be up to 64 characters long 3 Recipient The name of the person to whom you are sending the fax can be up to 32 characters long 3 Click on the OK button The display will return to the Transmit Settings dialogue box 4 Click on the Add to Destination List to add the entered information to the destination list 5 If the sender information is ...

Page 228: ...age checkbox Verify that the checkbox is checked 2 Cover Page Templates selection box To change the template select a new template 3 Edit Message button Click on this button to change the message on the cover page The message can be up to 1000 characters long 4 Preview button Click on this button to display the contents of the newly selected template on the Preview of Cover Page 4 Optional Setting...

Page 229: ...t Setting dialogue box once that transmission is completed 2 Refer to 1 Sending Options Tab on page 2 9 for more detailed information on the corresponding settings in that tab 3 To start the fax transmission click on the Send button To continue the settings for other tabs click on another tab 5 Transmitting Terminal Information Data 1 To temporarily change the settings the present settings will be...

Page 230: ...ter to verify the status of a fax transmission currently being processed or to actually terminate that transmission 1 Once a fax transmission starts being processed a Transmission Control icon will be displayed in the Windows Task Bar 2 Double click on that icon to access the Transmission Control window which indicates the status of all transmissions being processed 3 To terminate any transmission...

Page 231: ...Sending a Fax 2 20 ...

Page 232: ...FAX Delayed Transmit Based on settings in the Network FAX Driver setting is possible to any 1 minute increment within the subsequent 24 hour period Transmit and Print Fax transmission and print out at the fax machine is available Broadcast Transmission Up to 100 destinations Job Accounting Requires the input of an Account ID in the Network FAX driver when Job Accounting is turned ON in the fax mac...

Page 233: ...Revision 1 0 2005 3 ...

Page 234: ...UTAX GmbH Ohechaussee 235 22848 Norderstedt Germany ...

Reviews: