


2
Quick Installation
Follow these steps to quickly install your new adapter:
NOTE:
Do not plug the adapter into the system before the driver is finished installing.
1. Insert the driver/manual CD and follow the instructions
2. Please press ‘
Continue Anyway
’ when Windows requests
3. Make sure to restart the computer as instructed
4. Turn on your second monitor and connect it to the adapter
5. Plug the adapter into an available
USB 2.0 port
6. When the new hardware wizard appears, follow the instructions
7. Please press ‘
Continue Anyway
’ when Windows requests
8. After complete, you should see the extended display on the second monitor
See
Frequently Asked Questions
and
Troubleshooting Tips
for additional help.
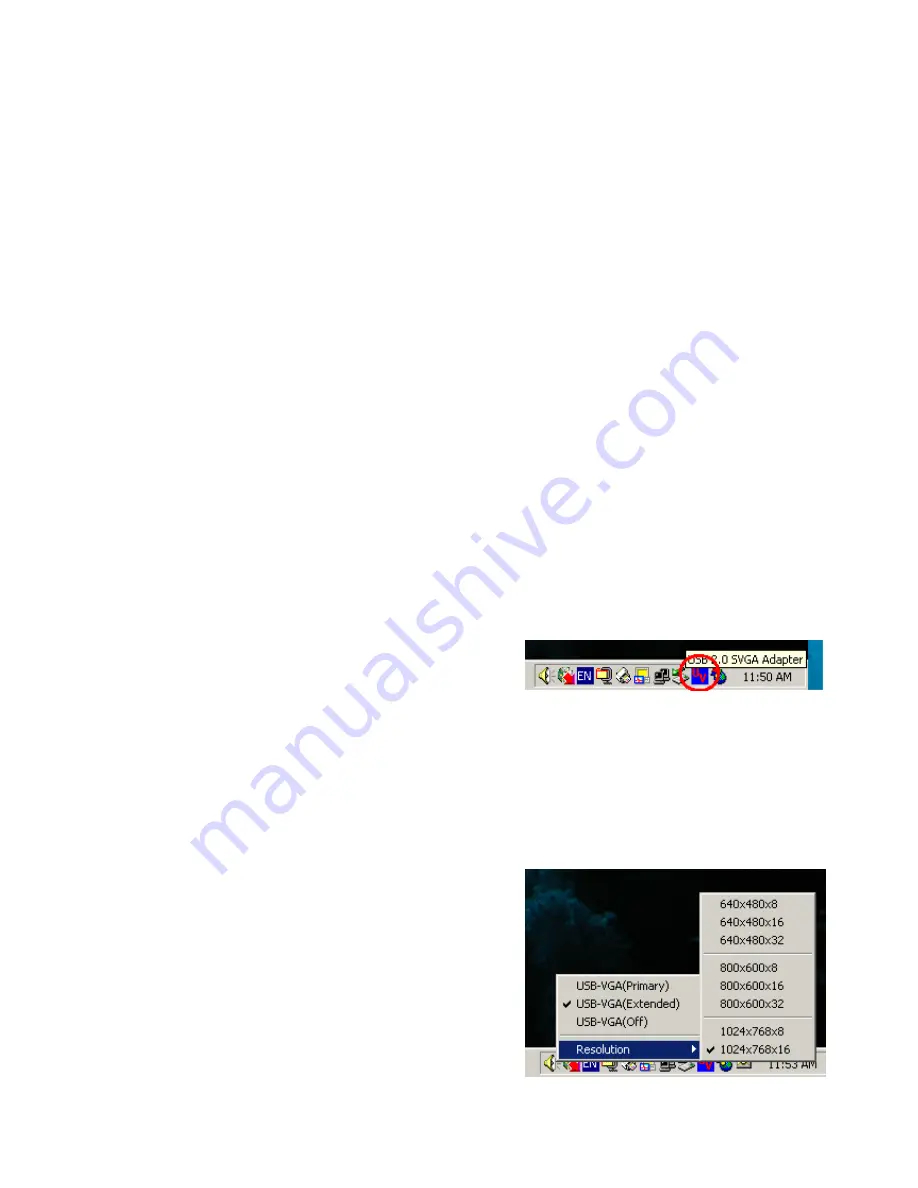
Display Utility
After the driver is installed, a utility will appear in the lower right taskbar (next to clock). This
utility allows you to quickly change the settings and
resolution for your USB 2.0 SVGA Adapter. Access
the menu by right clicking on the icon.
USB-VGA (Primary)
Make the
USB 2.0 SVGA Adapter
the main display adapter in the system. The system’s
main display adapter (and monitor) will automatically switch to being the secondary display
adapter and act as the extended desktop.
Note:
Some display utilities and drivers that ship
with AGP and built-in display adapters will prevent this option from working on some
systems. You can disable the other utility (usually
found in the same toolbar located on the bottom right
hand corner) to make this function work properly.
USB-VGA (Extended)
By default, your USB 2.0 SVGA Adapter will extend
your Windows desktop. Use this to add additional
space on your Windows desktop to keep
applications in view while you work. Gaming and


