background image

10

R100 Installing

Setup and Using the R100

The R100 Remote’s Home Menu pages have buttons that allow you

to navigate menus to perform setup of HomeSet and the R100 

Remote. While this section goes into the Professional Installer’s

setup, many of the same buttons are used for daily operation.

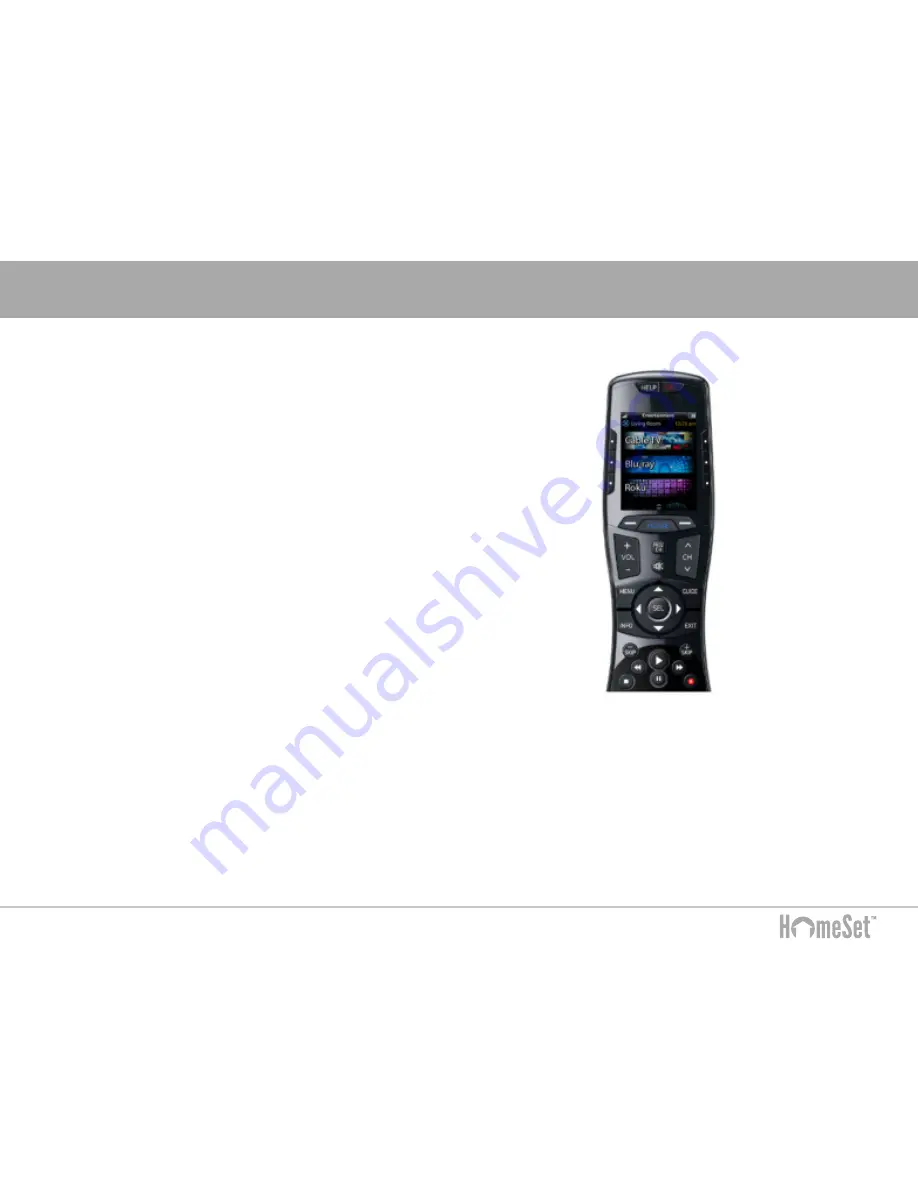
The Home Menu pages display activities and devices in the 

system. Press the 

Home

page button to view activities and devices.

Navigate the home page by using the 

Up

and 

Down

navigation

buttons. Press any button adjacent to the screen to select an 

activity or device. Press 

Home

to return to that page and to select 

a new device or activity.

The Volume and Mute
buttons are always 
available regardless 
of what screen is 
displayed.

The Home button
always displays the
Home menu pages.

The Up and Down
buttons are used to
navigate through a
menu screen.

Summary of Contents for R100

Page 1: ...www UniversalRemote com U n i v e r s a l R e m o t e C o n t r o l I n c R100 REMOTE CONTROL Owner s Manual ...

Page 2: ...techsupport universalremote com HomeSet URC 500 Mamaroneck Ave Harrison NY 10528 Toll Free 800 901 0800 Main 914 835 4484 Contents Introduction 4 R100 Remote Control 5 Features and Benefits 6 What s Included in Box 7 Getting Started 8 Connecting to the Home Network 8 Programming via HomeSet Webpage 8 Installing 9 Lithium Polymer Battery 9 Micro USB Charger 9 Communication Via Wi Fi 9 Setup Using R...

Page 3: ...re trademarks of their respective companies or owners Safety Precautions For your safety do not attempt to disassemble the R100 Remote Control There are no user serviceable parts inside Use only the micro USB charger and rechargeable lithium polymer battery supplied with the unit or proper replacement batteries Do not expose for extended periods of time to excessive heat moisture or direct sunligh...

Page 4: ...io video and home entertainment devices such as lights thermostats security systems and more to make life more enjoyable The R100 is a wireless remote that is installed as part of a HomeSet system by your smart home professional The R100 is a Wi Fi based Remote and does not use line of sight infrared IR or low frequency RF It s the perfect accessory companion for your TV room or bedroom ...

Page 5: ...hat in addition to data being sent to an electronic component such as a Nest Thermostat data is also returned to your remote so you can see graphical information of current status including the current temperature in the home and more Adding the HomeSet Mobile App for Android and iOS devices provides the same two way feature ...

Page 6: ...ie with one press Two way metadata feedback Experience two way feedback on your R100 s Remote screen when used with compatible home devices such as entertainment lights and more Two way control of Nest is available on the R100 Remote and via HomeSet s mobile apps Enjoy the same feedback when used in conjunction with a regularly expanding line of products made by other manufacturers Pick up sensor ...

Page 7: ...7 R100 Introduction What s Included in the Box 1 R100 Remote Control 2 AC Power Adapter 3 Rechargeable Lithium Polymer Battery 1 2 3 ...

Page 8: ... or computers work Used in conjunction with a HomeSet C100 Base Station the R100 can also control your home s A V devices By using a local wireless network connection the R100 can control your system without being in line of sight of the equipment by sending commands over your home network Programmable via a web page interface by an authorized programmer To fully automate your home entertainment c...

Page 9: ...A battery is included in the box Place the battery into the battery compartment making sure to align the contacts on the battery to the contacts on the R100 The battery snaps into place when aligned properly Replace the cover Using the Micro USB Charger Plug the micro USB charger into a power outlet and into the bottom of the R100 Remote There is no harm in leaving the R100 plugged in and charging...

Page 10: ...ay activities and devices in the system Press the Home page button to view activities and devices Navigate the home page by using the Up and Down navigation buttons Press any button adjacent to the screen to select an activity or device Press Home to return to that page and to select a new device or activity The Volume and Mute buttons are always available regardless of what screen is displayed Th...

Page 11: ...o select press the button on the side of the LCD screen or the Select button when a line item is highlighted To go back a step or to get out of the Settings menu press the Home button Shown below is the expanded view of R100 Settings Menu showing all available Setup Menu options Note Not all options on this image are available on the screen at once Up and Down navigation buttons reveal the entire ...

Page 12: ...uired C100 Control Hub Base Station Setup After connecting the HomeSet C100 Control Hub to the local network select the Base Station see below setup item which results in display of the available C100 Hubs within the home C100 Hubs Base Stations are identified by their MAC Address which is displayed on a sticker on the hub Selecting a C100 Hub results in the display of a screen that allows the vie...

Page 13: ...re If this is included in the system there is a user accessory account setup that will be performed by your Installer as shown here Accessory Account info item allows the entry of an TRF ZW Z Wave account username and password The R100 provides a two way interface to these devices over the local wireless Ethernet network as seen below left Contact your dealer or installer to acquire Z Wave smart h...

Page 14: ... be set independently based on whether the remote is using battery power or connected to the Micro USB Charger Selecting an item on this screen allows for the setting of each Sleep Timer value Once the Sleep Timers are adjusted press the Save button Pressing the Go Back button reverts to the remote control s last saved setting ...

Page 15: ...ness level Once the brightness is adjusted press the Save button Pressing the Go Back button re verts to the remote s last saved settings Note The higher the brightness the faster the battery depletes System Information The System information screen displays data about your R100 s Operating System and Memory along with other information Press More button to view further system information Pressing...

Page 16: ...ncrease decrease button light level Once the LCD screen button light is adjusted press Save Pressing the Go Back button reverts the remote s last saved setting Power You can display the remaining battery level by selecting Power You can also adjust when the Low Battery warning screen appears Once power is adjusted press Save Pressing Go Back reverts to the remote s last saved setting ...

Page 17: ...ease decrease button volume level Once sound is adjusted press Save Pressing Go Back reverts to the remote s last saved setting Pickup You can set the R100 to turn on when the remote is picked up Simply select Low Med or High Turn ON or Off After Pickup has been adjusted the System Menu is displayed again ...

Page 18: ...ks for a firmware update for the R100 Remote and C100 Hub if necessary If a firmware update is available the below screen is displayed Selecting Yes starts the firmware update process Selecting No results in display of the R100 System Menu If a firmware update is not available the screen below displays ...

Page 19: ...s the memory of the HS R100 to factory settings All programming will be lost Selecting Yes sets the R100 to factory default Selecting No returns the R100 to the Setup Menu screen Exit When you ve finished adjusting Settings simply press Exit to re turn to normal operation ...

Page 20: ...ranty www HomeSetHome com limited warranty statement This Limited Warranty is valid only in the United States of America Any URC HomeSet equipment that is purchased from an unauthorized source will not be eligible for a tech support or support of any kind from URC HomeSet and b any warranty by URC HomeSet ...

Page 21: ...W x 1 19 D Battery Warranty 90 Days Weight with battery loaded 5 6 oz Updating HomeSet features and hardware may be updated from time to time Manual HomeSet software and or hardware updates should only be performed by your authorized HomeSet installer programmer Features may vary between customized software and URC software releases To find out more please contact your custom installation professi...

Page 22: ...ructions may cause harmful interference to radio communications However there is no guarantee that interference will not occur in a particular installation If this equipment does cause harmful interference to radio or television reception which can be determined by turning the equipment off and on the user is encouraged to try to correct the interference by one more of the following measures Reori...

Page 23: ...this device may not cause harmful interference and 2 this device must accept any interference received including interference that may cause undesired operation Any changes or modifications not expressly approved by the party responsible for compliance could void the authority to operate equipment The antenna s used for this transmitter must not be co located or operating in conjunction with any o...

Page 24: ... Company Name Email Contact Info HomeSet R100 Serial Number Date of Installation Programming Completion This Area Intentionally Left Blank for Notes 500 Mamaroneck Avenue Harrison NY 10528 Toll Free 800 901 0800 Main 914 835 4484 www HomeSetHome com Manual v 1 0 2016 Universal Remote Inc ...

Reviews: