


© UPLIFT Desk
• 800-349-3839 • [email protected] • upliftdesk.com
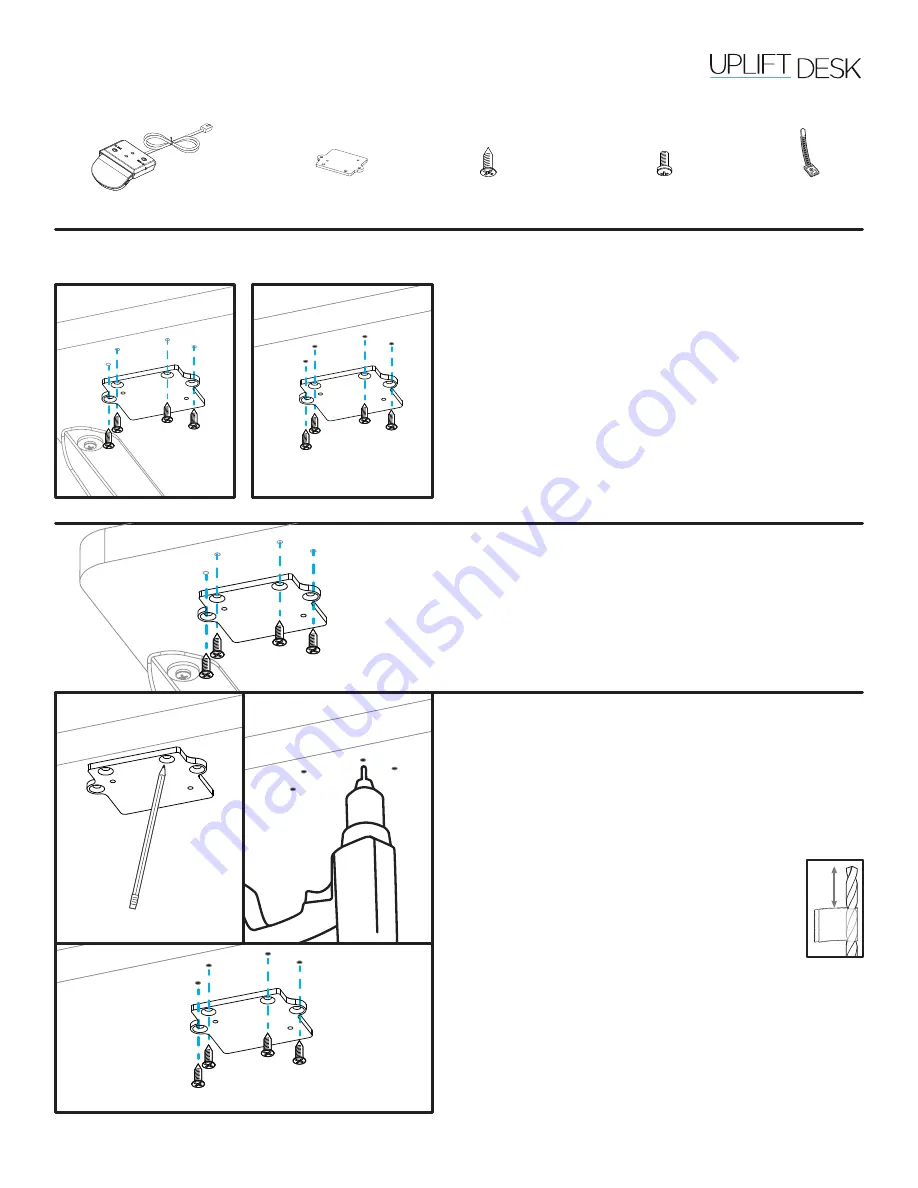
Step 3 (Installation Without Using Pre-drilled Holes)
A. If you do not have an UPLIFT Desktop with pre-
drilled holes or choose to place the Keypad in a
different location, hold the Mounting Plate where
you would like to attach it.
B. Make a pencil mark on the desktop in the center of
each mounting hole.
C. Next drill a pilot hole at each pencil
mark using a 1/8” (or 3mm) diameter bit.
Note: DRILL NO DEEPER THAN 1/2”.
To ensure this, we recommend wrapping
a piece of tape around your drill bit 1/2”
from the tip. Stop drilling just before the
tape touches the desktop.
D. Attach the Mounting Plate to the desktop using
the #10x5/8” Wood Screws. Do not over tighten
to avoid stripping.
Package Contents
Advanced Paddle
Keypad
M4x10mm Machine Screws
(qty 2)
Cable Mount
(qty 3)
#10x5/8” Wood Screws
(qty 4)
Mounting Plate
Advanced Paddle Keypad
FRM055
Step 1
Determine your mounting method. There are two
ways to attach the Keypad to your desktop:
Install Using Pre-drilled Holes:
If you would like to
attach the Keypad to your UPLIFT Desk using the
pre-drilled holes on the front, left or right side, follow
the “Installation Using Pre-drilled Holes” instructions
(Step 2).
Install Without Using Pre-drilled Holes:
If you do
not have an UPLIFT Desktop with pre-drilled holes or
choose to place the Keypad in a different location, fol-
low the “Installation Without Using Pre-drilled Holes”
instructions (Step 3).
Using
Pre-drilled Holes
Without Using
Pre-drilled Holes
Step 2 (Installation Using Pre-drilled Holes)
A. Line up the Mounting Plate with all four pre-drilled
holes and attach it with four #10x5/8’’ Wood
Screws.
B. Do not over tighten to avoid stripping.
C. Skip Step 3 and proceed with Step 4.
1/2’’