Unisight Digital Technologies
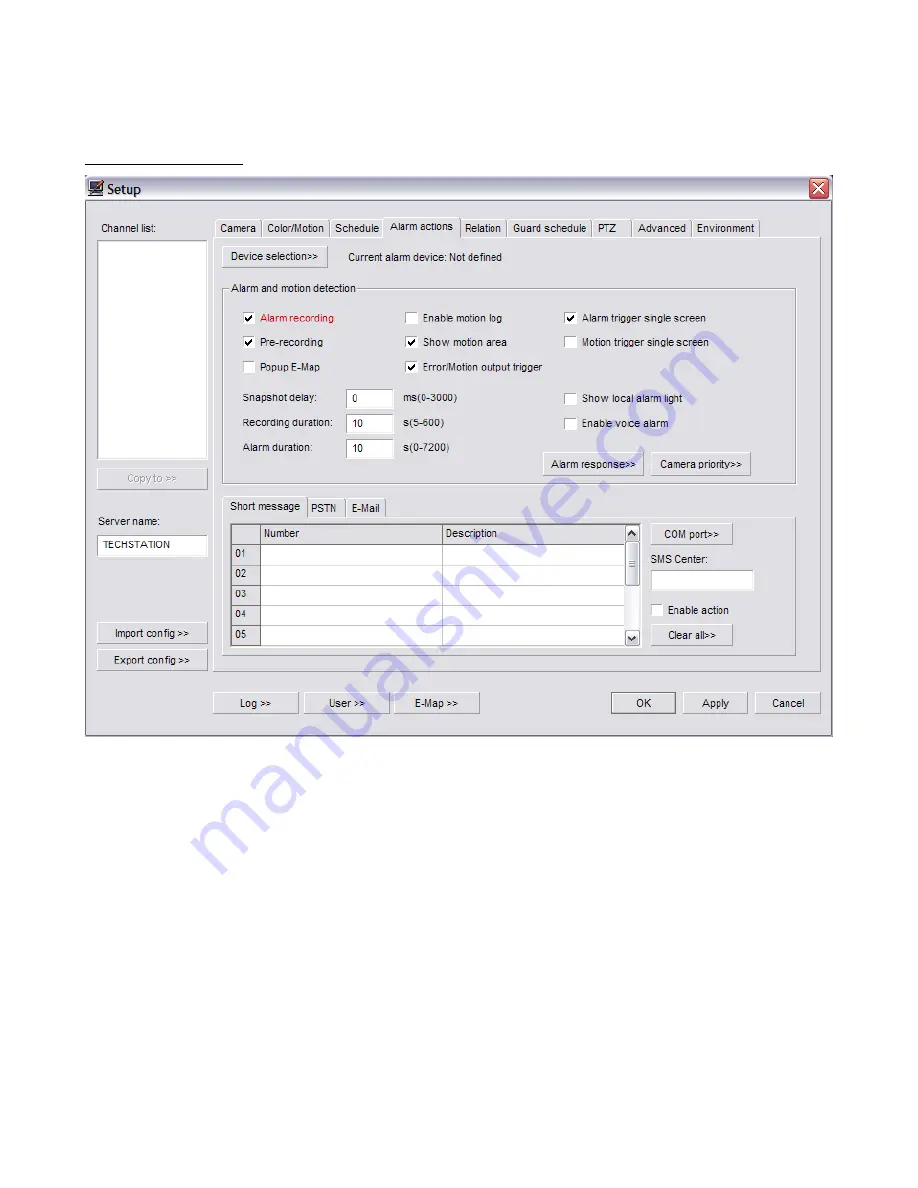
Alarm Actions Tab
(Fig. 2-7)
The
Device Selection
button will bring up the Device Select dialog box. (Fig. 2-8)
Select your supported alarm relay controller from the Type drop down box. To configure the
communication settings for your alarm relay controller select the
COM Port
button, which will
bring up the Communication Port dialog box. (Fig. 2-9) Set the correct device settings, refer
to the manufacturer's specifications, using the associated drop down boxes. The Camera
Priority button will open the Camera Action Priority dialog box. (Fig. 2-10) Here you can raise
or lower the priority of individual channels. When either the Alarm Trigger Single Screen or
Motion Trigger Single Screen feature is enabled, the channel with the highest priority will
remain visible. This feature brings the alarm condition to your attention and will not change
without user input, either by double-clicking the single screen or by selecting one of the Grid
Layout buttons. The Popup E-Map check box enables the automatic showing of the E-Map
when an alarm condition is detected. The Pre-recording check box, when enabled, will record
10-20 seconds of video before the alarm condition happened. This will help aid in
determining what events led up to the alarm condition.
16


