background image

SpidoCook

English

9

SpidoTouch digital control operation

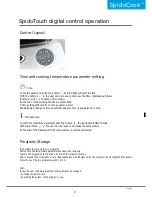
Control Layout:

Time and cooking temperature parameter setting


Time 

To set the parameter push the button 

, and led light will start to blink.

With the buttons 

 the user can increase or decrease the time, indicates as follows

(Example: 2.35 = 2 minutes e 35 seconds). 
At the end of leds blinking the time is memorized.
A time setting different from zero equals to a strat. 
Equivalently a change of time parameter equal to zero is equivalent to a stop. 

Temperature 

To set the temperature parameter push the button  

, the led light will start to blink. 

With the buttons 

 the user can increase or decrease the temperature. 

At the end of the flashing LED the temperature is considered stored. 

Programs Storage

It is possible to store up to two programs. 
Set the time and temperature parameters as describe previously. 
To store the program hold the button P1 and P2 for at least 3 seconds.  
After 3 second the confirmation of recording takes place with the light on for one second of the LED light and the buzzer. 
To start one of the two programs push P1 or P2. 

N.B.:

In case the user start a program the cooking time can be stopped:
- by taking the time to zero, 
- by pushing the button  of the program in use.

Summary of Contents for SpidoCook

Page 1: ...English Italiano Manuale d istruzione Instruction manual ENGLISH ITALIANO ...

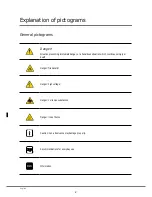
Page 2: ...ous situation which could cause injury or death Danger fire hazard Danger high voltage Danger corrosive substances Danger risk of burns Caution non observance may damage property Recommendations for everyday use Information Explanation of pictograms General pictograms ...

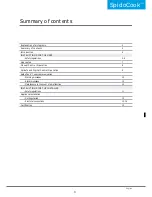
Page 3: ...ations 5 6 Guarantee 7 Manual Control Operation 8 SpidoTouch Digital Control Operation 9 SpidoCook user communication Warning messages 10 Alarm messages 10 Maintenance in the event of a malfunction 10 INSTRUCTIONS FOR THE INSTALLER Safety regulations 11 Appliance installation Getting started 12 Electrical connections 13 14 Certification 15 3 ...

Page 4: ...ong lasting partnership As you are aware the SpidoCook range of grills and fry tops are equipped with the SHB system for contact and infrared cooking and a ultra rapid and uniform heating hobs The contact grills and fry top of the SpidoCook by UNOX are available in the manual and digital version with the innovative cotrol SpidoTouch UNOX S p A Introduction Dealer Installer Installation date ...

Page 5: ...and therefore constitute a fire The equipment should not be used by individuals including children with reduced physical mental and sensory capacities or by inexperienced or untrained persons unless they have been given guidance on how to use the product correctly and are supervised by someone who is responsible for their safety Children should not be allowed to play with the equipment Pay high at...

Page 6: ...with the grill Use the scraper with caution and make sure the blade contact the plates very good Do not use the edge of the scraperas this may cause scratches on the plate that would compromise the overall appearance and cleanability Substitute the blade of the scraper whenever when it is no longer perfectly sharp After using the scraper cover the blade with the special protection and do not leave...

Page 7: ...ocedures not specified by Unox and by environmental factors e g the use of dirty and aggressive water bad quality gas or unsuitable voltage levels are not covered The warranty does not cover any damage resulting from the application of excess voltage or from tampering by unauthorized or unskilled individuals Warranty rights will also be diminished in the event of damage or malfunctioning resulting...

Page 8: ...er switch Activates the unit Button located outside contact grill off Button located inside contact grill on For Fry Top models For the Fry Top model the power switch is integrated in the temperature knob and it is activated by turning the knob clockwise moving the screen printed index from zero to off it is deactivated taking the index to zero Power light Indicates the successful activation of th...

Page 9: ... the temperature parameter push the button the led light will start to blink With the buttons the user can increase or decrease the temperature At the end of the flashing LED the temperature is considered stored Programs Storage It is possible to store up to two programs Set the time and temperature parameters as describe previously To store the program hold the button P1 and P2 for at least 3 sec...

Page 10: ...rol board setting error The appliance keeps on working with some limitations due to the setting involved on the error Contact the Customer Assistance Service Allarm messages When a condition arises which prevents the appliance from operating at all an ALARM signal is displayed and the appliance must be switched to its STOP status The device stops operating and the ALARM message appears on the oven...

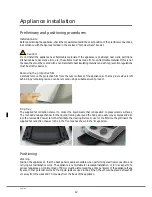
Page 11: ...ation instructions carefully before installing the appliance This appliance may only be used to grill and cook food in industrial kitchens Any other application does not conform to the specified use and is therefore considered hazardous Instructions for appliance transportation Make sure that the appliance is not in danger of tipping over during transportation Take the weight of the appliance into...

Page 12: ... a suitable solvent product Drip tray The supplied fat collection drawer to collect the liquid waste that is deposited on glass ceramic surfaces The rounded drainage channel for the liquids flowing all around the hobs can easily convey liquids and dirt into the removable drawer to further facilitate the clearing Before to use for the fist time the grill insert the supplied fat collection drawer in...

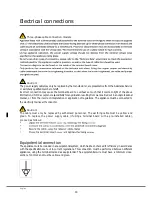
Page 13: ... the above information UNOX accepts no responsibility for any situation resulting from work carried out in an unprofessional manner or from the incorrect intepretation or application of regulations Caution Before connecting the grill or fry top SpidoCook by UNOX to the electricity mains compare the power supply data with the appliance requirements specified on its rating plate If the voltages and ...

Page 14: ...ppliance must be connected to the electricity mains earth conductor Caution The cable must only be replaced by authorised personnel The earthing cable must be yellow and green To replace the power supply cable if using a terminal board with a pre installed cable proceed as follows Equipotential connection The appliance must be included in an equipotential system which has been checked for efficien...

Page 15: ...this manual refers to the following directives Low Voltage directive 2006 95 EC in accordance with standards EN 60335 2 38 2003 A1 2008 used in conjunction with EN 60335 1 2002 A11 2004 A1 2004 A12 2006 A2 2006 A13 2008 EN 62233 2008 Electromagnetic Compatibility directive 2004 108 EC in accordance with standards EN 55014 1 2006 EN 55014 2 1997 A1 2001 EN 61000 3 2 2006 EN 61000 3 3 1995 A1 2001 A...

Reviews: