background image


Warranty 


The 

UNIVEX

 100

M

 Slicer carries a 

one-year, on-site parts and labor warranty 

against any defects in materials or 

workmanship. The one-year period begins 

on the date of purchase by the end user and 

remains in full effect provided the unit is used 

properly in accordance with our instructions. 

Any work to be performed under this warranty 

must be performed between the hours of 

8:00 a.m. and 5:00 p.m. local time, Monday 

through Friday. 

UNIVEX

 will not cover 

overtime charges of any kind. Please call 

the 

UNIVEX

 Warranty Service Department 

at 800-258-6358 to report warranty claims 

before arranging repair or attempting to return

the unit to 

UNIVEX.


Damages incurred in transit or incurred because 

of installation error, accident, alteration or 

misuse are not covered. Transit damages should 

be reported to the carrier immediately. 


UNIVEX


will not be liable for any 

consequential, compensatory, incidental or 

special damages. 


3 Old Rockingham Road, Salem, NH 03079-2140  Telephone  1-603-893-6191   Fax 1-603-893-1249


TOLL FREE ORDERING FAX 1-800-356-5614


27

Summary of Contents for 1000M

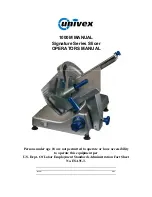
Page 1: ...re Series Slicer OPERATORS MANUAL Persons under age 18 are not permitted to operate or have accessibility to operate this equipment per U S Dept Of Labor Employment Standards Administration Fact Sheet No ESA91 3 1000M ED 2 ...

Page 2: ...L THAT WILL BE INVOLVED WITH YOUR NEW UNIVEX SLICER MUST READ AND UNDERSTAND THESE INSTRUCTIONS BEFORE ATTEMPTING TO OPERATE THIS UNIT WE APPRECIATE YOUR COOPERATION AND YOUR BUSINESS SHOULD THERE BE A QUESTION OR IF WE CAN BE OF FURTHER ASSISTANCE PLEASE CALL US 800 258 6358 2 ...

Page 3: ...gs 5 6 Operating Instructions 6 Sharpening Instructions 7 Operator s Care of Slicer Cleaning Instructions 9 Lubrication Instructions 10 Warranty Information 11 LIST OF ILLUSTRATIONS ILLUSTRATIONS PAGE Figure 1 Overall View of Meat Slicer 4 Figure 3 Sharpener Assembly 7 Figure 4 Sharpener Positioning 8 Figure 2 Lubrication Assembly 9 3 ...

Page 4: ...e 1 1 INDICATOR LIGHT 7 CARRIAGE 2 ON OFF SWITCH 8 CARRIAGE ARM 3 FENCE 9 CARRIAGE ARM KNOB 4 LAST SLICE DEVICE 10 CARRIAGE HANDLE 5 PROTECTIVE GUARD 11 GRADUATED KNOB 6 KNIFE GUARD 12 SERIAL NAME PLATE ON REAR OPER OPERATOR S MANUAL 4 ...

Page 5: ...the height determined to suit the operator It is most important that the forearm of the operator be at the proper level for ease and safety of operation as well as for maximum production This height is considered optimum when the carriage handle Figure 1 10 of the slicer is at approximately the height of the operator s elbow when standing IMPORTANT Warning Caution Before making electrical connecti...

Page 6: ...ided which can be locked out of the way when not required Do not use this last slice device to work the carriage back and forth Use only the carriage arm handle Figure 1 10 Always make sure the carriage is positively secured to the slicer by checking to see that the carriage arm knob Figure 1 9 is fully tightened PROTECTIVE GUARD Warning The protective guard Figure 1 5 covers the knife edge comple...

Page 7: ...Tighten the knob Figure 3 1 until sharpener is secure to the fence Do not tighten too much 6 Turn slicer ON Rotate the sharpener dial downward Figure 3 5 on the right side of the sharpener assembly to position 1 and hold This will start the grinding stone rotating Run until the beveled cutting surface on the back side of the blade cleans up This can take from 15 to 30 seconds depending on how dull...

Page 8: ...ENER NEUTRAL POSITION 5 SHARPENING POSITION FIGURE 3 POSITION THE SHARPENER ASSEMBLY SO THAT THE LOCKING KNOB ASSEMBLY IS BEHIND THE FENCE SLIDE THE CARRIAGE FORWARD UNTIL THE PLASTIC BEAD SLIPS INTO THE NOTCH ON THE FENCE TIGHTEN THE KNOB TO SECURE THE SHARPENER TO THE FENCE FIGURE 4 8 ...

Page 9: ...ces should the slicer be hose rinsed 6 Remove knife guard Figure 1 6 by loosening knife guard knob Figure 3 35 Then carefully lift and remove guard by the handle Figure 3 18 7 Rotate the meat deflector Fig 3 7 by swinging away from the back of the blade Warning 8 CAREFULLY wash the front and rear of the knife with a cloth using warm water and mild soap CAREFULLY wash between the knife edge and pro...

Page 10: ...th the lubrication instructions below During this lubrication sequence be sure to check for free operation and movement of related parts as well as for excessive wear and looseness of various parts Be sure to check all handles and knobs for tightness LUBRICATION INSTRUCTIONS A Clean and apply mineral B Apply Petro Gel 4400408 often as oil weekly required to maintain light film 10 ...

Page 11: ...ed between the hours of 8 00 a m and 5 00 p m local time Monday through Friday UNIVEX will not cover overtime charges of any kind Please call the UNIVEX Warranty Service Department at 800 258 6358 to report warranty claims before arranging repair or attempting to return the unit to UNIVEX Damages incurred in transit or incurred because of installation error accident alteration or misuse are not co...

Reviews: