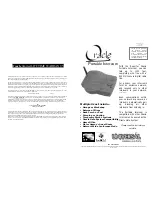


INTERCOM QUICK SETUP GUIDE
1) Remove the battery door from the bottom of each unit and place four fresh AA
Alkaline batteries in the battery pack. Use premium batteries for best
performance. Once the batteries are installed, the channel lights will begin to
flash in sequence.
2) To create an Intercom Network, stand the antennas up, then Press the LEARN
button for 1 second on each intercom. Note: all LEARN buttons must be
pressed within ten seconds of each other. The units will beep as they join the
Network. Additional Intercoms may be added to the network at any time by
pressing the LEARN button on one of the networked units and on the new unit.
3) Press and release the TALK button on an Intercom unit to verify that the
network is complete.
Using the Intercom
To talk, hold down the TALK button. All
intercom units in your network will receive
the signal. When somebody responds by
holding down the TALK button on a different
intercom unit, a secure channel is created
and other units will not hear the signal,
making your conversation secure.
Channel Selection
The default setting for the intercom is
Paging Mode, with all four Channel lights
flashing in sequence. Pressing the CHANNEL
button will set an intercom unit to one of four
secure channels. While on a channel, you can
only be heard by other units set to the same
channel or in paging mode.
Adjusting the speaker volume
Press the VOLUME button repeatedly to cycle
through the three volume levels.
Turning the intercom On or Off
An intercom may be turned off by holding
down the VOLUME button for five seconds. To
turn it back on, press any button.
Conference Mode
To put an intercom unit in Conference
mode, slide dipswitch #2 UP. This will
allow any number of units to join a
conversation, not just two.
Batteries
With average use, the batteries will last
up to one year A double beep every
ten minutes will alert you that the
batteries are getting low.
If desired, the Intercom may also be
powered by a 12-volt DC transformer
(commonly available in most department
stores). In this case, both the power and
channel lights will remain on constantly.
Oracle System Compatibility
If you receive a CALL from the Oracle
Gate System, the Portable intercom Alert
light will illuminate as it chimes. The
CHANNEL/REMOTE button will open the
gate. See the Oracle Gate System manual
for complete information.
Portable Intercom Settings
Portable Intercom units are intended to
be an add-on accessory with limited
function and can only control the Primary
Gate Controller (#1). The default setting
is ON (towards the circuit board). OFF
(open) is away from the circuit board.
−
sw1 is ON to disable Gate Status
Checking and OFF to display Gate
Status.
−
sw2 is ON for secure mode, OFF
for intercom conference mode
D
C Transformer LEARN button
Channel Select
Talk
(Power-ON,)
Volume/Sensitivity
(Power-OFF)
Radio Frequency Test Feature
When used with the Oracle PRO Gate Access Panel (GAP), you can test the quality of the
radio channel that units are transmitting on. Activate the oracle Pro units as normal and
enter the master PIN code, and then 01 on the keypad. The GAP will emit a number of
beeps as it tests the frequency, and then give a double-beep when it’s ready to report
the test results. The result will be 1-10 beeps, indicating the signal quality, with 6-10
beeps indicating an acceptable connection. To correct for unacceptable signal quality,
add repeaters, and/or move the units closer together.
Troubleshooting and Frequently Asked Questions
My intercom does nothing. What should I do?
If there are no lights illuminated, make sure four fresh AA alkaline batteries are all
installed correctly. The CHANNEL lights should flash. If you are using the optional
12-volt transformer, make sure it is plugged in. The POWER and CHANNEL lights
should be continuously on. If not, try another outlet.
If the units have power but do not communicate, they may need to form a network.
Press the LEARN button on each unit that needs to form a network and they will beep
in response. You may need to clear their memory and re-teach them (see Removing
from a Network, below).
If the units do not have the same channel light flashing, press the CHANNEL button
until both units are on the same channel or in Paging mode, with all channel lights
illuminated.
How do I Remove an Intercom from a Network?
Press and hold the Learn button, for fifteen seconds. It will beep when it has
cleared its memory and you can re-teach it to a new intercom. If an intercom signals,
while the Learn button is depressed, the procedure will have to be repeated.
Why is the intercom not getting the expected 1000 foot range?
To assure best range, make sure that the intercom unit’s antenna is VERTICAL. Cell
phones, cordless phones, or other radio devices may reduce the intercom’s range if
they are within a few feet of an intercom. Trees, metal, electrical wiring or other
electrical devices directly between units may also limit the range.
Why is there a double beep every ten minutes?
The intercom is indicating that the batteries are low and need to be replaced.
How do I use the Portable Intercom with Oracle Repeaters?
When using Oracle Repeaters to extend the range of an Oracle network, be sure to
clear the memory of the Portable Intercom by holding down the LEARN button for
15 seconds, before teaching it to the Repeater.
What kind of Wall Transformer can I use to Power my Intercom?
The Wirefree intercom is optimized for high quality AA batteries, but it may be
powered by an 9-12 volt, 500mA, DC transformer purchased separately (center-
positive polarity on the round plug) like Radio Shack’s
12V/500mA AC-to-DC Power
Adapter
.


