


6. Connecting External Devices
6.1. Control Ports
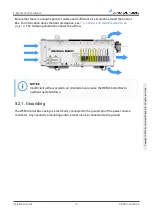
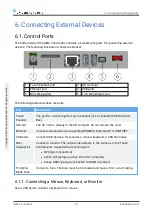
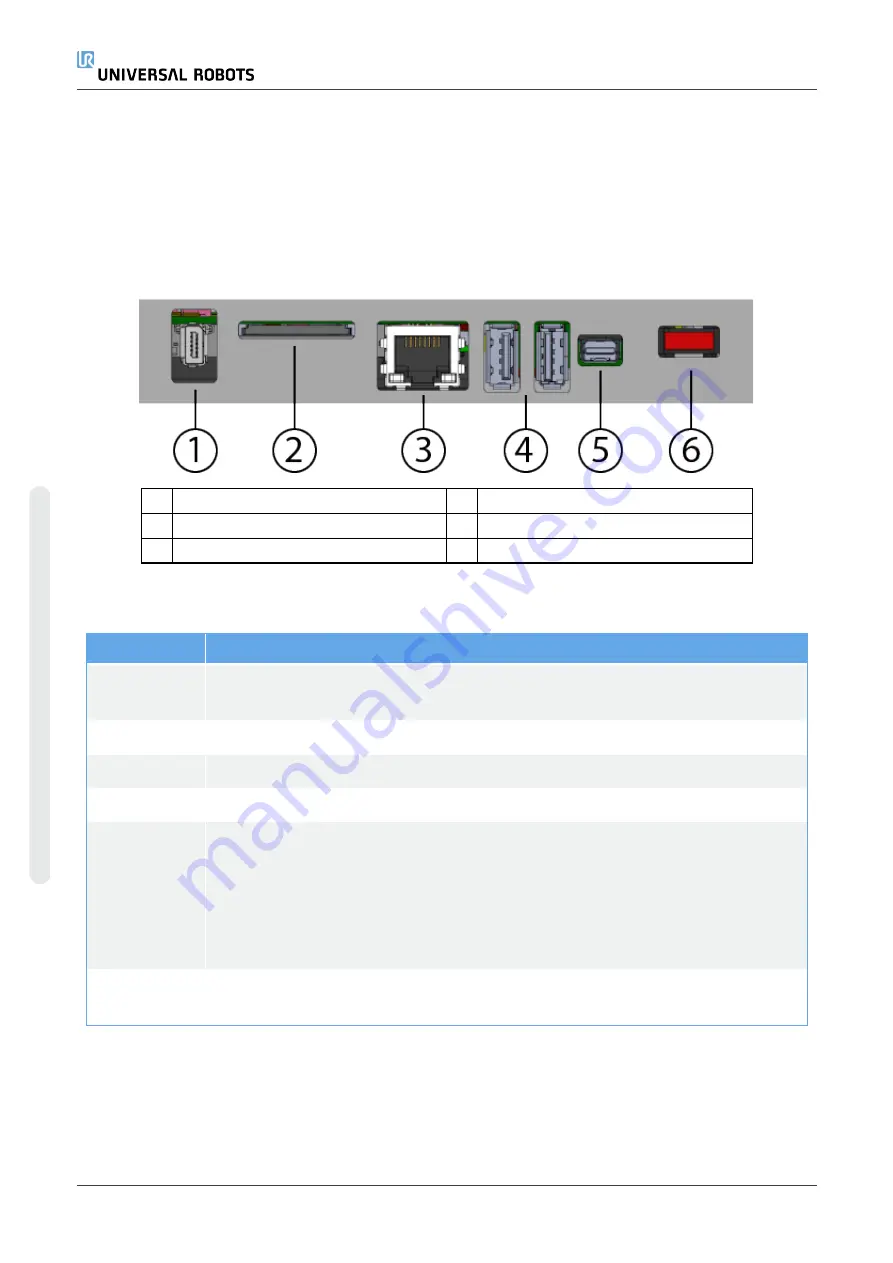
The bottom side of the OEM Control Box contains a bracket with ports for connecting external
devices. The following illustration shows the bracket.
1
Teach Pendant port
2
SD card slot
3
Ethernet port
4
USB ports
5
Mini DisplayPort
6
10 A Mini Blade Fuse
The following table describes the ports.
Port
Description
Teach
Pendant
The port for connecting the Teach Pendant (not included with OEM Control
Box).
SD card
The SD card is already in the SD card port. Do not remove the card.
Ethernet
Connect external devices supporting MODBUS, Ethernet/IP, or PROFINET.
USB ports
Connect USB devices, for example a mouse, keyboard, a USB flash drive.
Mini
DisplayPort
Connect a monitor. The output video stream is the same as in the Teach
Pendant port. Supported connection types:
l
DP (direct connection).
l
Active DVI (using an active DP to DVI converter).
l
Active HDMI (using an active DP to HDMI converter).
10 A Mini
Blade Fuse
Connect a fuse. The fuse must be UL-marked and have a 10 A current rating.
6.1.1. Connecting a Mouse, Keyboard, or Monitor
Use a USB port to connect a keyboard or a mouse.
OEM Control Box
14
Installation Guide
6. Connecting External Devices
C
o
p
yr
ig
h
t
©
2
0
1
9
b
y
U
n
iv
e
rs
a
l
R
o
b
o
ts
A
/S
.
A
ll
ri
g
h
ts
re
s
e
rv
e
d
.


