background image

24

23

AU

X Function:Pr

ogr

amming 

an 8th Component

ADV

ANCED SETUP

AUX Function: Pr

ogr
amming 

an 8th Component

ADV

ANCED SETUP

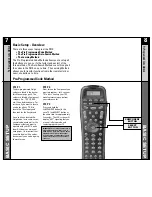
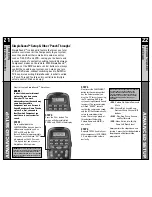
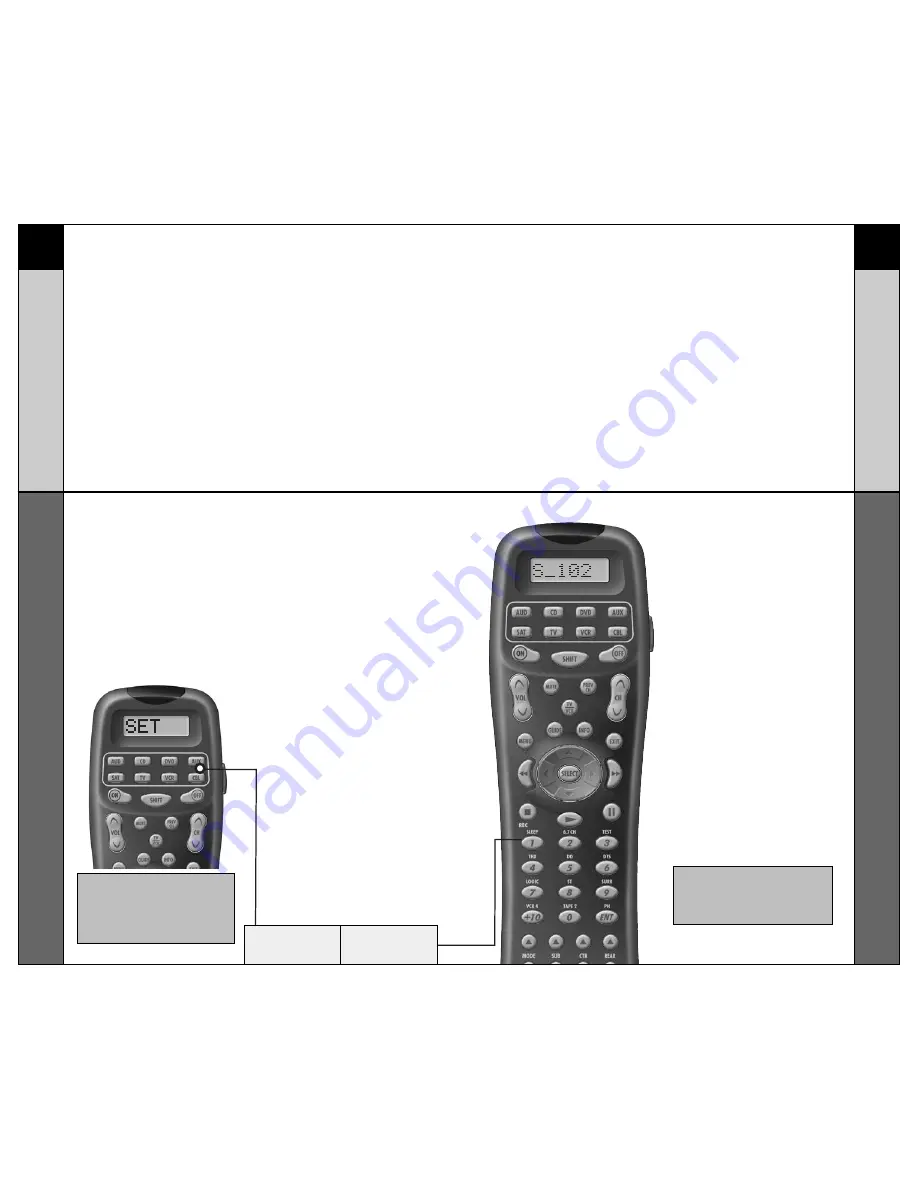
AUX Function: Programming

an 8th Component

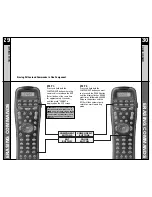
STEP 1:

Turn on the component you
wish to setup (a second TV for
example).

STEP 2:

Press and hold both the AUX
and SEL (Select) buttons at the
same time for approximately 3
seconds, until the word “SET”
displays on the LCD screen.

STEP 3:

Press the component button you
want to setup (in this case TV).

Channel buttons (for TV), or PLAY
and STOP (for VCR and DVD) to
make sure they all work. If any of
the buttons do not work properly,
you need to find a new correct
code. For example, maybe your
Sony TV turned off with code
number 147, but the volume con-
trols did not work properly. If this
is the case, try the next code
number listed for that Component
until you find a perfect match.

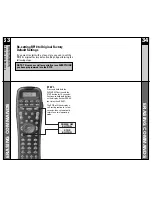
STEP 4:

Point the RF10 toward the
Component you want to
program, (in this example, TV),
and punch in the 3-digit code
that you wrote down for that
specific Component. Use the
Number buttons 0-9 on the
remote to punch in the code.
If the 3-digit code number that
you just punched in is correct,
the Component will turn off.
If the Component does not turn
off, continue entering code
numbers from your list until
the Component turns off.
Some brands have several
possible code numbers.

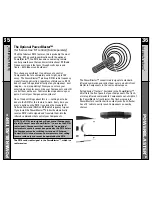
STEP 6:

Once you have found the right
code, save the code number by
pressing the Component button
you pressed in STEP 2 (in this case
AUX) one more time.  The LCD
screen will blink "SAVED" two
times, signaling that the code
number has been successfully
saved, and then return to normal
operating mode.

STEP 5:

When the Component turns off,
press the ON button to turn the
Component back on. Now you
can test the Volume and

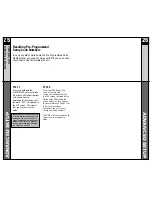
After you’ve finished customizing the RF10’s programming for
seven primary components, and you did not use AUX, you
can take advantage of the AUX function to program an 8th
component, such as a second TV, VCR, or any other
audio/video component that you may have in your system.

AUX

BUTTON

NUMBER

BUTTONS

NOTE: Any component button can be setup
to operate any type of component by
following these same steps. Simply
substitute the desired component button
in place of AUX in STEP 2.

IMPORTANT: You now have 30 seconds to
perform the next step while you are in Setup
mode. If you don’t press a button within
30 seconds, ”SET” will disappear from the
screen, signaling that you have exited Setup
mode and you will need to start over.

Summary of Contents for RF10 MASTERCONTROL

Page 1: ......

Page 2: ...because of the extensive code library pre programmed into the remote And the RF10 s impressive lineup of special advanced features can automate and customize the operation of your system in many ways...

Page 3: ...provide you with many time saving conveniences and enhance your overall entertainment experience However we strongly recommend that you fully complete all of the Basic Setup steps before proceeding to...

Page 4: ...the RF10 easy to use in the dark or dim lighting conditions Simply press the LIGHT button to backlight all the keypad buttons and LCD screen To turn off the backlight press the LIGHT button again or...

Page 5: ...want to locate a code for a Sony TV first locate the TV category and then look for the Sony brand Once you have located the 3 digit code or in some cases several code numbers for the Component that y...

Page 6: ...ss the ON button to turn the Component back on Now you can test the Volume and Channel buttons for TV or PLAY and STOP for VCR and DVD to make sure they all work If any of the buttons do not work prop...

Page 7: ...n successfully saved and then return to normal operating mode STEP 4 When the Component turns off press the ON button to turn the Component back on Now you can test the Volume and Channel buttons for...

Page 8: ...ch a com mand to Once you press a but ton the top of the screen display will change from LEARN to READY NOTE REGARDING SHIFT FUNCTIONS You can teach a second additional command to a button by pressing...

Page 9: ...Process Learned functions override any existing pre programmed functions on the remote control All buttons can be learned except for the PAGE MAIN and LIGHT buttons Learned functions are automaticall...

Page 10: ...o perform the next step while you are in EDIT mode If you don t press a button within 30 seconds EDIT will disappear from the screen signaling that you have exited EDIT mode and you will need to start...

Page 11: ...by CABLE The LCD screen changes to the MACRO step display for each command NOTE Whenever a button is pressed another Macro step is counted and displayed on the screen NOTE Don t worry about the numbe...

Page 12: ...ting mode This sets up a group of three buttons Volume Up Volume Down and MUTE in one action VOL Volume Up Volume Down and Mute CH Channel Up Channel Down Previous Ch and Channel 0 9 buttons PLAY Play...

Page 13: ...he Component will turn off If the Component does not turn off continue entering code numbers from your list until the Component turns off Some brands have several possible code numbers STEP 6 Once you...

Page 14: ...LCD screen This signals that you are now in setup mode IMPORTANT You now have 30 seconds to perform the next step while you are in SETUP mode If you don t press a button within 30 seconds SETUP will...

Page 15: ...the word LEARN is displayed on the LCD screen IMPORTANT You now have 30 seconds to perform the next step while you are in LEARN mode If you don t press a button within 30 seconds LEARN will disappear...

Page 16: ...l the word LEARN is displayed on the LCD screen IMPORTANT You now have 30 seconds to perform the next step while you are in LEARN mode If you don t press a button within 30 seconds LEARN will disappea...

Page 17: ...to normal operating mode STEP 1 Press and hold one of the MACRO buttons ON OFF or one of the 8 COMPONENT buttons and the MUTE button until the word MACRO is displayed on the LCD screen IMPORTANT You n...

Page 18: ...settings by performing the following steps STEP 1 Press and hold both the POWER OFF button and the STOP button for 10 seconds Continue to hold both buttons as the display flashes ERASE ten times then...

Page 19: ...me you press a button on the RF10 it sends both a standard IR Infrared Command AND an RF Radio Frequency signal If you install the PowerBlaster kit it will automatically receive RF10 s radio signals a...

Page 20: ...for using Pre Programmed codes are found on page 7 TV TVs Plasmas Projectors and Monitors CABLE Cable TVs and Web TVs DVD DVD Players and TV DVD Combos VCR VCRs and TV VCR Combos AUDIO Amps Preamps A...

Page 21: ...043 004 048 143 SEARS 015 030 004 007 028 057 143 094 160 082 165 166 SELECO 189 200 205 227 SHARP 081 019 014 170 028 029 004 022 143 175 251 SIEMENS 088 SIM2 189 200 205 227 SIGNATURE 072 SOLE 231...

Page 22: ...99 ARCHER 005 007 014 ARMSTONG 074 AT T BROADBAND 074 ATLANTIC BROADBAND 043 074 BELL SOUTH 099 BLUE RIDGE 043 074 BRESNAN 074 BRIGHT HOUSE 043 110 BUCKEYE COMM 074 CABLEVISION 043 074 108 CENTURION 0...

Page 23: ...SSE 167 COBY 258 DENON 007 080 173 FUNAI 143 GATEWAT 175 GE 026 027 GOVIDEO 137 218 220 221 222 HARMAN KARDON 084 140 HITACHI 101 ILO 268 INTEGRA 142 180 JVC 012 KENWOOD 151 KLH 135 KISS 179 279 KRELL...

Page 24: ...ons for VCR 067 POLAROID 234 SAMSUNG 137 159 SANSUI 154 SONY 145 191 TOSHIBA 141 ZENITH 091 VCR Functions for VCR171 DVD DVD Recorder GATEWAY 175 GO VIDEO 220 221 222 ILO 268 KISS 279 LITEON 265 PANAS...

Page 25: ...A 053 054 ORION 025 PANASONIC 066 070 145 083 133 140 157 163 074 167 PENTAX 013 020 031 063 PHILCO 031 034 067 PHILIPS 031 067 034 101 054 071 156 PILOT 101 PIONEER 021 013 048 PORTLAND 108 PULSAR 07...

Page 26: ...14 266 279 291 KENWOOD 026 066 145 146 181 190 197 192 182 199 151 222 180 005 280 374 550 KINERGETICS 220 140 KLH 331 KOSS 216 573 KRELL 150 072 376 384 KYOCERA 007 LEXICON 120 235 236 237 357 358 35...

Page 27: ...95 096 097 098 099 100 167 168 ELECTROHOME 089 EUROSAT 114 EXPRESSVU 122 FUJITSU 017 021 022 027 133 134 GENERAL ELECTRIC 151 106 150 GENERAL INSTRUMENT 003 004 016 029 031 059 101 148 GOI 122 HITACHI...

Page 28: ...CARRERA 057 080 CARVER 185 041 044 050 086 107 130 134 135 138 139 203 204 167 CASIO 111 182 CLARINETTE 182 CREEK 159 CROWN 035 DENON 002 123 EMERSON 042 069 102 FISHER 050 185 134 008 FRABA 111 GENE...

Page 29: ...152 AIWA 164 APPLE iPod 401 ARCHER 155 AURORA MULTIMEDIA 220 AUTON 191 BOSE 409 CELADON 221 CRESTRON 213 214 215 216 217 218 DELL 261 262 DMX 156 DRAPER SCREEN 204 DREAMVISION 097 DWIN 080 253 EVERQUE...

Page 30: ...CT SELECT LEFT LEFT RIGHT RIGHT 1 1 SLEEP 2 2 6 7 CH 3 3 TEST 4 4 THX 5 5 DD 6 6 DTS 7 7 LOGIC 8 8 ST 9 9 SURR 0 0 TAPE 2 10 10 VCR 4 ENTER ENT PH PIP ON OFF MODE PIP SWAP SUB PIP POSITION CENTER PIP...

Page 31: ...N DOWN SELECT SELECT LEFT LEFT RIGHT RIGHT SCAN REW REW SCAN FF FF STOP STOP REC PLAY PLAY PAUSE PAUSE 1 1 SLEEP 2 2 6 7 CH 3 3 TEST 4 4 THX 5 5 DD 6 6 DTS 7 7 LOGIC 8 8 ST 9 9 SURR 0 0 TAPE 2 10 10 V...

Page 32: ...t then press 0 TAPE2 button POWER OFF OFF POWER ON ON VOL VOL VOL VOL MUTE MUTE PRESET CH PRESET CH SCAN PREV CH BAND FM AM TV VCR MODE MENU DISPLAY GUIDE OSD INFO CLEAR EXIT UP UP DOWN DOWN SELECT SE...

Page 33: ...n BASS Press SHIFT first then press MODE button TREBLE Press SHIFT first then press SUB button SURR Press SHIFT first then press CENTER button DELAY Press SHIFT first then press REAR button BASS Press...

Page 34: ...ss 1 SLEEP button INTRO Press SHIFT first then press 2 6 7CH button DISC Press SHIFT first then press 3 TEST button TIME Press SHIFT first then press 4 THX button POWER OFF OFF POWER ON ON VOL VOL VOL...

Page 35: ...ttons one at a time the RF10 enables you to setup one button that does all those steps automatically with one press For more information on how and why you should setup macro buttons watch the Quick S...

Page 36: ...500 Mamaroneck Avenue Harrison NY 10528 Phone 1 914 835 4484 FAX 1 914 835 4532 www universalremote com OCE 0046A_rev01...

Reviews: