background image

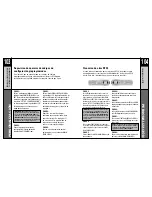
104

PERSONALIZACIÓN

Clonaci

ón de otros RF20

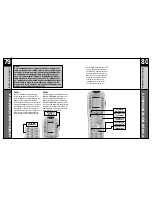
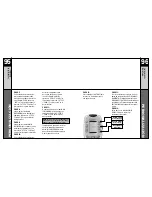
103

PERSONALIZACIÓN

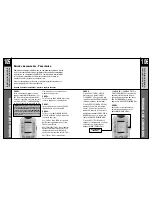
Reposición de números de códigos de 
configuración preprogramados

En el caso de que no haya anotado los números de códigos 
preprogramados que haya utilizado para configurar su RF20, podrá 
recuperarlos con facilidad, mediante el proceso sencillo que sigue:

PASO 1:

Pulse y mantenga oprimidos al mismo
tiempo el botón MAIN (PRINCIPAL) y el
ENT (Enter o Intro) durante aproximada-
mente tres segundos, hasta que aparezca
la palabra “SETUP” (“CONFIGURACIÓN”)
en la parte superior de la pantalla de LCD.
Esto indicará que se encuentra en el
modo de configuración.

PASO 2:

Vaya a la página 2 del menú de 
configuración (Setup), pulsando 
el botón PAGE (PÁGINA) (

).

PASO 3:

Pulse el botón RECALL (REPOSICIÓN) en
la pantalla de LCD. La pantalla pasará a las
de Recall (Reposición). La imagen variará
automáticamente entre cuatro pantallas
distintas, haciendo que parpadeen alter-
nativamente los componentes y números
de códigos de la página 1 y, luego, los de
la página 2.

PASO 4:

Anote los números de códigos, 
conforme vayan apareciendo, para
consultas futuras. En la página 111 
de este manual se proporciona un
espacio conveniente para que 
anote sus números de códigos.

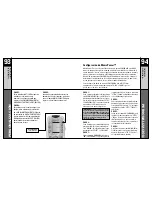
PASO 5:

Vuelva al funcionamiento normal 
pulsando dos veces el botón MAIN
(PRINCIPAL).

IMPORTANTE: Ahora tendrá a su disposición 30
segundos para efectuar el paso siguiente mientras
esté en el modo SETUP (CONFIGURA- CIÓN). Si no
oprime un botón  en un lapso de 30 segundos, SETUP
(CONFIGURACIÓN) desaparecerá de la pantalla,
indicándole que ha salido del modo de configuración
y tendrá que volver a comenzar la operación.

Reposici

ón de n

úmeros de c

ódigos

de configuraci

ón preprogramados

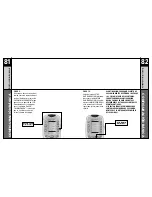
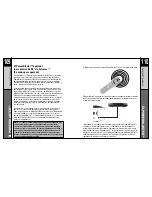
PASO 1:

Para el RF20 programado que desee clonar y el
que todavía no se haya programado, pulse y man-
tenga oprimidos al mismo tiempo el botón MAIN
(PRINCIPAL) y el ENT (Enter o Intro) durante aprox-
imadamente tres segundos, hasta que aparezca la
palabra “SETUP” (“CONFIGURACIÓN”) en la parte
superior de la pantalla de LCD. Esto indicará que
se encuentra en el modo de configuración. 

PASO 2:

Pulse un botón PAGE (PÁGINA) en cada uno de
los controles remotos para que aparezca la página
2 de la configuración y que se presente el botón
CLONE (CLONACIÓN).

PASO 3:

Pulse el botón CLONE (CLONACIÓN) en cada
control remoto.

PASO 4:

Alinee los dos RF20, cabeza con cabeza, a
una distancia de aproximadamente 25 mm
(una pulgada).

PASO 5:

Pulse el botín de presentación RECV en el RF20
no programado que desee configurar mediante
la clonación.

PASO 6:

Pulse el botón de presentación SEND (ENVÍO)
en el RF20 programado que desee clonar.

PASO 7:

Pulse el botón START (COMIENZO) en el RF20 no
programado y, luego, el del RF20 programado que
desee clonar.

PASO 8:

Regrese al funcionamiento normal pulsando
dos veces el botón MAIN (PRINCIPAL).

NOTA: Por lo común, la clonación requiere aproximada-
mente 40 segundos. Después de que haya concluido la
clonación con éxito, el RF20 recién clonado mostrará
parpadeando la palabra “GOOD” (“BUENO”).

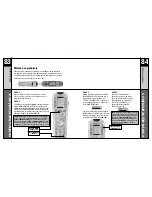
Clonación de otros RF20

Si tiene la buena fortuna de poseer más de un RF20, le agradará saber
que podrá copiar y transferir con facilidad todos los ajustes de un RF20
a otro. Para ello, sólo tendrá que seguir estos pasos sencillos:

IMPORTANTE: Ahora tendrá a su disposición 30 segun-
dos para efectuar el paso siguiente mientras esté en el
modo SETUP (CONFIGURACIÓN). Si no oprime un botón
en un lapso de 30 segundos, SETUP (CONFIGURACIÓN)
desaparecerá de la pantalla, indicándole que ha salido
del modo de configuración y tendrá que volver a comen-
zar la operación.

Summary of Contents for MasterControl RF2

Page 1: ...simply MORE powerful RF20...

Page 2: ...ING COMMANDS Overview 37 Erasing Learned Button Macro or Favorite Channel Commands 37 Re setting RF20 to Original Factory Default Settings 39 THE OPTIONAL POWERBLASTERTM PowerBlasterTM 41 PRE PROGRAMM...

Page 3: ...end that you fully complete all of the Basic Setup steps before proceeding to customize your RF20 with any of the special advanced features Battery Installation The very first step is to insert the fo...

Page 4: ...AIN button again to return to Page 1 of the MAIN menu and select the next Component you want to operate If you don t see the Component you want to control on Page 1 of the MAIN menu just use the PAGE...

Page 5: ...look for the Sony brand Once you have located the 3 digit code or in some cases several code numbers for the Component that you want to operate with your RF20 write them ALL down on a piece of note pa...

Page 6: ...ant to program For example If you want to setup the TV Component button press the TV Component display button The display at the bottom of the LCD screen will flash FROM TABLE STEP 6 In this step you...

Page 7: ...atyouwrote downforthatspecificComponent Usethe Numberbuttons0 9ontheremoteto punchinthecode Ifthe3 digitcode numberthatyoujustpunchedinis correct theComponentwillturnoff Ifthe Componentdoesnotturnoff...

Page 8: ...g that the code number has been successfully saved STEP 10 ExitSETUPmodebypressingtheMAIN buttontwotimes WhentheLCDscreendisplaysMAIN you arebackinnormaloperatingmode NOW PROGRAM THE REST OF YOUR COMP...

Page 9: ...are in SETUP mode If you don t press a button within 30 seconds SETUP will disappear from the screen sig naling that you have exited setup mode and you will need to start over STEP 3 PresstheLEARNdis...

Page 10: ...halogen or quartz lighting can inter fere with the learning process Even though the old remote seems to be working fine put in fresh alkaline batteries Gradually vary the distance between the remote...

Page 11: ...he LCD will blink LOCKED three times and then display LOCKED To Return to Normal Operation Press the 10 and ENT Enter buttons simultaneously again for 3 seconds The LCD will display the last use mode...

Page 12: ...the Right cursor button STEP 8 When you are finished editing the button press the button you edited and SAVED will flash at the bottom of the display To change any other button labels on the same Comp...

Page 13: ...e ABC CBS NBC of the favorite channel you want to setup STEP 4 Press the favorite channel display button you want to setup The top of the screen will change to show the channel name The bottom of the...

Page 14: ...the screenand STEP1 atthebottom STEP 5 Then press the ON button to confirm the command and STEP 2 will display at the bottom of the screen NOTE Whenever a button is pressed another Macro step is count...

Page 15: ...screen STEP 7 will display at the bottom of the screen STEP 11 Then press the ON button to confirm the command STEP 8 will display at the bottom of the screen You can also program delays in between co...

Page 16: ...all the Components in your system even those without their own built in volume control such as TiVo DVD and VCR saving you the hassle and inconvenience of constantly needing to switch between Compone...

Page 17: ...a group of controls consider using Punch Through for another group as listed here VOL Volume Up Volume Down and Mute CH Channel Up Channel Down Previous Ch and Channel 0 9 buttons PLAY Play Stop Pause...

Page 18: ...u will need to start over STEP 1 Press and hold the MAIN and ENT Enter buttons at the same time for approximately 3 seconds until the word SETUP is displayed at the top of the LCD screen This signals...

Page 19: ...grammed RF20 press and hold the MAIN and ENT Enter buttons at the same time for pproximately 3 seconds until the word SETUP is dis played at the top of their respective LCD screens This signals that b...

Page 20: ...LEARN MACRO or FAV button The following screen appears ALL Erases ALL of the specified Learned Macro or FAV but tons every where in the RF20 DEVICE Erases all learned or Macro buttons in a single Comp...

Page 21: ...e following steps NOTE This process will essentially erase EVERYTHING you have pro grammed into the RF20 STEP 1 Press and hold both the MAIN and the STOP buttons for 10 seconds STEP 2 After 10 seconds...

Page 22: ...ou press a button on the RF20 it sends both a standard IR Infrared Command AND an RF Radio Frequency signal If you install the PowerBlasterTM kit it will automatically receive RF20 s radio signals and...

Page 23: ...includes TV VCR combo units Within each category the code numbers are listed in rows by brand Sony Panasonic B K etc Some brands have more than one three digit code for you to try Just circle the cor...

Page 24: ...230 330 INSIGNIA 350 399 403 052 164 JBL 164 JCPENNEY 004 024 197 008 009 030 065 101 143 156 160 JENSEN 013 JVC 038 034 070 083 145 199 210 240 241 KEC 043 KENWOOD 197 070 KLOSS 002 059 KMC 143 KTV...

Page 25: ...74 143 164 034 WESTING HOUSE 076 280 WINBOOK 339 YAMAHA 197 004 YORK 004 YUPITERU 043 ZENITH 073 072 095 103 157 183 243 284 ZONDA 112 ABC 004 103 003 039 042 046 053 ADELPHIA 043 074 ADVANCED NEWHOUS...

Page 26: ...5 112 116 ARCAM 122 CAMBRIDGE AUDIO 215 CARY AUDIO DESIGN 174 CLASSE 167 COBY 258 DENON 007 080 173 FUNAI 143 GATEWAT 175 GE 026 027 GO VIDEO 137 218 220 221 222 HARMAN KARDON 084 140 HITACHI 101 ILO...

Page 27: ...YAMAHA 042 089 166 195 197 ZENITH 057 074 091 DVD TV DVD Combos AIWA 146 AKAI 281 FUNAI 143 INSIGNIA 143 SAMSUNG 165 SYLVANIA 143 SYMPHONIC 143 TOSHIBA 130 DVD TV DVD VCR Combos MAGNAVOX 143 PANASONI...

Page 28: ...NORDMENDE 043 OPTONICA 053 054 ORION 025 PANASONIC 066 070 145 083 133 140 157 163 074 167 PENTAX 013 020 031 063 PHILCO 031 034 067 PHILIPS 031 067 034 101 054 071 156 PILOT 101 PIONEER 021 013 048...

Page 29: ...B K 096 097 BOSE 070 170 224 347 409 459 460 532 BOSTON ACOUSTICS 447 BRYSTON 023 CAMBRIDGE AUDIO 522 CARVER 006 028 061 071 201 214 226 180 185 022 029 077 284 CASIO 076 CHIRO 140 CINEMA SOUND 034 13...

Page 30: ...2 261 294 295 333 334 PHAST 196 PHILIPS 249 250 251 063 119 PIONEER 014 033 039 044 045 050 069 159 168 116 035 078 198 480 POLKAUDIO 029 515 PRIMARE 464 PROCEED 144 268 RCA 010 048 117 156 067 288 RE...

Page 31: ...IO EASE 165 AUDIO TECHNICA 046 BSR 037 057 CALIFORNIA AUDIO 103 008 CAPETRONIC 063 CARRERA 057 080 CARVER 185 041 044 050 086 107 130 134 135 138 139 203 204 167 CASIO 111 182 CLARINETTE 182 CREEK 159...

Page 32: ...T 069 102 SHARP 026 031 051 066 SHERWOOD 003 019 051 096 112 115 119 166 SIGNATURE 033 SONY 048 081 097 126 133 177 225 226 164 SOUNDESIGN 251 SUMO 155 SYLVANIA 044 107 SYMPHONIC 052 181 TAEKWANG 195...

Page 33: ...015 071 100 114 CARVER 006 008 027 024 036 DENON 105 227 229 FISHER 064 GOLDSTAR 011 HARMAN KARDON 233 JVC 106 116 239 240 KENWOOD 005 013 023 026 064 145 146 181 190 LINN 124 LUXMAN 035 137 139 MAGNA...

Page 34: ...atteries included LCD Size 0 88 x 1 88 Frequently Asked Questions What is a macro button A macro is a button on the RF20 that you setup to make a lot of things happen when you press it For example to...

Page 35: ...armful interference to radio or television reception which can be determined by turning the equipment off and on the user is encouraged to try to correct the interference by one more of the following...

Page 36: ...imply MORE powerful RF20 MANUALDELPROPIETARIO Control Remoto Universal 500 Mamaroneck Avenue Harrison NY 10528 Phone 1 914 835 4484 FAX 1 914 835 4532 www universalremote com simply MORE powerful RF20...

Page 37: ...p DVD Program Guide gu a de programa de DVD para configuraci n r pida le ayudar a programar su control remoto conduci ndolo a trav s de un proceso sencillo de paso a paso El Manual del propietario se...

Page 38: ...lva a poner la cubierta en su lugar Ya estar listo para comenzar Panor mica del comienzo Esto es lo que es el MASTERCONTROL RF20 El RF20 se dise para que maneje hasta diez componentes distintos de aud...

Page 39: ...gu iente componente que quiera activar Si no ve el componente que desee mane jar en la p gina 1 del men MAIN PRIN CIPAL use los botones PAGE P GINA del lado izquierdo de la pantalla para que aparezca...

Page 40: ...onente que desee hacer que funcione con su RF20 an telos TODOS en un papel Es importante que anote todos los n meros de c digos porque s lo funcionar para usted uno de ellos PASO 2 A continuaci n enci...

Page 41: ...que desee programar Por ejemplo si desea configurar el bot n del compo nente TV TELEVISI N pulse el bot n de presentaci n de TV En la parte inferior de la pantalla de LCD parpadear FROM TABLE DE LA T...

Page 42: ...leado es correcto el componente se apagar Si no lo hace as siga introduciendo n meros de c digos de su lista hasta que se apague Algunas marcas tienen varios n meros de c digos posibles PASO 8 Cuando...

Page 43: ...veces el bot n MAIN CONFIGURACI N Cuando aparezca MAIN PRINCIPAL en la pantalla de LCD habr regresado al funcionamiento normal A CONTINUACI N PROGRAME EL RESTO DE SUS COMPONENTES REP TIENDO LOS PASOS...

Page 44: ...LEARN APRENDIZAJE y presentar los cinco componentes de la p gina 1 del men MAIN PRINCIPAL Para pasar a la p gina 2 del men MAIN PRINCIPAL que contiene otros cinco com ponentes adicionales pulse simple...

Page 45: ...arles son el PAGE P GINAS y el MAIN PRINCIPAL Vaya a otra habitaci n Los televisores de plasma los rayos del sol la iluminaci n de hal geno o la de cuarzo pueden obsta culizar el proceso de aprendiza...

Page 46: ...s de presentaci n incluyendo los canales favoritos en la pantalla de LCD siguien do los pasos que se indican a continuaci n PASO 1 Pulse y mantenga oprimidos al mismo tiempo el bot n MAIN PRINCIPAL y...

Page 47: ...ya terminado la correcci n de los botones pulse cuatro veces el bot n MAIN PRINCIPAL para volver al funcionamiento normal PASO 6 Cambie el car cter utilizando cualquiera de las teclas num ricas Cada p...

Page 48: ...En la parte inferior de la pantalla parpadear SELECT SELECCI N IMPORTANTE Ahora tendr a su disposici n 30 segundos para efectuar el paso siguiente mientras est en el modo SETUP CONFIGURACI N Si no op...

Page 49: ...m ponentequedeseequeenciendaelmacro en esteejemplo TV yaparecer TV enlaparte superiordelapantallay STEP1 PASO1 enlainferior PASO 5 Luego pulse el bot n ON ENCENDIDO para confirmar el comando y aparece...

Page 50: ...rior PASO 11 A continuaci n pulse el bot n ON ENCENDIDO para confirmar el comando Aparecer STEP 8 PASO 8 en la parte inferior de la pantalla Tambi n podr programar retrasos entre los comandos pulsando...

Page 51: ...Sound es una caracter stica din mica que le proporciona control total de volumen sobre todos los componentes del sistema incluso los que no tengan su propio control de volumen integrado tales como los...

Page 52: ...0 9 PLAY Reproducci n Detenci n Pausa Retroceso r pido Y Avance r pido VDD Gu a Men Info Salida Arriba Abajo Izquierda Derecha Selecci n Configuraci n de opciones de retroiluminaci n Podr personaliza...

Page 53: ...e se encuentra en el modo de configuraci n PASO 2 Pulse el bot n de presentaci n EDIT CORRECCI N en la pantalla de LCD PASO 3 Pulse el bot n de presentaci n PAGE P GINA una vez que la pantalla pase al...

Page 54: ...la operaci n Reposici n de n meros de c digos de configuraci n preprogramados PASO 1 ParaelRF20programadoquedeseeclonaryel quetodav anosehayaprogramado pulseyman tengaoprimidosalmismotiempoelbot nMAI...

Page 55: ...ICE DISPOSITIVO Borra todos los botones aprendidos o de macros en un componente indivi dual NOTA Esta opci n no est disponible para los FAV KEY TECLA Borra s lo un bot n IMPORTANTE Ahora tendr a su di...

Page 56: ...ASO 2 Al cabo de diez segundos aparecer la pantalla RESET RESTAURACI N Pulse el bot n ALL TODO El RF20 presentar un bot n SURE SEGURO Pulse el bot n SURE SEGURO para bor rar todos sus ajustes y regres...

Page 57: ...el RF20 enviar tanto un IR comando infrarrojo COMO una se al de RF radiofrecuencias Si instala el equipo de PowerfBlaster recibir autom ticamente las se ales de radio del RF20 y las traducir a los com...

Page 58: ...marcas tienen m s de un c digo de tres d gitos para que los pruebe Encierre en un c rculo la hilera correcta y cons ltela mientras efect a la configuraci n en la p gina 73 se dan instrucciones paso a...

Page 59: ...Control y el Servicio a los Clientes est listo para responder a las preguntas que desee hacerles Ll menos al tel fono 1 914 835 4484 Lunes a viernes de las 9 00 a las 18 00 horas ESTE Garant a El Mas...

Page 60: ...116 OTROS DATOS 115 OTROS DATOS NOTAS NOTAS...

Page 61: ...500 Mamaroneck Avenue Harrison NY 10528 Tel fono 914 835 4484 Fax 914 835 4532 www universalremote com simply MORE powerful RF20 MANUALDEL PROPIETARIO OCE 0048B_rev01...

Reviews: