background image

27

U R C - 3 0 0

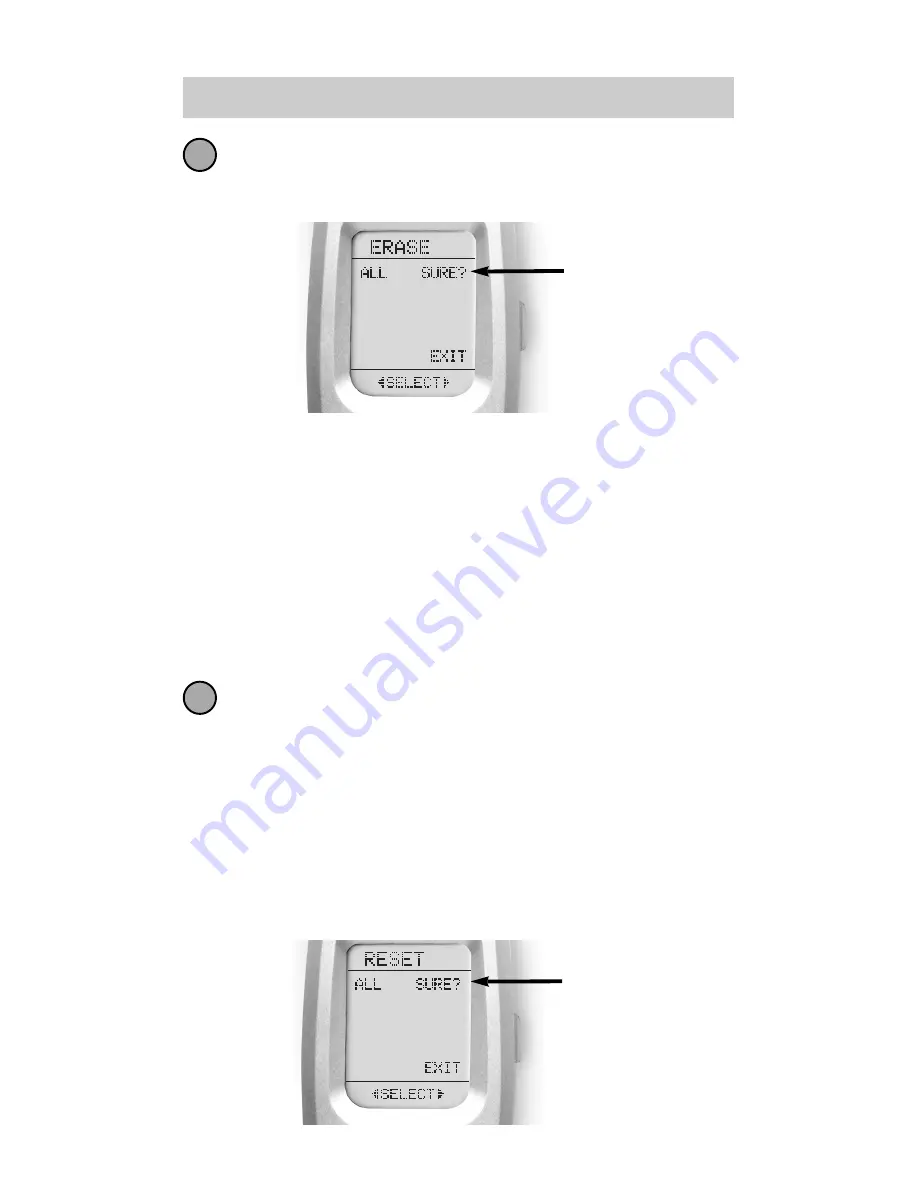
If you press ALL, the Customizer displays a SURE?
button. After the SURE button is pressed, all the
buttons will be erased.

If you press DEVICE, a list of Devices will appear.
Press the device button that you wish to erase.
The bottom of the screen will flash ERASE twice,
then ERASED.

If you press KEY, you’ll have to navigate to the
Device and Page you want using the MAIN,
DEVICE and PAGE buttons. Press a button to erase
it. The bottom of the display will flash ERASE
twice, then ERASED.

To return to normal operating mode, press the
MAIN button four times.

Erasing the Entire Customizer

To erase EVERYTHING, press and hold both the MAIN
and the STOP buttons for 10 seconds. After 10 sec-
onds, the RESET screen appears. Press the ALL button.
The Customizer will display a SURE? button. Press the
SURE button to erase all of your settings and return to the
factory default setup.

4

5

SURE
Button

SURE
Button 

Summary of Contents for Customizer URC-300

Page 1: ...Owner s Manual...

Page 2: ...information in this manual is copyright protected No part of this manual may be copied or reproduced in any form without prior written consent from Universal Remote Control Inc UNIVERSAL REMOTE CONTRO...

Page 3: ...on 15 Advanced Setup 17 Editing Button Labels 17 Macro Button Setup 20 Favorite Channel Setup 22 Hiding and Adding Pages 24 Erasing Settings 26 Cloning One Customizer to Another 28 Recalling Pre Progr...

Page 4: ...few minutes Basic Setup is described on pages 5 to 14 The Customizer s exciting advanced features automate and customize operation in many ways You could use Macro Setup to power on all of your compo...

Page 5: ...3 0 0 Button Layout MAIN Button takes you to the MAIN Menu Touch the Screen to use the Buttons on the screen PAGE Numbers FUNCTION Buttons TITLE LIGHT Button PAGE Buttons change the page of buttons di...

Page 6: ...es of display buttons already labeled for TV operation To operate another of your components e g VCR DVD etc press the MAIN button to return to the MAIN menu The MAIN menu displays seven of your Devic...

Page 7: ...wer off commands Refer to the pre programmed code tables on pages 33 47 and write down the code numbers listed for your A V component The code numbers are listed by categories of devices then by brand...

Page 8: ...the cursor UP or DOWN buttons to change the flashing name When it is correct press the SELECT button For Example I wanted to setup the TV Device button first so I pressed the cursor UP or DOWN until T...

Page 9: ...te controlled pianos See page 33 for a list of component types each Code Table contains Point the Customizer at the component then enter the first three digit code number from your notes using the num...

Page 10: ...ils to turn off after you have entered all the code numbers listed for your brand you can scan through the other brands in the table by alternately pressing the UP or DOWN and POWER OFF buttons Exit S...

Page 11: ...9 However the number buttons didn t work when I tested them So I repeated steps one to ten using other code numbers and eventually discovered that when code number 185 is set all the buttons work perf...

Page 12: ...o inches apart Press and hold the MAIN and ENT Enter buttons at the same time for approximately three seconds The top of the display will show SETUP You are in SETUP mode now Note You have 30 seconds...

Page 13: ...vice button Press any button you want to teach a command to Note If you don t see the display button you would like to teach use the PAGE buttons The only buttons you can t teach are the PAGE and MAIN...

Page 14: ...ears on top of the display try to teach the same button in Customizer once again by repeating steps 6 8 Continue to teach any commands from any of your remote controls by repeating steps 5 9 to go bac...

Page 15: ...se Punch Through to set the Customizer s volume buttons to always control the sound in your system That way when the Customizer is set to VCR or DVD the volume up down and mute buttons will work perfe...

Page 16: ...ay will flash SAVED Repeat steps 3 5 until all your devices operate the volume perfectly Press the MAIN button twice to return to normal operating mode and test your Punch Through settings Note The Pu...

Page 17: ...u don t want backlighting at all this extends battery life press the ON button that appears on the screen The ON will change to OFF Press the SAVE button Exit the setup mode by pressing the MAIN butto...

Page 18: ...ursor DOWN buttons at the same time Transmitting Busy Signal Icon When a command is being transmitted an icon will appear in the top right corner of the display It is a useful aid when setting up Macr...

Page 19: ...uttons including Favorite Channels by following these steps Press and hold both the MAIN and ENT Enter buttons for approximately three seconds The top of the display will show SETUP You are in SETUP m...

Page 20: ...a DEVICE button press the Page Up button twice The top of the display changes to MAIN and you can navigate to MAIN page 1 or page 2 before going on to Step 5 Press the button you wish to edit The firs...

Page 21: ...finished editing the button press the button you edited and SAVED will flash at the bottom of the display To change any other button labels on the same device press the next button then repeat steps...

Page 22: ...Press the MACRO button The top of the display will show MACRO The bottom of the display will flash SELECT Navigate to the Device and Page where there is a button you would like to set as a Macro butt...

Page 23: ...essed another Macro step is counted and displayed at the bottom of the screen Don t worry about the number of steps Each macro button can store up to 190 steps so you are not likely to run out of step...

Page 24: ...or each step otherwise the Customizer will time out automatically Press the FAV display button The top of the display will show FAV The bottom of the display will flash SELECT Use the Page buttons unt...

Page 25: ...es the delay by a half second Note Some brands of television require an ENT Enter command after the channel numbers Press the LIGHT button after you enter the channel number A new screen appears To sa...

Page 26: ...pages on devices OR on your favorite channel pages using this simple process Note Be sure to program your Macros before you hide pages with potential macro in them You can t access hidden pages during...

Page 27: ...d When you would like to change a page s visibility press the LIGHT button You can continue to ADD or HIDE pages on other devices by repeating Steps 4 and 5 When you are finished adding and hiding pag...

Page 28: ...reset everything to the factory default condition Erasing Learned Buttons Macros or Favs Enter SETUP mode by pressing and holding both MAIN and ENT for three seconds Note You have 30 seconds for each...

Page 29: ...Page you want using the MAIN DEVICE and PAGE buttons Press a button to erase it The bottom of the display will flash ERASE twice then ERASED To return to normal operating mode press the MAIN button fo...

Page 30: ...PAGE button to display page two of Setup Press the CLONE button Align the two Customizers head to head about an inch apart Press the RECV display button on the new Customizer you would like to setup...

Page 31: ...step otherwise the Customizer will time out automatically Press the RECAL button The display changes to the recall screens Each of the four screens dis plays the Device Name and the Code Number Note...

Page 32: ...ince the Expander picks up the Customizer s radio signals from any direction regardless of distance the Customizer doesn t have to be pointed Nothing has to be done to the Customizer for this feature...

Page 33: ...ds radio signal to the Expander which is a radio receiver Self adhesive flashers included in the Expander kit affix to the front panels of your components The flashers relay infrared com mands to comp...

Page 34: ...32 T h e C u s t o m i z e r Pre Programmed Code Notes Record the three digit codes for your system here TV CABLE WEB TV DVD VCR AUDIO SAT CD DVR LDP LIGHT TAPE AUX PHONO...

Page 35: ...while you setup step by step instructions for using Pre Programmed codes are found on page 5 TV s Plasmas Projectors and Monitors Amps Preamps and A V Receivers DVDPlayers TV DVDCombos TV DVD VCRComb...

Page 36: ...3 DELL 319 320 321 DREAMVISION 235 DWIN 177 257 DYNASTY 043 DYNATECH 062 EIKI 187 ELECTROHOME 143 024 076 196 EMERSON 028 048 043 155 005 197 004 047 050 051 076 096 143 151 153 154 FISHER 007 057 FUJ...

Page 37: ...164 005 093 038 197 003 004 059 127 184 206 239 259 PIONEER 135 025 197 018 023 116 190 234 PORTLAND 004 143 PROSCAN 144 160 161 165 167 PROTON 004 131 058 143 171 173 193 QUASAR 034 056 092 RADIO SH...

Page 38: ...RK 004 YUPITERU 043 ZENITH 073 072 095 103 157 183 243 284 ZONDA 112 ADC 007 ADCOM 082 092 225 161 269 355 356 366 AIWA 170 018 104 202 203 213 211 188 AKAI 138 189 AMC 125 126 127 128 258 281 282 038...

Page 39: ...E 371 INKEL 197 INTEGRA 354 438 JAMO 398 JBL 263 JCPENNEY 076 216 JEFF ROWLAND 206 JENSEN 058 JVC 240 163 191 114 266 279 291 KENWOOD 026 066 145 146 181 190 197 192 182 199 151 222 180 005 280 374 KI...

Page 40: ...SEARS 076 SHARP 026 094 131 175 181 SHERWOOD 024 038 055 102 103 105 106 051 030 447 SONY 018 093 223 247 248 160 166 015 101 184 218 271 353 369 372 380 417 421 SOUNDESIGN 036 SOUNDMATTERS 375 SOUNDS...

Page 41: ...8 131 PROCEED 086 PROSCAN 026 027 RCA 026 027 SAMSUNG 056 070 119 165 170 137 159 SANSUI 154 SANYO 147 SHARP 094 SONY 033 118 145 126 191 SYLVANIA 143 SYMPHONIC 143 TATUNG 102 THOMPSON 026 027 TOSHIBA...

Page 42: ...ENWOOD 152 013 MAGNAVOX 032 121 MARANTZ 211 MITSUBISHI 121 NAD 121 OPTIMUS 049 013 PANASONIC 113 PHILIPS 032 PIONEER 106 117 121 RADIO SHACK 120 RCA 002 REALISTIC 049 RUNCO 127 SANYO 075 SHARP 152 013...

Page 43: ...4 043 063 137 160 013 INSTANTREPLAY 031 JCL 031 JCPENNEY 012 013 015 040 066 101 JENSEN 043 JVC 048 043 130 150 055 060 012 031 050 152 166 KENWOOD 014 048 034 047 LG 101 106 114 013 020 012 123 LLOYD...

Page 44: ...58 077 052 003 078 076 031 149 154 SOUNDESIGN 034 STS 013 SYLVANIA 031 034 059 067 SYMPHONIC 034 TANDY 010 034 TATUNG 039 043 TEAC 034 039 043 TECHNICS 031 070 TEKNIKA 031 019 034 101 THOMAS 034 TMK 0...

Page 45: ...074 BRIGHT HOUSE 043 BUCKEYE COMM 074 CABLEVISION 043 074 108 CENTURION 092 CENTURY 007 CHARTER 043 074 CITIZEN 007 COGECO 074 COMBANO 080 081 COMCAST 043 074 110 COMSAT 074 COX DIGITAL 043 074 DIGICA...

Page 46: ...ERS 043 SAMSUNG 030 SCIENTIFIC ATLANTA 043 011 003 041 042 045 046 SEREN 043 SERVICE ELECTRIC 074 SHAW 074 SIGECOM 043 SONY 096 108 SPRUCER 047 078 STARCOM 002 004 008 009 STARGATE 008 030 097 104 SUS...

Page 47: ...92 141 JENSEN 158 JVC 004 022 136 163 213 214 242 243 KENWOOD 185 007 023 055 071 072 142 137 254 KOSS 061 KRELL 241 KYOCERA 005 LOTTE 102 LUXMAN 011 028 070 076 249 252 LXI 059 MAGNAVOX 044 107 MARAN...

Page 48: ...G 195 085 TANDY 010 TEAC 015 034 036 051 052 101 131 140 079 TECHNICS 060 103 200 172 184 008 068 TECHWOOD 076 THETA DIGITAL 234 235 TOSHIBA 006 067 091 160 148 VECTOR RESEARCH 080 VICTOR 004 022 114...

Page 49: ...7 PROSCAN 151 106 150 RADIOSHACK 148 RCA 151 106 150 SAMSUNG 123 155 163 169 175 SKY 164 SONY 103 STAR CHOICE 148 TOSHIBA 127 068 154 157 158 UNIDEN 136 ZENITH 159 3M 152 AIWA 164 ARCHER 155 AURORA MU...

Page 50: ...A 015 071 100 114 CARVER 006 008 027 024 036 DENON 105 227 229 FISHER 064 GOLDSTAR 011 HARMAN KARDON 233 JVC 106 116 239 240 KENWOOD 005 013 023 026 064 145 146 181 190 LINN 124 LUXMAN 035 137 139 MAG...

Page 51: ...181 SHERWOOD 038 004 028 030 033 034 SONY 020 022 052 084 089 TEAC 009 059 212 TECHNICS 007 010 076 088 109 122 193 TOSHIBA 112 VICTOR 106 YAMAHA 021 026 031 067 040 JVC 004 KENWOOD 005 PIONEER 003 Y...

Page 52: ...those buttons one at a time the Customizer enables you to setup one button that does it all automatically with one press For more information on how and why you should setup macro buttons watch the Q...

Page 53: ...ture Products that have been modified or incorporated into other products Products purchased more than 12 months ago Units purchased from unauthorized dealers or companies Specifications Learning Capa...

Page 54: ...52 T h e A u t o m a t o r M E M O...

Page 55: ...53 T h e A u t o m a t o r M E M O...

Page 56: ...OCE 0025A Rev 04...

Reviews: