


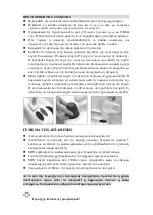

USING FOR THE FIRST TIME
Make sure the machine is unplugged from the mains.
Unscrew the safety cap
(2)
by pushing down and
turning anti clockwise.
Using the measuring jug and funnel
(15)
fill the
machine with up to 1500ml of
water. This should be
sufficient to steam clean for approximately one hour.
Once full, replace the safety cap by turning clockwise
and fasten tightly.
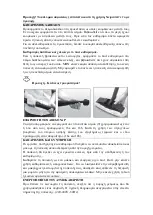
Attach the accessory or floor cleaning tool you require
to the machine.
Now plug the machine into the mains and switch on.
Two lights should illuminate.
The red light
(5)
is a
power indicator. The orange light
(6)
indicates that
the
machine is building up steam pressure. When the
machine is first turned on this
light will illuminate and
the machine can take up to 12 minutes to reach the
correct pressure level depending on the amount of
water in the tank.
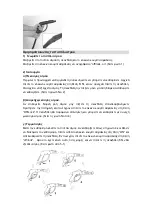
Once the orange light has gone out the machine is
ready to use. The orange light
may come back on
when the machine is in use. If this happens, release the safety
trigger
and allow the steam pressure to build up once again. This should take no
longer than 40 seconds. If the safety trigger is pressed when the orange
light is on
hot water may come out of the machine.
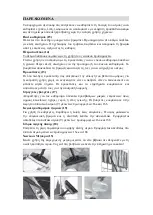
REFILLING THE WATER TANK
Switch the machine off using the on/off button(4)
Disconnect the power cable from the mains. Wait 5 minutes before
squeezing the safety trigger to make sure that the machine is no longer under
pressure before unscrewing the safety cap. DO NOT unscrew the safety cap until
the steam has stopped.
Fill the water tank as necessary using the funnel provided.
DO NOT exceed 1500ml of water before replacing the safety cap by turning
clockwise. Fasten cap tightly.
You are now ready to switch the machine on and resume steam cleaning.
If you live in a hard water area, it is best to use distilled water (this
prevents
internal limescale that may damage the steam system)
Warning - risk of injury!
Warning! This cap gets hot in use; handle with care.
Summary of Contents for SC5201
Page 9: ...1500ml 45 1...
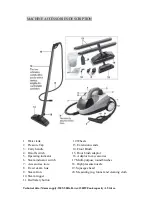
Page 10: ...1 12 2 13 3 14 4 15 5 16 6 17 7 18 8 19 9 20 10 11 230V 50Hz 1500W 1 5...
Page 11: ...2 15 1500ml 5 6 12 40 4 5 1500ml...
Page 12: ...9 16a 16b 16a 16b 220 240V 50Hz...
Page 13: ...1 off lock on 1 2 ON No 2 Off Lock No 3 4 4 ON off lock 5 1...
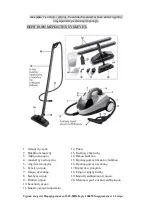
Page 14: ...15 14 13 17 9 16a 16b 19 9 16a 16b 18 16a 16b 15...
Page 15: ...15...