218
4 Web Operation
4.1 General Introduction
If it is your first time to login the device, please initialize your device first. Refer to chapter 4.2 Device
Initialization for detailed information.
The device web provides channel monitor menu tree, search, alarm setup, system setup, PTZ control and
monitor window and etc.
Note
⚫
Slight difference may be found on user interface. Please refer to the actual product for detailed
information.
⚫
Device supports various browsers such as Safari, Chrome and etc.
⚫
Use ChromeApp to login the WEB if the Chrome version is 45 or higher. Go to the Chrome online
store to download the ChromeApp installation package.
4.1.1 Preparation
Step 1 PC and NVR connection is OK.
Step 2 Set PC IP address, NVR IP address, subnet mask and gateway.
⚫
Set the IP address of the same section for the PC and NVR. Input corresponding gateway
and subnet mask if there are routers.)
⚫
The device default IP address is 192.168.1.108.
Step 3 Check the PC and device connection is OK or not. Refer to the following two ways to check the
network connection is OK or not. When the PC and device network connection is OK, login the
WEB via the PC.
⚫
On PC, use order ping ***.***.***.***(NVR IP address) to check connection is OK or not.
Login Usually the TTL value is 255.
⚫
Login the device local menu, from setting->Network->Network test and then input PC IP
address. Check the connection is OK or not.
Step 4 Login the WEB. Refer to chapter 4.10 Login for detailed information.
4.2 Device Initialization
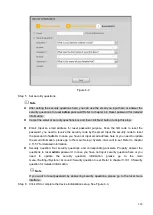
If it is your first time to use the device, please set a login password of
admin
(system default user).
Note
For your device safety, please keep your login password of
admin
well after the initialization steps, and
change the password regularly.
Please follow the steps listed below.
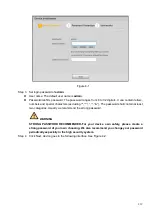
Step 1 Open the IE and then input the NVR IP address in the address column.
Step 2 Click Enter button.
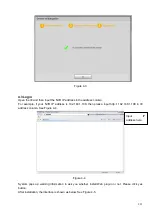
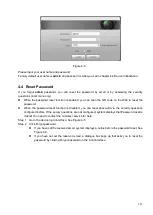
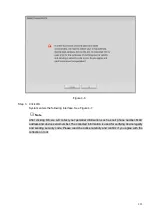
Device displays device initialization interface. See Figure 4-1.
Summary of Contents for EmPower NVR
Page 1: ...EmPower NVR User s Manual V4 4 3...
Page 36: ...23 Figure 3 16 Step 2 Click device display edit interface See Figure 3 17...
Page 97: ...84 Figure 3 91 Figure 3 92...
Page 120: ...107 Figure 3 110 Figure 3 111 Figure 3 112...
Page 131: ...118 Figure 3 123 Figure 3 124...
Page 133: ...120 Figure 3 126 Click draw button to draw the zone See Figure 3 127...
Page 137: ...124 Figure 3 130 Click Draw button to draw a zone See Figure 3 131 Figure 3 131...
Page 142: ...129 Figure 3 136 Click draw button to draw the zone See Figure 3 137...
Page 155: ...142 Figure 3 149 Figure 3 150...
Page 156: ...143 Figure 3 151 Figure 3 152...
Page 174: ...161 Figure 3 172 Figure 3 173...
Page 277: ...264 Figure 4 61 Figure 4 62 Figure 4 63...
Page 303: ...290 Figure 4 101 Figure 4 102...
Page 327: ...314 Figure 4 136 Note For admin you can change the email information See Figure 4 137...

