background image

19

UNIDEN UH5060

Operation

NOTE

If SCAN is deactivated while on an active channel, the UHF 

CB Radio will stay on that active channel. If no channels are 

active, the UHF CB Radio will reinstate the starting channel.

NOTE

OS Mode is indicated by the absence of the GS icon.

Group Scan (GS) Mode

Includes the accessory feature Priority Watch

which allows you to monitor the Instant Priority

Channel while scanning (see p.15 for setting

Instant Priority Channel and p.20 to turn on

Priority Watch).

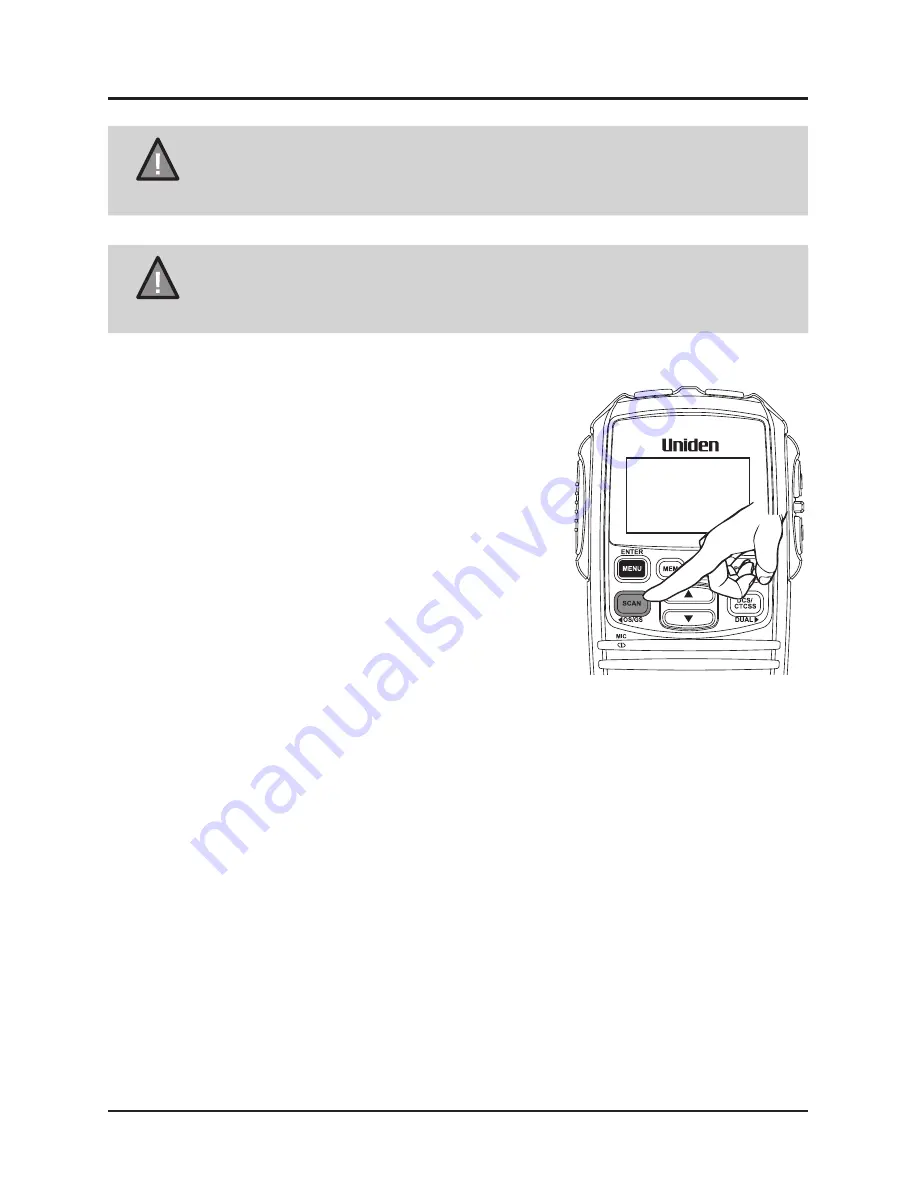
To use GS Mode Scanning, press and hold

[SCAN/OS/GS]

. GS icon appears on

the display.

GS Scanning checks the Instant Priority

Channel for activity regularly when Priority

Watch is ON.

If the Priority Channel becomes active the radio will stay on that channel 

for as long as the signal is present. If the received signal ceases, Priority 

Scanning continues after 3 seconds.

If scanning stops on a channel which is not a Priority Channel, UHF CB 

Radio will continue monitoring the Priority Channel for activity

while listening to the active one.

To deactivate SCAN, press the 

[SCAN/OS/GS]

 button.

UHF CB Transceiver

Summary of Contents for UH5060

Page 1: ...UH5060 Remote Speaker MIC UHF CB Transceiver For more exciting new products please visit our website Australia www uniden com au ...

Page 2: ...tion 15 DUAL Watch 16 Using Repeater Channels 16 Operating the UHF CB Radio in Duplex Mode 17 Scanning 18 Open Scan OS Mode 18 Group Scan GS Mode 19 Priority Watch 20 Add Remove Channels from SCAN Memory 20 Selecting the Call tone 21 Busy Channel Lockout 21 Roger Beep 22 CTCSS Continuous Tone Coded Squelch System 22 DCS Digital Coded Squelch 23 Beep On Off 23 Backlight 24 LCD Contrast 24 CTCSS Cod...

Page 3: ...uitry Transmission Power 5W LCD Display with Backlight LCD Backlight brightness control HI LO Off Signal Strength Power Meter Instant Channel Programming One touch Instant Channel recalling Dual Watch with Instant Channel Duplex Capability Group Scan and Priority Channel Watch Open Scan Scan Channel Memory On Off separately with Open Scan Group Scan Channel Select Busy Channel Lock out Function Ro...

Page 4: ...4 Controls Connectors 6 8 15 9 16 10 17 21 22 11 18 19 20 14 7 3 4 5 2 UNIDEN UH5060 12 13 1 UHF CB Transceiver ...

Page 5: ... 10 MEM Memory Scan Channel 11 SCAN Scan Button OS GS Open Scan Group Scan 12 MICROPHONE 13 SPEAKER 14 Liquid Crystal Display LCD 15 VOL Volume Up Button 16 VOL Volume Down Button 17 POWER Power ON OFF Button 18 SQL Auto Squelch MON Monitor Button 19 DCS CTCSS DCS CTCSS Button DUAL Dual Watch Button 20 Select Up and Down Buttons 21 RJ45 type plug 22 Front MIC Jack Cover 5 Controls Connectors UNIDE...

Page 6: ...Coded Squelch 6 MON Monitor 7 INST Instant Channel 8 DUAL Dual Watch 9 SCAN Scan mode 10 Signal Power Level 11 GS Group Scan 12 S RF Receive Signal or Transmit 13 PRI Priority Channel Watch 14 Channel Frequency 15 BCL Busy Channel Lockout 16 DCS CTCSS Code Number 16 13 14 15 1 2 3 4 5 6 7 8 9 10 11 12 UHF CB Transceiver ...

Page 7: ...om au for Australia 7 Included in your UH5060 Transceiver UNIDEN UH5060 Remote LCD Speaker Microphone RM500 Owner s Manual Microphone Hanger with screws washers Mounting Bracket with mounting screws DC Power Cord with fuse Extension Cable UH5060 UHF Mobile Radio For more exciting new products please visit our website Australia www uniden com au UHF CB Transceiver ...

Page 8: ...IC or Extension Cable cord to test that the connection is locked Use the rubber cover which is on the cord to seal the MIC jack entry from dust Disconnecting the MIC from the MIC Jack Pull back the rubber cover and move it down along the cord Using the flat blade of a screwdriver or similar object carefully push the lock tab of the MIC plug towards the MIC cord and at the same time tug on the MIC ...

Page 9: ... will determine which parts to use Conventional Mounting with Screws Use the front part of the MIC Hanger only Locate a suitable mounting position and mark and drill two 3mm holes Fix the MIC Hanger into place with screws 9 Mounting the MIC Hanger UNIDEN UH5060 UHF CB Transceiver ...

Page 10: ...rews Locate a suitable mounting position Apply high quality Double Sided tape onto the flat area of the MIC Hanger back piece and then press firmly to the mounting position Mounting the MIC Hanger MIC Hanger mounted over MIC Cable NOTE The curly cord of the Remote SPK MIC can extend up to 1 5m For practical installation of the MIC Hanger mounted over MIC Cable use this method with the Extension Ca...

Page 11: ...er collar dust cover on the microphone cable is not required and can be cut away or pushed out of the way along the cable 2 Drill a 13mm hole at the MIC hanger location 3 Thread the microphone plug through the hole and connect with the extension cable 4 Mount the MIC Hanger over the hole and cable 5 At the Radio Connect the extension cable plug to the MIC Jack Fit the rubber bushing over the MIC j...

Page 12: ...source must not exceed 25VDC otherwise permanent damage may occur to your radio which may not be covered by the manufacturer s warranty If the input voltage falls below 10VDC LO DC flashes for 5 seconds The power turns off automatically if voltage falls below 8 5VDC Switch your UH5060 OFF and disconnect it from the power source before locating the cause of the power supply problem Operation UHF CB...

Page 13: ...h open 1 max sensitivity min squelch 2 med sensitivity med squelch 3 min sensitivity max tight squelch It requires no adjustment 1 Press SQL MON The squelch setting flashes 2 Press to change the setting If tight squelch is selected SQT icon will also flash 3 Press MENU ENTER to store the setting Operation UHF CB Transceiver ...

Page 14: ...ld SQL MON to cancel Selecting a Channel Press to select the desired channel NOTE For your reference a list of the available channels corresponding frequencies and guidelines for their use is printed on p 27 p 29 For Australia Channels 05 and 35 are reserved for Emergency Calls Operation UHF CB Transceiver ...

Page 15: ...ponding frequencies and guidelines for their use and selection is printed on p 27 p 29 For Australia Channels 05 and 35 are reserved for Emergency Calls Select the desired channel Press the microphone s PTT button and speak normally into the microphone Hold it approx 7cm from your mouth Release the PTT button to end the transmission and listen for a reply Call Function Press the microphone CALL Bu...

Page 16: ...eaters are used to retransmit or relay your signal Repeaters will extend the range of your radio and overcome the shielding effect caused by solid obstructions In normal Simplex operation your radio transmits on one particular frequency and receives on that same frequency If there is a barrier that partially blocks your transmitted signal the probability of another radio receiving the signal is ve...

Page 17: ...ve on CH02 but Transmit on CH32 etc If you transmit on CH01 Duplex mode you are actually transmitting on CH31 the repeater station down coverts your signal and retransmits on CH01 Operating the UHF CB Radio in Duplex Mode For this example we are adopting CH01 as the channel being used in your area for repeater use 1 Press MENU ENTER The duplex setting flashes 2 Press to change the setting between ...

Page 18: ...ve you flexibility and allow you to use the radio more effectively Press SCAN OS GS and Scanning starts The SCAN icon appears The scan direction can be changed at any time by pressing Open Scan OS Mode Allows continuous scanning of all selected channels If an active channel is found scanning will stop on that channel If the received signal ceases the unit will wait 3 seconds for the signal to retu...

Page 19: ... Channel and p 20 to turn on Priority Watch To use GS Mode Scanning press and hold SCAN OS GS GS icon appears on the display GS Scanning checks the Instant Priority Channel for activity regularly when Priority Watch is ON If the Priority Channel becomes active the radio will stay on that channel for as long as the signal is present If the received signal ceases Priority Scanning continues after 3 ...

Page 20: ...l stay on that active channel If none of the channels are active the UHF CB Radio will reinstate the scan start channel NOTE If OS GS Scanning is initiated when there are no channels programmed in OS GS memory an error tone will be heard and scanning will not start see Programming Scan Channels below Add Remove Channels from SCAN Memory Select which Scanning Mode you wish to use OS or GS Select th...

Page 21: ...Radio will automatically exit the Menu Mode Busy Channel Lockout If the channel is already in use you can prevent the UHF CB Radio from transmitting This is particularly important when using CTCSS DCS 1 Press MENU ENTER four times The BCL setting flashes 2 Press to change the setting between ON or OFF 3 Press MENU ENTER to store the setting 4 Press and hold MENU ENTER to save exit from the menu mo...

Page 22: ...rom the menu mode NOTE If a button is not pressed within 10 seconds the UHF CB Radio will automatically exit the Menu Mode CTCSS Continuous Tone Coded Squelch System Press the desired channel to use CTCSS Press DCS CTCSS CTCSS icon flashes Press on the Remote SPK MIC to select the desired CTCSS code 01 38 Press DCS CTCSS once to store the new setting To turn off CTCSS or DCS select the oFF code du...

Page 23: ...8 followed by DCS 1 104 Follow the steps for setting a CTCSS code Press until the DCS codes appear Press DCS CTCSS to set The DCS icon and code will display Beep On Off 1 Press MENU ENTER six times The Beep setting flashes 2 Press to change the setting between ON or OFF 3 Press MENU ENTER to store the setting 4 Press and hold MENU ENTER to save exit from the menu mode UHF CB Transceiver ...

Page 24: ...ENU ENTER to store the setting 4 Press and hold MENU ENTER to save exit from the menu mode LCD Contrast 1 Press MENU ENTER eight times The LCD Contrast setting flashes 2 Press to change the setting between 01 low contrast to 10 high contrast 3 Press MENU ENTER to store the setting 4 Press and hold MENU ENTER to save exit from the menu mode UHF CB Transceiver ...

Page 25: ...71 9 22 141 3 3 74 4 23 146 2 4 77 0 24 151 4 5 79 7 25 156 7 6 82 5 26 162 2 7 85 4 27 167 9 8 88 5 28 173 8 9 91 5 29 179 9 10 94 8 30 186 2 11 97 4 31 192 8 12 100 0 32 203 5 13 103 5 33 210 7 14 107 2 34 218 1 15 110 9 35 225 7 16 114 8 36 223 6 17 118 8 37 241 8 18 123 0 38 250 3 19 127 3 UHF CB Transceiver ...

Page 26: ...06 12 065 47 263 82 516 13 071 48 265 83 523 14 072 49 266 84 526 15 073 50 271 85 532 16 074 51 274 86 546 17 114 52 306 87 565 18 115 53 311 88 606 19 116 54 315 89 612 20 122 55 325 90 624 21 125 56 331 91 627 22 131 57 332 92 631 23 132 58 343 93 632 24 134 59 346 94 654 25 143 60 351 95 662 26 145 61 356 96 664 27 152 62 364 97 703 28 155 63 365 98 712 29 156 64 371 99 723 30 162 65 411 100 7...

Page 27: ...his allows for additional channels to be added up to 80 Channels This simply means that the new narrowband radio you have purchased will have more channels than older radios Please refer to the guidelines above and the channel chart for further channel information A list of currently authorised channels can also be obtained from the ACMA website in Australia and the MED website in New Zealand Inte...

Page 28: ... 33 23 476 975 RX only 4 476 500 477 250 CH 34 24 477 000 5 476 525 477 275 CH 35 25 477 025 6 476 550 477 300 CH 36 26 477 050 7 476 575 477 325 CH 37 27 477 075 8 476 600 477 350 CH 38 28 477 100 9 476 625 29 477 125 10 476 650 30 477 150 11 476 675 31 477 175 12 476 700 32 477 200 13 476 725 33 477 225 14 476 750 34 477 250 15 476 775 35 477 275 16 476 800 36 477 300 17 476 825 37 477 325 18 47...

Page 29: ...uture use 476 9875 RX only 44 476 5125 477 2625 CH 74 64 477 0125 45 476 5375 477 2875 CH 75 65 477 0375 46 476 5625 477 3125 CH 76 66 477 0625 47 476 5875 477 3375 CH 77 67 477 0875 48 476 6125 477 3625 CH 78 68 477 1125 49 476 6375 69 477 1375 50 476 6625 70 477 1625 51 476 6875 71 477 1875 52 476 7125 72 477 2125 53 476 7375 73 477 2375 54 476 7625 74 477 2625 55 476 7875 75 477 2875 56 476 812...

Page 30: ...e original country of purchase for a Product first purchased either in Australia or New Zealand Product 5 Years Battery Pack Accessories 1 Year If a warranty claim is made this warranty will not apply if the Product is found by Uniden to be A Damaged or not maintained in a reasonable manner or as recommended in the relevant Uniden Owner s Manual B Modified altered or used as part of any conversion...

Page 31: ...your rights under either the COMPETITION AND CONSUMER ACT 2010 Australia or the CONSUMER GUARANTEES ACT New Zealand as the case may be none of which can be excluded Procedure for obtaining warranty service Depending on the country in which the Product was first purchased if you believe that your Product does not conform with this warranty you should deliver the Product together with satisfactory e...

Page 32: ...THANK YOU FOR BUYING A UNIDEN PRODUCT 2015 Uniden Australia Pty Limited Printed in Vietnam U01UT946AZZ 0 ...

Reviews: