background image

91

English

INITIALIZING THE CARD MEMORY 
AND INTERNAL MEMORY

A card must be formatted with this camera:

i

After purchasing, when used for the first time, or

i

If it was formatted using a personal computer or another digital camera.

The card cannot be reformatted if the lock switch is set to the “LOCK” 
position. Proceed with the reformat procedure after setting the lock switch to 
the unlocked position.

To reformat a card, install it in the camera. To reformat the camera’s 
internal memory, remove the card from the camera.

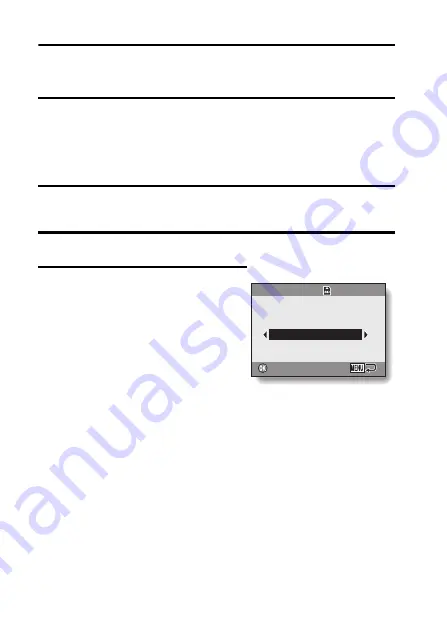
Display the Option Menu (page 78).

Select “FORMAT” and press the ok 
button.

h

The screen to begin formatting 
appears.

FORMAT:

A normal formatting is executed.

OK

OK

OK

FORMAT

(     CARD)

(     CARD)

(     CARD)

FORMAT

FORMAT

FORMAT

<With card installed>

Summary of Contents for SPECIFICATIONS

Page 1: ...lations on your purchase of the Uniden UDC 7M Digital Camera Please be sure to read this Instruction Manual before you begin using your camera Save this manual for future reference Review the separate booklet SAFETY MANUAL before operating your camera ...

Page 2: ...ular installation If this equipment does cause harmful interference to radio or television reception which can be determined by turning the equipment off and on the user is encouraged to try to correct the interference by one or more of the following measures h Reorient or relocate the receiving antenna h Increase the separation between the equipment and receiver h Connect the equipment into an ou...

Page 3: ...English ii kFOR CANADIAN USERS i This Class B digital apparatus complies with Canadian ICES 003 ...

Page 4: ...ill turn off when the battery pack is fully charged h Charging takes approximately 90 minutes 2 Open the battery card compartment cover and insert the battery pack h The battery card compartment cover is located on the side of the camera h Press the on off button to turn the camera on CHARGE indicator Uniden logo To power outlet o mark Socket Battery pack o mark on off button Uniden logo ...

Page 5: ...ss the shutter button Single shot mode A still image is captured Sequential shots mode Shooting begins Release the shutter button to discontinue shooting Video clip recording mode Recording begins To stop recording press the shutter button again Shutter button l or m button n button 6 c Single shot mode P Sequential shots mode t Video clip recording mode Shooting mode PHOTOGRAPH 1 IMAGE Single sho...

Page 6: ...ay switches to the Playback Screen h Press the l or m button to display the video clip you wish to play back h Video clips are indicated by a video clip pattern along the top and bottom of the screen 2 Press the ok button h Playback of the selected video clip begins h If the playback button is pressed again the display changes to the Shooting Screen When you are finished taking pictures Press the ...

Page 7: ... ON AND OFF 18 DATE AND TIME SETTING 20 BASIC OPERATION BEFORE TAKING PICTURES 23 CAPTURING AND PLAYING BACK STILL IMAGES 30 SHOOTING SEQUENTIAL SHOTS 37 VIDEO CLIP RECORDING AND PLAYBACK 38 USING THE SCENE FUNCTION 42 USING THE ZOOM 46 FLASH SETTING 47 SELF TIMER 49 FOCUS RANGE 51 SHOOTING ACCESSING THE RECORDING MENU 52 RESOLUTION VIDEO SIZE SETTING 55 FOCUS AREA SETTING 58 ISO SENSITIVITY 60 WH...

Page 8: ...MONITOR BRIGHTNESS 84 SCREEN LANGUAGE 85 TV SYSTEM SETTING 86 AUTO POWER OFF FUNCTION 87 FILE No RESET FUNCTION 88 INITIALIZING THE CARD MEMORY AND INTERNAL MEMORY 91 RESETTING THE CAMERA SETTINGS 93 CHECKING THE REMAINING INTERNAL MEMORY AND CARD MEMORY 94 CHECKING THE REMAINING BATTERY CHARGE 96 OTHER DEVICES AND CONNECTIONS CONNECTING TO A TV 98 CONNECTING TO A COMPUTER 99 DIRECT PRINTING 106 A...

Page 9: ...ed shooting Recording a video clip on page 38 Shooting single shots on page 30 SHOOTING SEQUENTIAL SHOTS on page 37 Log the date and time of your photos DATE AND TIME SETTING on page 20 Zoom in on the subject USING THE ZOOM on page 46 Close up photography FOCUS RANGE macro mode on page 51 For more accurate focus FOCUS RANGE manual focus on page 51 Set the focus to a narrow range FOCUS AREA SETTING...

Page 10: ...graphing people USING THE SCENE FUNCTION portrait mode night view portrait mode face chaser mode on page 42 FLASH SETTING red eye reduction on page 47 Photographing landscapes USING THE SCENE FUNCTION landscape mode on page 42 Take a self photo SELF TIMER on page 49 Make images lighter or darker EXPOSURE CORRECTION on page 62 Adjust the camera s sensitivity ISO SENSITIVITY on page 60 Change the co...

Page 11: ...wing still images on page 32 Search for image data 9 image display playback on page 33 Magnify an image Magnifying zooming in the image on page 34 Change the angle of view ROTATE IMAGE on page 67 Slideshow playback SLIDESHOW PLAYBACK on page 76 Adjust the monitor brightness ADJUST THE MONITOR BRIGHTNESS on page 84 Playback on a TV CONNECTING TO A TV for playback on page 98 Set the TV system TV SYS...

Page 12: ...ersa COPY DATA on page 70 Delete files Erasing files on page 35 Protect images from accidental erasure IMAGE PROTECT on page 66 Format a card INITIALIZING THE CARD MEMORY AND INTERNAL MEMORY on page 91 Specify the number of prints and date imprint PRINT SETTINGS on page 72 View the settings that were in effect when the image audio data was recorded DISPLAYING STILL IMAGE PROPERTIES on page 77 ...

Page 13: ... pack battery pack 1 i Lithium ion battery pack charger and power cord i Dedicated USB interface cable 1 i Dedicated video interface cable 1 i SAFETY MANUAL safety precautions booklet Please read this booklet carefully before using the digital camera i Wrist Strap 1 ...

Page 14: ... SD Memory Card i Multi Media Card What card means in this manual i In this manual SD Memory Cards and Multi Media Cards that can be used in this digital camera are referred to as card i The cards in the illustrations in this manual are SD Memory Cards but all installation and removal procedures are the same for both SD Memory Cards and Multi Media Cards ...

Page 15: ...tions and more k Abundant scene functions You can select from a variety of preset settings aperture shutter speed etc for specific shooting conditions k Speedy mode switching Switch the shooting mode from still images to video clips to sequential shots with a single button operation 12 9 AUTO AUTO AUTO Use auto settings Use auto settings Use auto settings VIDEO CLIP ...

Page 16: ...os to the computer s hard disk You can connect it to a printer for direct printing of your photos Or take the card to a photo shop to have your photos printed there Dedicated USB interface cable Dedicated videointerface cable Computer Printer TV Commercially available SD Memory Card Multi Media Card Internet i Card reader i DPOF compatible printer i Photo shop Battery charger supplied ...

Page 17: ...11 English SETUP PARTS NAMES Front Lens A V OUT terminal Self timer indicator Microphone DC IN terminal Flash on off button Shutter button ...

Page 18: ...r ok button Playback button Battery card compartment cover n button o button l button m button Strap holder Illumination sensor Detects the ambient brightness and automatically adjusts the brightness of the monitor accordingly Delete button menu button Speaker ...

Page 19: ...upplied power cord to the socket on the battery pack charger h Insert the connector straight and securely 3 Plug the power plug into a power outlet h Recharging begins h During recharge the CHARGE indicator is lit red 4 When the CHARGE indicator turns off unplug the power cord from the power outlet and remove the battery pack from the charger HINT i The recharge time is approx 90 minutes Uniden lo...

Page 20: ...te a malfunction If there is interference to your TV or radio during recharging i Move the battery pack and charger further away from the TV or radio Ambient temperature during recharging i It is recommended that the ambient temperature during recharging be between about 10 C and 35 C 50 F and 95 F Due to the characteristics of the battery pack at temperatures below 0 C 32 F it may not be possible...

Page 21: ...is turned off and it is therefore recommended that the battery pack be removed from the camera if it is not going to be used for a long time Note that when the battery pack is removed for a long period the time and date settings may be cleared Before using your camera again be sure to confirm that the camera settings are correct CHARGE indicator Not lit Not connected properly i To recharge the bat...

Page 22: ... correct h When inserting the battery pack be careful of the latch that secures it 1 2 4 3 Open battery card compartment cover on the side of the camera Insert the battery pack Insert all the way until it clicks 3Pull out 2 Push down then pull out 1 Open o mark Contact end 2 Press the latch down tor release the lock Battery pack Close the battery card compartment cover To remove the card Card 1 Op...

Page 23: ...il it is completely inserted or released i If you remove your finger too soon the card may spring out and become lost or hit someone in the eye HINT Shooting without a card installed i When a card is installed images are recorded to and played back from the card When no card is installed images are recorded to and played back from the camera s internal memory When the camera is turned on with no c...

Page 24: ...t was last turned off In the playback mode 1 Press the playback button for at least one second h The Playback Screen appears on the monitor pages 32 and 39 Turning off the camera 1 Press the on off button h The camera turns off If the camera was turned on by pressing the playback button h When the playback button or on off button is pressed the camera turns off Monitor on off button Playback butto...

Page 25: ... the on off button or the playback button to turn it back on i You can change the setting for the time elapsed before the camera automatically turns off page 87 i When the camera is connected to a computer or printer using the dedicated USB interface cable the auto power save function is disabled and the camera turns off after about 12 hours HINT If the K icon appears i When a picture is taken the...

Page 26: ...the m button h The Option Menu appears 3 Press the n or o button to select CLOCK SET and press the ok button or the m button h The Clock Set Screen appears h The current date and time settings are shown h Follow the procedures below to enable or disable the date display during playback to set the display format for the date and to set the date and time h To return to the Option Menu press the menu...

Page 27: ... button to change the time setting 4 Press the m button to select the Y M D indication 5 Press the n or o button to change the displayed date order h Press the o button to change the displayed date order as follows h Press the n button to change it in the reverse order OK 12 00 2006 12 24 OK OK OK Y M D CLOCK SET CLOCK SET CLOCK SET OK Y M D CLOCK SET CLOCK SET CLOCK SET OK OK OK 19 30 2006 12 24 ...

Page 28: ...attery will maintain the date and time settings However there is a small chance the settings may be lost The backup will last for about 7 days It is recommended to check that the date and time settings are still correct after replacing the battery pack and before shooting or recording of any type follow steps 1 to 3 To correct the date and time settings i In step 4 select the indication that you w...

Page 29: ...e sure that the lens and flash are not blocked by your fingers or the handstrap HINT i Images captured in the still image shooting mode can be rotated when they are played back page 67 i When the optical zoom is used or when the autofocus is operating the image may appear to waver but this is not a malfunction A finger is blocking the lens or flash Correct hold Incorrect hold ...

Page 30: ...ect focus The following examples are some of the situations where the autofocus function may not work i Subjects with low contrast very bright subjects at the center of the image or dark subjects or locations Use the focus lock function to lock the focus on an object with contrast at the same distance as the desired subject i Subjects without vertical lines Use the focus lock function to lock the ...

Page 31: ...r and far objects are present Use the focus lock function to lock the focus on an object at the same distance as the desired subject then reposition the camera to compose the picture i Fast moving subjects Use the focus lock function to lock the focus on an object at the same distance as the desired subject then reposition the camera to compose the picture ...

Page 32: ...ime the playback button is pressed the camera switches between the shooting mode and the playback mode HINT To turn the camera on in the playback mode i Press the playback button for at least 1 second and the camera will turn on in the playback mode 6 100 0001 2006 12 24 2006 12 24 2006 12 24 on off button Playback button Shooting mode Playback mode ...

Page 33: ... the on off button to turn the camera on 2 Press the n button h The screen to set the shooting mode and the self timer appears 3 Press the m button to select the shooting mode 4 Press the ok button h The selected shooting mode is set h An icon in the upper left area of the monitor indicates the active shooting mode setting 6 on off button n button ok button Shooting mode c Single shot mode P Seque...

Page 34: ...le you shoot or the normal display mode in which the setting indications are turned off providing a full view of the subject 1 Press the on off button to turn the camera on 2 Press the ok button h Each time the ok button is pressed the camera switches between the settings display mode and the normal display mode on off button ok button 6 Settings display mode Normal display mode ...

Page 35: ...mory or on the card installed in the camera i When a card is installed in the camera the data is recorded on the card If no card is installed the data is recorded in the camera s internal memory Taking pictures in backlight conditions i When taking pictures with the light coming from behind the subject due to the characteristics of the CCD light lines or ghost patterns flare phenomenon may appear ...

Page 36: ...equential shots please see page 37 Shooting single shots 1 Set the camera to the single shot mode page 27 2 Press the shutter button halfway h Engage the autofocus by pressing the shutter button halfway focus lock 3 Continue to gently press the shutter button all the way h Press the shutter button gently taking care not to move the camera h The image that was captured appears on the monitor as lon...

Page 37: ...to focus on you can refocus for example by changing the shooting angle i The large target mark appears when the camera focuses on a wide area in the center of the screen About the focus indicator i A green focus indicator appears when the subject is successfully focused or a red focus indicator when the camera was not able to focus the subject The shutter speed and aperture are displayed i The shu...

Page 38: ...ious or next image To display the previous image Press l To display the next image Press m h To return to Shooting Screen press the playback button If the camera was turned on by pressing the playback button h When the playback button or on off button is pressed the camera turns off When you are finished viewing images i Press the on off button to turn the camera off HINT For still images with voi...

Page 39: ...ve the orange frame to the desired image and press the ok button Instead of pressing the ok button you can press T on the zoom switch to show the image full screen 100 100 100 0001 0001 0001 0002 0002 0002 0003 0003 0003 0007 0007 0007 0008 0008 0008 0009 0009 0009 0005 0005 0005 0006 0006 0006 0004 0004 0004 ok button Zoom switch W T Orange frame Still image Image number Video clip Arrow buttons ...

Page 40: ...gnification increases with each press of T on the zoom switch To return to normal size Magnification decreases with each press of W P on the zoom switch h Press the ok button to return to the normal 100 view HINT The magnified portion of the image can be saved as a separate image i Press the shutter button The magnified portion is saved as a new still image OK 109 109 109 100 100 Move Move Press s...

Page 41: ...2 Set the camera to the playback mode and press the delete button h The Delete Screen appears ALL FILES Erases all the data 1 FILE Erases one file at a time 3 Delete the files To delete all the files 1 Use the l and m buttons to view the images and check if it is OK to delete all the files 2 Press the n or o button to select ALL FILES 3 Press the ok button h The Delete Confirmation Screen appears ...

Page 42: ...accidental erase cannot be erased To erase protected files set the protect setting for the file to off page 66 and then follow the file delete procedure HINT To quickly delete a still image immediately after capturing it direct delete i If you press the delete button while the post view image is displayed page 83 the image is immediately deleted still images only 1 While the post view image is bei...

Page 43: ...e subject h Note that if the shutter button is released during shooting shooting stops immediately HINT About the focus when shooting sequential shots i When sequential shots are captured the autofocus operates when the focus lock is activated fixing the focus Can the self timer and or flash be used i The self timer and flash do not operate when shooting sequential shots i The following scene func...

Page 44: ...ngth of the video clip and the remaining recording time available are shown on the monitor h It is not necessary to continue pressing the shutter button while shooting 3 End the recording h Press the shutter button again to stop recording and save the video clip 00 45 00 00 45 00 00 45 00 00 00 30 Shutter button Video clip recoding icon Recorded length time of video clip Remaining recording time a...

Page 45: ...yback button for at least 1 second h The video clip just recorded appears on the monitor h Video clips are indicated by a video clip pattern along the top and bottom of the screen 5 Press the ok button h Video clip playback begins h To stop playback press the o button 2006 12 24 2006 12 24 2006 12 24 101 0008 101 0008 101 0008 Playback button Video clip pattern o button ok button ...

Page 46: ...yback is paused press and hold the m button During reverse playback While playback is paused press and hold the l button To accelerate playback Forward playback During forward playback press the m button The playback speed changes each time the m button is pressed as follows Normal playback 2 5 10 15 Press the l button to resume normal playback speed Reverse playback During forward playback press ...

Page 47: ... for a video clip is very large i Therefore be aware that if the video clip is uploaded to a computer to be played back the computer may not be able to play back the video fast enough making it appear jerky The video will always be displayed properly on the monitor If video clip recording stops even when there is card memory remaining i Depending on the card you are using recording may stop even i...

Page 48: ...tting Features Shooting mode setting c P t X Auto The camera makes the optimum settings m m m Y Sports Capture a split second image of a fast moving subject m m m Z Portrait Enhance the three dimensional feel of the subject by blurring the background m m m Landscape For beautiful shots of distant scenery m n m Night view portrait Photograph the subject while keeping the background night scenery m ...

Page 49: ...vivid colors of flowers m m m a Still image with audio Shoot a still image and add a voice memo m n n q Blur reduction Minimize the effects of camera shake m m n k Snow beach For photographing bright scenes such as on a ski slope or at the beach m m m r Face chaser The subject s face is kept in focus and the exposure adjusted as the image is captured m m m 8 Monochrome Create black and white photo...

Page 50: ... shutter button to take the picture then speak into the microphone h During recording be careful not to obstruct the microphone with your fingers for example h Audio recording begins During recording the length of the audio track and the remaining recording time available are shown on the monitor h The maximum recording time for a voice memo is about 10 seconds h To end the recording before 10 sec...

Page 51: ...a searches for the subject s face When it detects the face an orange frame appears h Do not press the shutter button halfway until the orange frame appears The camera cannot search when the autofocus is activated 3 Press the shutter button halfway h The camera focuses on the subject and the exposure is adjusted h When the face is in focus the orange frame changes to green 4 Press the shutter butto...

Page 52: ...ly When T on the zoom switch is pressed again the mode changes to the digital zoom mode and zooming continues 3 Take the picture HINT Can t access the digital zoom i The digital zoom cannot be used when the face chaser r scene function is active or the focus mode is set to AF seeker p Can t access the optical zoom i When the focus range is set to pan o or during video clip recording the optical zo...

Page 53: ...sh only when required In a backlight situation if only the center of the image is very dark the flash will operate to compensate auto m The flash will operate with every image captured regardless of the conditions Use this setting under backlight conditions when the subject is in shade under fluorescent lighting conditions etc forced flash l The flash will not operate even in dark situations Use t...

Page 54: ... flash operates according to the selected mode HINT When auto is selected i The k icon indicating the flash setting is not shown on the Shooting Screen When auto or red eye reduction is selected i When the subject is in focus if the camera determines that the flash is necessary a k or J icon appearing on the monitor indicates that the flash will operate ...

Page 55: ... menu appears 2 Use the n and o buttons to select the desired self timer setting and press the ok button h The self timer is set and you are returned to the Shooting Screen y The image is captured about 2 seconds after the shutter button is pressed x The image is captured about 10 seconds after the shutter button is pressed Self timer menu n button 1 PHOTOGRAPH 1 IMAGE ...

Page 56: ... shutter button one more time to restart the self timer i To cancel self timer photography set the self timer setting to off c i After the self timer picture is snapped the self timer is automatically reset to off When x is selected i When the shutter button is pressed the self timer indicator flashes for approximately 10 seconds after which shooting begins i About 3 seconds before shooting the se...

Page 57: ...end o The focus operates within the ranges shown below pan Still image shooting i At maximum aperture 2 2 m 7 22 ft to i At minimum aperture 1 3 m 4 27 ft to Video clip recording i Wide end At maximum aperture 40 cm 15 75 in to At minimum aperture 30 cm 11 81 in to i Tele end At maximum aperture 1 7 m 5 58 ft to At minimum aperture 1 2 m 3 94 ft to 7 The camera automatically focuses on the subject...

Page 58: ...u 1 Set the camera to a shooting mode page 27 2 Press the menu button h The Recording Menu corresponding to the shooting mode set in step 1 appears h The Recording Menu can be canceled by pressing the menu button RESOLUTION FOCUS MODE ISO WHITE BALANCE EXPOSURE INSERT DATE ON IMAGE OFF RECORDING MENU menu button ...

Page 59: ...53 English ACCESSING THE RECORDING MENU Overview of the Recording Menu 1 2 3 4 5 6 RESOLUTION FOCUS MODE ISO WHITE BALANCE EXPOSURE INSERT DATE ON IMAGE OFF RECORDING MENU ...

Page 60: ...2 2 304 pixels f Shoot at 2 592 1 944 pixels g Shoot at 2 048 1 536 pixels h Shoot at 1 024 768 pixels Shoot at 640 480 pixels Video clip recording mode d Shoot at 640 480 pixels 5 Shoot at 320 240 pixels e Shoot at 160 120 pixels Make an audio recording page 56 B 9 point focus mode C Spot focus mode p The focus follows the focus locked subject t Sets the ISO sensitivity automatically corresponds ...

Page 61: ...n the video clip recording mode select CLIP SIZE and press the ok button h The resolution menu or video size menu appears Single shot sequential shots mode Video clip recording mode 3 Select the desired icon and press the ok button h The selected resolution setting or video size setting is set n Shoot image at 3 072 2 304 pixels f Shoot image at 2 592 1 944 pixels g Shoot image at 2 048 1 536 pixe...

Page 62: ... button 3 Press the menu button h The recording mode is enabled 4 Press the shutter button h Audio recording begins During recording the length of the audio track and the remaining recording time available are shown on the monitor h It is not necessary to continue pressing the shutter button while recording h Take care not to cover the microphone with your fingers 5 End the recording h Press the s...

Page 63: ...During fast forward or fast reverse press the n button Fast forward During forward playback press the m button The speed changes each time the m button is pressed as follows Normal playback 2 5 10 15 Press the l button to resume normal speed Fast reverse During forward playback press the l button The speed changes each time the l button is pressed as follows 15 10 5 Press the m button to resume no...

Page 64: ...nitor AF seeker Once the focus is locked on a subject page 30 it follows the subject The focus point automatically changes to remain continuously focused on a moving subject 1 Display the Recording Menu page 52 2 Select FOCUS MODE and press the ok button h The focus mode menu appears B 9 point range finder focus is selected page 31 C Spot focus is selected p AF seeker is selected h When the C or p...

Page 65: ... activated the seeker mark appears on the focused subject i During focus lock even if the focused subject moves the seeker mark automatically follows the subject i If the camera loses the focus lock on the subject the seeker mark disappears i In dark environments the seeker mark may follow the subject more slowly i When the p setting is selected the digital zoom is not available 1 60 1 60 1 60 F3 ...

Page 66: ...t ISO and press the ok button h The ISO sensitivity menu appears 3 Select the desired icon and press the ok button h The ISO sensitivity is set HINT i By setting a higher ISO sensitivity you can set higher shutter speeds and capture images in darker locations but noise in the captured images may increase t Sets the ISO sensitivity automatically Sets the sensitivity to ISO50 equivalent u Sets the s...

Page 67: ...e balance To use any of the other white balance settings proceed to step 3 3 Select the desired icon and press the menu button h This completes the white balance setting HINT To cancel the white balance setting i Perform steps 1 and 2 select and then press the menu button The camera will make the white balance adjustment automatically based on the natural and artificial light conditions This is th...

Page 68: ...ing Menu page 52 2 Select EXPOSURE and press the ok button h The screen to adjust the exposure appears 3 Use the n and o buttons to select the desired exposure numerical value and press the ok button h The specified exposure is set and you are returned to the Recording Menu HINT i The exposure correction setting returns to 0 after the camera is turned off ...

Page 69: ...n to select the desired setting and press the ok button h The date imprint mode is set and you are returned to the Recording Menu HINT About the capture date and date imprinting i When an image is edited the date of the image file changes to the date and time the image was edited However the imprinted capture date remains unchanged Is the sequential shots speed slow i When the date imprint mode is...

Page 70: ...s playback settings 1 Press the playback button h The display changes to the Playback Screen 2 Press the menu button h The Playback Menu appears h The Playback Menu is canceled when the menu button is pressed Playback button menu button PROTECT ROTATE CONTRAST CORRECT FILE COPY PRINT INSTRUCTIONS SLIDESHOW PLAYBACK MENU ...

Page 71: ...ntrast correction page 68 h Add contrast light and dark to the image to make it clearer 4 File copy page 70 h Copy files from the card to the internal memory or vice versa 5 Print instructions page 72 h Specify the print settings 6 Slideshow page 76 h Play back the images in a slideshow format 1 2 3 4 5 6 PROTECT ROTATE CONTRAST CORRECT SLIDESHOW PRINT INSTRUCTIONS FILE COPY PLAYBACK MENU ...

Page 72: ...protect mode is set for the data h The protect mark B indicates that the data is locked CAUTION i Even if the protect mode is set for certain data files they will be erased if the card is reformatted page 91 HINT To select a different image in steps 2 and 3 i Press the l or m button To cancel the protect mode for an image i Display the desired data and repeat steps 1 to 3 Lock the file Lock the fi...

Page 73: ...ress the ok button h The screen to rotate the image appears 3 Select YES and press the ok button h Each time the ok button is pressed the image is rotated another 90 degrees HINT i On the 9 image display playback rotated images are shown in their original orientation i An image for which the protect locked mode has been set cannot be rotated Rotate image Rotate image Rotate image YES OK OK OK EXIT...

Page 74: ...ion Screen appears YES Proceed with the contrast correction EXIT Return to the Playback Menu 3 Select YES and press the ok button h Image processing begins h During image processing Processing is shown on the screen h When processing is completed the modified image is shown Check the image to see if the post processing result is satisfactory EXIT YES OK OK OK Autocorrect Autocorrect the contrast t...

Page 75: ...he modified image is saved 5 Select the desired method to save the modified image and press the ok button h The modified image is saved and you are returned to the Contrast Correction Screen HINT Concerning the date and time information for the modified image i The date display that is shown when an edited image is played back is the date that the image was saved after it was modified Can t overwr...

Page 76: ...Display the Playback Menu page 64 3 Select FILE COPY and press the ok button h The screen to copy files appears 4 Select the copy direction INT MEM CARD Copy image data from the internal memory to the card CARD INT MEM Copy image data from the card to the internal memory If no card is set in the camera you cannot copy data OK OK OK INT MEM CARD CARD INT MEM Copy file Copy file Copy file ...

Page 77: ...e to the copy destination EXIT You are returned to the screen to copy files step 3 6 Select the desired type of copy When selecting COPY SINGLE 1 Press the l or m button to display the image you wish to copy 2 Press the n or o button to select COPY SINGLE When selecting COPY ALL 1 Press the n or o button to select COPY ALL 7 Press the ok button h The files are copied COPY ALL COPY SINGLE CARD CARD...

Page 78: ...rint settings apply to all the still images on the card ALL CLEAR Clear all the print settings HINT About the DPOF format i DPOF Digital Print Order Format is a print order format You can connect your camera to a DPOF compatible printer to produce your prints You can also set the print settings page 111 for the desired images and then have the reserved images printed automatically About the finish...

Page 79: ...et print settings are applied to all the still images on the card 3 Press the ok button h The Date Copies Print Screen appears h If EACH IMAGE was selected press the l or m button to display the desired image to print h The print settings for the currently displayed image are shown in the upper left area of the monitor You can press the l or m button to confirm the print settings for each image Sp...

Page 80: ...ated prints h Press W on the zoom switch to add a check mark next to 5 Press the ok button h This completes the settings for the number of prints and date imprinting h If you press the menu button you are returned to the screen to set the print settings step 1 CAUTION i Do not specify dated prints for images that were captured with the date imprint function page 63 set to ON or else the date will ...

Page 81: ...ll Clear Screen appears YES Clear the print settings for all images EXIT Cancel the clear procedure and return to the screen to set the print settings 4 Select YES and press the ok button h All the print settings are cleared and you are returned to the Playback Menu OK Specify the printing Specify the printing instructions instructions Specify the printing instructions EACH IMAGE ALL IMAGES ALL CL...

Page 82: ...on h Slideshow playback starts h To stop slideshow playback press the ok button or menu button HINT i Audio data is not played during slideshow playback TIME Adjust the transition speed the period that an image is displayed before it changes to the next image EFFECT Select a transition effect as an image changes to the next image BGM Specify the settings for playing background music during slidesh...

Page 83: ...k button h The Information Screen appears h If the ok button is pressed again the Information Screen is canceled 1 Resolution setting 2 Resolution 3 Scene function setting 4 Image number 5 Protect setting 6 File size 7 Aperture value 8 Shutter speed 9 Exposure correction setting 0 Remaining battery power 100 0004 1 2 4 5 6 7 8 9 3 INFO 3072 2304 SIZE IRIS SHUTTER 1836KB F3 1 1 30 EXPOSE 0 ...

Page 84: ...yback Menu see page 64 2 Press the n or o button to select the option tab 3 h The Option Menu appears To exit the Option Menu To return to the Shooting Screen or Playback Screen Press the menu button To return to the Recording Menu or the Playback Menu With the option tab 3 selected press the n or o button 3sec CLOCK SET SOUND POST VIEW BRIGHTNESS LANGUAGE TV SYSTEM OPTION MENU 1 2 ...

Page 85: ...glish DISPLAYING THE OPTION MENU Overview of the Option Menu 1 2 3 4 5 6 7 8 9 AUTO POWER OFF FILE NO RESET FORMAT RESET SETTINGS CLOCK SET SOUND POST VIEW 3sec BRIGHTNESS LANGUAGE TV SYSTEM OPTION MENU 1 2 ...

Page 86: ...ages are displayed 6 TV system setting page 86 h Select the type of TV signal that is output from the camera s A V OUT terminal 7 Auto power off page 87 h Specify the time elapsed before the auto power off function operates to turn the camera off 8 File number reset page 88 h Set the file number reset function to ON or OFF 9 Format page 91 h Reformat the camera s internal memory or the card instal...

Page 87: ...URN ON OFF Mute or enable the sound that is produced when the camera is turned on or off SHUTTER Select the sound that is produced when the shutter button is pressed KEY SW Select the sound that is produced when a camera button ok button menu button etc is pressed PLAY VOLUME Adjust the volume for playing back video clips and audio files OK OK OK OPERATION VOL TURN ON OFF SHUTTER KEY SW PLAY VOLUM...

Page 88: ... each operation sound appears ON Activates the sound OFF Deactivates the sound If OPERATION VOL or PLAY VOLUME is selected h The screen to select the volume setting appears h You can select a volume setting from 1 minimum to 5 maximum h If OFF is selected no sound is produced 5 Press the ok button h The sound settings are completed h To return to the Option Menu press the menu button ...

Page 89: ...ay the Option Menu page 78 2 Select POST VIEW and press the ok button h The Post View Menu appears h When OFF is selected the post view image is not displayed 3 Select the desired setting and press the ok button h This completes the post view setting 2sec 3sec 1sec 4sec 5sec OFF CLOCK SET SOUND POST VIEW BRIGHTNESS LANGUAGE TV SYSTEM OPTION MENU 1 2 ...

Page 90: ...u page 78 2 Select BRIGHTNESS and press the ok button h The Monitor Brightness Menu appears h When set to AUTO the illumination sensor page 12 detects the ambient brightness and automatically adjusts the brightness of the monitor accordingly 3 Select the desired setting and press the ok button h This completes the monitor brightness setting 2 1 0 1 2 OPTION MENU 1 2 0 BRIGHTNESS ...

Page 91: ...everal languages 1 Display the Option Menu page 78 2 Select LANGUAGE and press the ok button h The screen to select the display language appears 3 Select the desired language and press the ok button h The selected display language is set LANGUAGE LANGUAGE OK LANGUAGE LANGUAGE LANGUAGE LANGUAGE LANGUAGE OK ...

Page 92: ...ton h The TV System Menu appears NTSC Outputs NTSC video signals PAL Outputs PAL video signals 3 Select the desired setting and press the ok button h The selected TV system is set HINT If no image appears on the TV i If the TV system setting is not correct for the connected equipment no image will appear on the TV CLOCK SET SOUND POST VIEW BRIGHTNESS LANGUAGE TV SYSTEM OPTION MENU 1 2 ...

Page 93: ...on Menu page 78 2 Select AUTO POWER OFF and press the ok button h The screen to set the standby time appears RECORDING Set the standby time for the shooting mode PLAYBACK Set the standby time for the playback mode 3 Select the desired option and press the ok button h The Standby Time Menu appears 4 Press the n or o button to select the standby time 5 Press the ok button h The auto power off functi...

Page 94: ...onsequently it results in more than one card containing images with the same numbers By setting the file number reset function to OFF even if the card is reformatted or the card is replaced with another card the consecutive numbering of file names continues from the last number recorded by the camera File number reset function ON File number reset function OFF File name image number Card A 0001 00...

Page 95: ...on Card A When the highest image number on Card B before replacing is higher than the highest image number on Card A the file name of the next recorded image continues from last file name recorded on Card B HINT What about the internal memory i The file number reset function works the same for the internal memory Card A 0001 0002 0012 0013 Card B 0001 0002 0014 0015 0025 0026 Previously recorded i...

Page 96: ...er reset function is OFF 3 Select OFF and press the ok button h The file number reset function was set to OFF HINT i Until the file number reset function is turned ON consecutive file names are assigned It is recommended that the file number reset function be returned to ON at the end of each photography session AUTO POWER OFF FILE NO RESET FORMAT RESET SETTINGS OPTION MENU 2 2 ON OFF ...

Page 97: ... switch is set to the LOCK position Proceed with the reformat procedure after setting the lock switch to the unlocked position 1 To reformat a card install it in the camera To reformat the camera s internal memory remove the card from the camera 2 Display the Option Menu page 78 3 Select FORMAT and press the ok button h The screen to begin formatting appears FORMAT A normal formatting is executed ...

Page 98: ...efore reformatting a card any data you want to keep should be copied to your personal computer s hard disk or other storage medium Caution regarding disposing transferring the card recovering data from a reformatted card i If a card is reformatted or the data is erased from the card using the camera or a computer the card s control data may be merely modified and the data itself may not be complet...

Page 99: ...to the factory preset settings NO Do not change the settings and return to the Option Menu 3 Select YES and press the ok button h The camera settings are reset to the factory preset settings HINT i Note that the following settings do not change with this procedure Date and time setting Language setting TV system setting File No reset setting AUTO POWER OFF FILE NO RESET FORMAT RESET SETTINGS OPTIO...

Page 100: ...age 131 1 Press the on off button to turn the camera on To check the remaining number of still images Set the shooting mode to the single shot or sequential shots mode page 27 To check the remaining video clip recording time Set the shooting mode to the video clip recording mode page 27 h The remaining recording time is shown on the monitor h The remaining number of images and video recording time...

Page 101: ...l a new card or save the images to a computer and then erase them page 35 from the card i When the remaining number of images or the remaining video recording time is 0 it may be possible to capture a few more images by changing the resolution setting or video clip mode setting page 55 i The maximum number of images is 9 999 and the maximum video audio recording time is 99 59 59 Note that if a lar...

Page 102: ...e ambient temperature is low may appear early for an incorrect indication of the remaining charge Also depending on the conditions of use of the camera or the ambient conditions temperature etc the indicated remaining charge may change Therefore this indication can only be used as a general approximation of the remaining charge Battery pack remaining charge indicator Battery remaining charge No in...

Page 103: ...or the ambient temperature temperatures below 10 C 50 F the number of images that can be saved on a fully charged battery pack will vary greatly i It is recommended that you prepare an extra battery pack s when taking pictures at a wedding or while traveling for example so you don t miss capturing images of important moments due to the battery pack power running out The same is recommended for tak...

Page 104: ... with the camera is used to play back voice memos and audio recordings as well Voice memo playback see page 32 Audio playback see page 57 CAUTION Insert and pull out the cable carefully i When connecting the cables make sure that the cable plugs are correctly oriented and that they match the shapes of the terminal sockets on the devices Push the plugs in straight when connecting them If undue forc...

Page 105: ...equired Correct operation cannot be guaranteed for models with upgraded Windows systems Macintosh A model with a standard equipped USB port and preinstalled with Mac OS 9 0 9 1 9 2 Mac OS X 10 1 or later is required Data file formats The format of the files saved on the card and the method in which the file names are determined are explained below Consecutive numbers assigned in the order the data...

Page 106: ...e URL may change About file names when the card is replaced i If the file number reset function is set to off even when the card is replaced consecutive numbering of folder numbers and file names continues from the previously installed card see page 92 CAUTION If you intend to view the images on the camera do not use a computer to rewrite the card data i If the folders file names or their configur...

Page 107: ... to the computer h Connect the camera s USB VIDEO terminal to the computer s USB connector h The USB Connection Screen appears on the camera s monitor CARD READER PictBridge CANCEL SELECT SELECT OK OK OK SELECT USB CONNECTION USB CONNECTION USB CONNECTION To USB connector on the computer Supplied dedicated USB interface cable To the A V OUT terminal ...

Page 108: ...e terminal sockets on the devices Push the plugs in straight when connecting them If undue force is used to connect a cable it may permanently damage the connector pins in the terminal socket i Do not use excessive force when connecting and disconnecting cables i Please connect the dedicated USB interface cable to your computer s USB connector Do not connect it to the USB port on your monitor or k...

Page 109: ...rent on your computer 2 Select an action h Select the desired procedure from the UDC 7M E window Dismounting the camera CAUTION i To disconnect your camera be sure to follow the procedure below Failure to follow this procedure may cause faulty operation of your computer or loss of card data 1 Left click on the icon for safely removing hardware h A list appears showing the devices connected to the ...

Page 110: ...talled in your camera exactly like you would the data in the other computer drives Dismounting the camera CAUTION i To disconnect your camera be sure to follow the procedure below Failure to follow this procedure may cause faulty operation of your computer or loss of card data 1 Left click on Unplug or Eject Hardware in the task tray h A list appears showing the devices connected to the computer s...

Page 111: ...other computer drives Dismounting the camera CAUTION i To disconnect your camera be sure to follow the procedure below Failure to follow this procedure may cause faulty operation of your computer or loss of card data 1 Drag the Untitled icon for your camera on the Desktop to the trashcan h The Untitled icon disappears from the Desktop h You can now disconnect your camera For Mac OS X users Use the...

Page 112: ...ining the images you wish to print in the camera 2 Turn the printer on use the supplied USB interface cable to connect the camera to the printer h Connect the camera s A V OUT terminal to the printer s USB connector h The USB Connection Screen appears on the camera s monitor OK OK OK SELECT SELECT SELECT CARD READER PictBridge CANCEL USB CONNECTION USB CONNECTION USB CONNECTION Supplied dedicated ...

Page 113: ...ion response is slower i If the camera is powered by the battery pack for printing make sure that the remaining battery charge is sufficient Insert and pull out the cable carefully i When connecting the cables make sure that the cable plugs are correctly oriented and that they match the shapes of the terminal sockets on the devices Push the plugs in straight when connecting them If undue force is ...

Page 114: ...elected image Procedure to select one still image and print it 1 Complete the printing setup page 106 2 Press the l or m button h Display the image you wish to print 1 1 DATE DATE DATE PRINT PRINT PRINT Print this image Print this image Print this image ...

Page 115: ...rk next to 4 Press the ok button h Printing begins HINT To cancel printing 1 During printing press the o button h The Confirm Cancel Printing Screen appears 2 Select YES and press the ok button h If EXIT is selected and the ok button is pressed printing resumes CAUTION i Do not specify dated prints for images that were captured with the date imprint function page 63 set to ON or else the date will...

Page 116: ...s h Press the n or o button to specify the number of prints h Press the n or o button until the desired number of prints is displayed Specifying dated prints h Press W on the zoom switch to add a check mark next to 5 Press the ok button h Printing begins CAUTION Printing is not possible if there are more than 999 still images in the card or internal memory i Delete unwanted images before printing ...

Page 117: ... image that is set to print page 72 is displayed 4 Press the ok button h Printing begins h Printing begins about 1 minute after the ok button is pressed HINT i In step 3 if you press the l or m button you can confirm the images that are set to print and their DPOF settings CAUTION i Reserved images printing is not possible if a printer is used that does not support your camera s DPOF function i Mu...

Page 118: ...dge Menu appears 3 Select the printer settings tab v and press the ok button h The Printer Settings Menu appears DATE STAMP Print the date the photo was taken MEDIA TYPE Specify the type of paper used for printing PAPER SIZE Specify the size of paper used for printing LAYOUT Specify how the images are to be arranged on the paper QUALITY Select the print quality for the images ON VALUES VALUES VALU...

Page 119: ... parameters as desired h The contents of the settings that can be made for each parameter will differ depending on the printer When V VALUES is selected h The images will be printed according to the settings specified on the printer side HINT i The parameters that are displayed on the Printer Settings Menu will differ depending on the printer that is connected i To use printer functions which do n...

Page 120: ... it up before using it Why is the battery pack consumed so quickly The ambient temperature is very low Keep the battery pack in an environment of 10 to 40 C 50 to 104 F The battery pack life has expired Replace with a new battery pack Why does the icon appear The remaining battery pack power is low Recharge the battery pack Shooting Why doesn t the flash operate The camera has determined that the ...

Page 121: ...tter size or larger and for printing a close up of part of a photo trimming g For printing standard photo photo service sizes h For photos displayed on a web page or sent as e mail attachments What is the difference between the digital zoom and the optical zoom Because shooting with the optical zoom uses the optics of a physical lens you can shoot without losing minute details in the image The dig...

Page 122: ...itor When used in cold weather why does the image seem to leave traces as it moves Condition due to the liquid crystals Not a malfunction Spots that appear in the monitor only appear in the monitor and will not be recorded with the images Why does the displayed image contain some red blue and green dots or why are black spots visible Question Answer Action ...

Page 123: ...a correctly and when the image is locked in focus gently press the shutter button all the way to capture the image Why is there no image z is shown This may happen when trying to play back images stored on a card from a different digital camera Play back images that were recorded on a card using this camera Why do vertical stripes appear If a bright subject is shot in the video clip recording mode...

Page 124: ...te playback of data that has been edited using a computer Printing Why does a message appear during PictBridge printing There is a problem with the printer Please refer to the instruction manual for your printer Misc Why does the Card full or Internal memory full message appear There is no more available memory on the card or in the camera s internal memory Erase unnecessary data or use a card tha...

Page 125: ...hould purchase the necessary power outlet plug adaptors for the countries in which the battery charger will be used Please note that product support may not be available abroad Why does the System error message appear A problem has occurred within the camera or card Check the following items 1 Remove the card and then install it again 2 Remove the battery pack and then install them again 3 Install...

Page 126: ...ck is dead Recharge the battery pack 13 The battery pack has not been inserted correctly Reinsert the battery pack making sure to orient them correctly 16 The camera turns off by itself The power save function is operating Not a malfunction 19 Shooting An image is not captured when the shutter button is pressed The power is not turned on Press the on off button to turn the camera on before taking ...

Page 127: ...6 Erase the images that are not necessary Save the images to separate media then erase all the images from the card 35 91 The flash does not operate The flash off mode is selected Set the flash to automatic flash mode or forced flash mode 47 The battery pack is dead Recharge the battery pack 13 The Battery depleted message appears The battery pack is consumed Recharge the battery pack 13 Problem C...

Page 128: ...sensitivity setting is too high Set the ISO sensitivity to a lower setting 60 Monitor No playback image appears The playback mode is not active Press the playbackbutton 26 Viewing images The image is too dark The flash was blocked by a finger or other object Hold the camera correctly and make sure the flash is not obstructed 23 The subject was too far away Capture the image in the range of operati...

Page 129: ...47 The subject was too bright Use the exposure correction function 62 The ISO sensitivity setting is incorrect Set the ISO sensitivity to t 60 The image is not in focus The subject is too close to the camera Select the correct focus setting for your needs 30 51 The focus setting is not correct The camera moved when the shutter button was pressed Hold the camera correctly and press the shutter butt...

Page 130: ...er capturing images 30 32 Image editing You cannot edit or rotate an image The protect mode is set Cancel the protect mode 66 Misc The Image is protected message appears and the data cannot be erased You have attempted to erase data that is protected from accidental erasure Set the protect setting for the data to UNLOCK 66 The recording capacity is less than that indicated in the section Possible ...

Page 131: ...ng single shots The macro focus range setting is not available The macro focus range setting is not available The flash is disabled even when shooting single shots The AF seeker p focus mode setting is not available The distant and pan o focus range settings are not available r The pan o macro and distant focus range settings are not available The AF seeker p focus mode setting is not available ...

Page 132: ...digital photography devices for the images stored on removable memory cards However it is not guaranteed that all devices will support the DCF standard Video clips QuickTime Movie Photo JPEG Audio recordings WAVE format monaural Data storage media Internal memory Approx 23 MB External memory SD Memory Card equivalent to a 4 GB SDHC memory card Multi Media Card Camera effective number of pixels App...

Page 133: ...15 frames second e 160 120 pixels 15 frames second White balance Full auto TTL manual setting possible Lens 3 0 optical zoom lens f 6 3 mm to 18 9 mm 35 mm film camera conversion 38 mm to 114 mm Autofocus 5 groups 6 elements 6 with aspheric surfaces Aperture Open F 3 1 Wide to 5 9 Tele Exposure control type Programmable AE Exposure correction available from the Recording Menu 0 2 0 EV in 1 3 EV st...

Page 134: ... to fireworks etc During flash 1 30 to 1 2 000 sec Sequential shots mode 1 2 to 1 2 000 sec Video clip recording mode 1 30 to 1 10 000 sec Sensitivity Single shot mode sequential shots mode Auto equivalent to ISO50 to 400 equivalent to ISO50 ISO100 ISO200 ISO400 and ISO800 switchable from Recording Menu Maximum sensitivity equivalent to ISO3 200 when the scene function is set to _ Video clip recor...

Page 135: ...cus AF seeker Self timer Approx 2 second delay 10 second delay Ambient environment Temperature 0 to 40 C 32 to 104 F operation 20 to 60 C 4 to 140 F storage Humidity 30 to 85 operating no condensation 10 to 90 storage no condensation Power supply Battery pack Lithium ion battery pack BT 1003 1 Dimensions at narrowest part not including protrusions 91 0 W 55 5 H 21 1 D mm 3 58 W 2 19 H 0 83 D Weigh...

Page 136: ...ated regrouped jack Audio output 880 mVrms 1 1 dBs 2 2 kΩ or less monaural Video output 1 0 Vp p 75 Ω unbalanced sync negative composite video NTSC color TV system PAL TV system switchable from the Option Menu USB USB 2 0 Full Speed DC IN external DC power input terminal DC 5 V 2A or more EIAJ type 2 The battery pack cannot be recharged while it is installed in the camera Shooting Still image shoo...

Page 137: ...ata that can actually be stored may differ depending on the card brand etc i The continuous shooting time for each video clip will differ depending for example on the card capacity environmental conditions temperature and shooting conditions etc Shooting mode setting Resolution setting Internal memory SD Memory Card 512 MB 4 GB Still image shooting mode n 10 images 213 images 1 700 images f 14 ima...

Page 138: ...y pack BT 1003 Ambient environment Temperature 0 to 40 C 32 to 104 F recharge 20 to 60 C 4 to 140 F storage Humidity 20 to 80 no condensation Dimensions 46 W 21 2 H 91 D mm 1 81 W 0 83 H 3 58 D Weight Approx 55 g 1 9 oz not including power cord Power cord rated value Fro North America AC 125 V 3 A For Australia AC 250 V 2 5 A Part No BT 1003 Voltage 3 7 V Rated output 720 mAh Ambient environment T...

Page 139: ...from the contents of this manual i Uniden Corporation shall not be held responsible for any problems resulting from the use of this camera i Uniden Corporation declines all responsibility for damages due to improper use of the camera failure to adhere to the instructions given in this manual or repairs or changes done by those other than a technician authorized by the manufacturer i Uniden Corpora...

Page 140: ......

Reviews: