background image

Operation

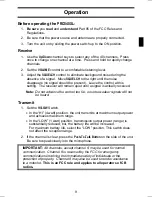
Before operating the PRO340XL:

1. Be sure you read and understand Part 95 of the FCC Rules and

Regulations.

2. Be sure that the power source and antenna are properly connected.

3. Turn the unit on by sliding the power switch up to the ON position.

Receive

1. Use the Up/Down channel keys to select any of the 40 channels.  Press

once to change one channel at a time.  Press and hold to rapidly change
channels.

2. Set the VOLUME control to a comfortable listening level.

3. Adjust the SQUELCH control to eliminate background noise during the

absence of a signal.  Move SQUELCH 

to the right

 until the noise

disappears (no signal should be present).  Leave the control at this
setting.  The receiver will remain quiet until a signal is actually received.

Note:

Do not advance the control too far, or some weaker signals will not
be heard.

Transmit

1. Set the HI/LOW Switch.

In the “HI” (4 watt) position, the unit transmits at maximum output power
and achieves maximum range.

In the “LOW” (1 watt) position, transmission output power (range) is
substantially reduced; but, the battery life will be increased. 
For maximum battery life

,

 select the “LOW” position. This switch does

not affect the reception range.

2. If the channel is clear, press the Push-To-Talk Button on the side of the unit.

Be sure to speak clearly into the microphone.

IMPORTANT: 

All channels, except channel 9, may be used for normal

communication.  Channel 9 is reserved by the FCC for emergency
communications involving the immediate safety of individuals or the
protection of property.  Channel 9 may also be used to render assistance
to a motorist.

  This is an FCC rule and applies to all operators of CB

radios.

9

Summary of Contents for PRO340XL

Page 1: ...eral Communications Commission FCC Any adjustments or alterations which alter the performance of the transceiver s original FCC type acceptance or change the frequency determining method are strictly...

Page 2: ...Product Registration Card In Operating Guide If any items are missing or damaged contact your place of purchase immediately Be sure to complete and mail in the Product Registration Card WARNING Do not...

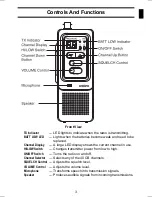
Page 3: ...ge LED display shows the current channel in use HI LOW Switch Changes transmitter power from low to high ON OFF Switch Turns the radio on and off Channel Selector Selects any of the 40 CB channels SQU...

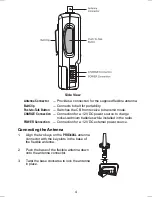
Page 4: ...on for a 12V DC power source to charge nickel cadmium batteries while installed in the radio POWER Connection Connection for a 12V DC external power source Connecting the Antenna 1 Align the two keys...

Page 5: ...garette lighter power cord when connected to a vehicle s 12 volt negative ground power system Installing Batteries WARNING Do not mix alkaline batteries with nickel cadmium batteries Alkaline Batterie...

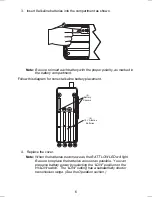
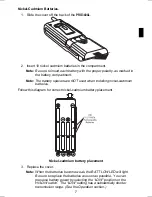
Page 6: ...ect alkaline battery placement 4 Replace the cover Note When the batteries become weak the BATT LOW LED will light Be sure to replace the batteries as soon as possible You can preserve battery power b...

Page 7: ...OT used when installing nickel cadmium batteries Follow this diagram for correct nickel cadmium battery placement Nickel cadmium battery placement 3 Replace the cover Note When the batteries become we...

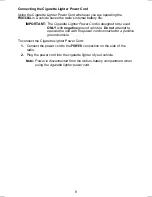
Page 8: ...o be used ONLY with negative ground vehicles Do not attempt to operate the unit with the power cord connected to a positive ground vehicle To connect the Cigarette Lighter Power Cord 1 Connect the pow...

Page 9: ...is actually received Note Do not advance the control too far or some weaker signals will not be heard Transmit 1 Set the HI LOW Switch In the HI 4 watt position the unit transmits at maximum output po...

Page 10: ...internal components Replacing the Cigarette Lighter Plug Fuse The cigarette lighter plug contains a 2 ampere fuse to protect it from power surges To replace a blown fuse 1 Squeeze the two metal conta...

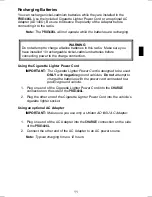
Page 11: ...g the Cigarette Lighter Power Cord IMPORTANT The Cigarette Lighter Power Cord is designed to be used ONLY with negative ground vehicles Do not attempt to charge the batteries with the power cord conne...

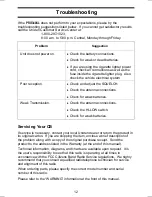
Page 12: ...connections Check the HI LOW switch Check for weak batteries Servicing Your CB If service is necessary contact your local Uniden dealer or return the product in its original carton If you are shippin...

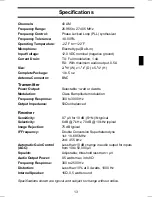
Page 13: ...odulation Class B amplitude modulation Frequency Response 300 to 3000 Hz Output Impedance 50 unbalanced Receiver Sensitivity 0 7 V for 10 dB S N N typical Selectivity 6 dB 7 kHz 70 dB 10 kHz typical I...

Page 14: ...PRO340XL Citizens Band Radio OPERATING GUIDE...

Page 15: ...3 Connecting the Antenna 4 Power 5 Installing Batteries 5 Alkaline Batteries 5 Nickel Cadmium Batteries 7 Connecting the Cigarette Lighter Power Cord 8 Operation 9 Before operating the PRO340XL 9 Rece...

Page 16: ...handling incurred by warrantor or its representatives in connection with the performance of this warranty THE LIMITED WARRANTY SET FORTH ABOVE IS THE SOLE AND ENTIRE WARRANTY PERTAINING TO THE PRODUC...

Page 17: ...1994 Uniden America Corporation All rights reserved UTUD01347ZZ Printed in the Philippines...

Reviews: