background image

CO

NT

EN

TS

OF

YOUR

OW

NER’S

M

ANU

AL

C O N T E N T S

Introduction. . . . . . . . . . . . . . . . . . . . . . . . . . . . . . . . . . . . . . . . . . . . . . . . . . . 1

•

Welcome. . . . . . . . . . . . . . . . . . . . . . . . . . . . . . . . . . . . . . . . . . . . . . . . . . . . . . . . . . . . 1

•

Features . . . . . . . . . . . . . . . . . . . . . . . . . . . . . . . . . . . . . . . . . . . . . . . . . . . . . . . . . . . . 1

•

Included in Your Package . . . . . . . . . . . . . . . . . . . . . . . . . . . . . . . . . . . . . . . . . . . . . . 2

Installing and Adjusting Your Phone. . . . . . . . . . . . . . . . . . . . . . . . . . . . . . . 3

•

Desk/Tabletop Installation. . . . . . . . . . . . . . . . . . . . . . . . . . . . . . . . . . . . . . . . . . . . . . 3

•

Wall Installation. . . . . . . . . . . . . . . . . . . . . . . . . . . . . . . . . . . . . . . . . . . . . . . . . . . . . . 4

•

Installing the Handset Battery Pack . . . . . . . . . . . . . . . . . . . . . . . . . . . . . . . . . . . . . 10

•

Charging the Battery Pack. . . . . . . . . . . . . . . . . . . . . . . . . . . . . . . . . . . . . . . . . . . . . 11

•

Cleaning the Battery Contacts . . . . . . . . . . . . . . . . . . . . . . . . . . . . . . . . . . . . . . . . . . 12

•

Setting the Pulse/Tone Switch. . . . . . . . . . . . . . . . . . . . . . . . . . . . . . . . . . . . . . . . . . 12

•

Adjusting the Handset Volume Controls . . . . . . . . . . . . . . . . . . . . . . . . . . . . . . . . . . 13

•

Installing the Beltclip. . . . . . . . . . . . . . . . . . . . . . . . . . . . . . . . . . . . . . . . . . . . . . . . . 14

•

Headset Installation . . . . . . . . . . . . . . . . . . . . . . . . . . . . . . . . . . . . . . . . . . . . . . . . . . 15

•

Automatic Digital Code Security . . . . . . . . . . . . . . . . . . . . . . . . . . . . . . . . . . . . . . . . 15

Using Your New Phone . . . . . . . . . . . . . . . . . . . . . . . . . . . . . . . . . . . . . . . . . 16

•

Making and Receiving Calls. . . . . . . . . . . . . . . . . . . . . . . . . . . . . . . . . . . . . . . . . . . . 16

•

Flash and Call Waiting. . . . . . . . . . . . . . . . . . . . . . . . . . . . . . . . . . . . . . . . . . . . . . . . 16

•

Storing a Phone Number in Memory . . . . . . . . . . . . . . . . . . . . . . . . . . . . . . . . . . . . 17

•

Editing a Phone Number in Memory . . . . . . . . . . . . . . . . . . . . . . . . . . . . . . . . . . . . 18

•

Erasing a Number from Memory. . . . . . . . . . . . . . . . . . . . . . . . . . . . . . . . . . . . . . . . 19

•

Using Memory Dialing. . . . . . . . . . . . . . . . . . . . . . . . . . . . . . . . . . . . . . . . . . . . . . . . 20

•

Traveling Out-of-Range . . . . . . . . . . . . . . . . . . . . . . . . . . . . . . . . . . . . . . . . . . . . . . . 20

•

Using Caller ID. . . . . . . . . . . . . . . . . . . . . . . . . . . . . . . . . . . . . . . . . . . . . . . . . . . . . . 21

•

Using Redial. . . . . . . . . . . . . . . . . . . . . . . . . . . . . . . . . . . . . . . . . . . . . . . . . . . . . . . . 25

•

Using the Tone Feature . . . . . . . . . . . . . . . . . . . . . . . . . . . . . . . . . . . . . . . . . . . . . . . 25

•

Using the Page Feature . . . . . . . . . . . . . . . . . . . . . . . . . . . . . . . . . . . . . . . . . . . . . . . 26

Troubleshooting . . . . . . . . . . . . . . . . . . . . . . . . . . . . . . . . . . . . . . . . . . . . . . 27

•

Quick Reference Chart . . . . . . . . . . . . . . . . . . . . . . . . . . . . . . . . . . . . . . . . . . . . . . . . 27

Specifications . . . . . . . . . . . . . . . . . . . . . . . . . . . . . . . . . . . . . . . . . . . . . . . . 29

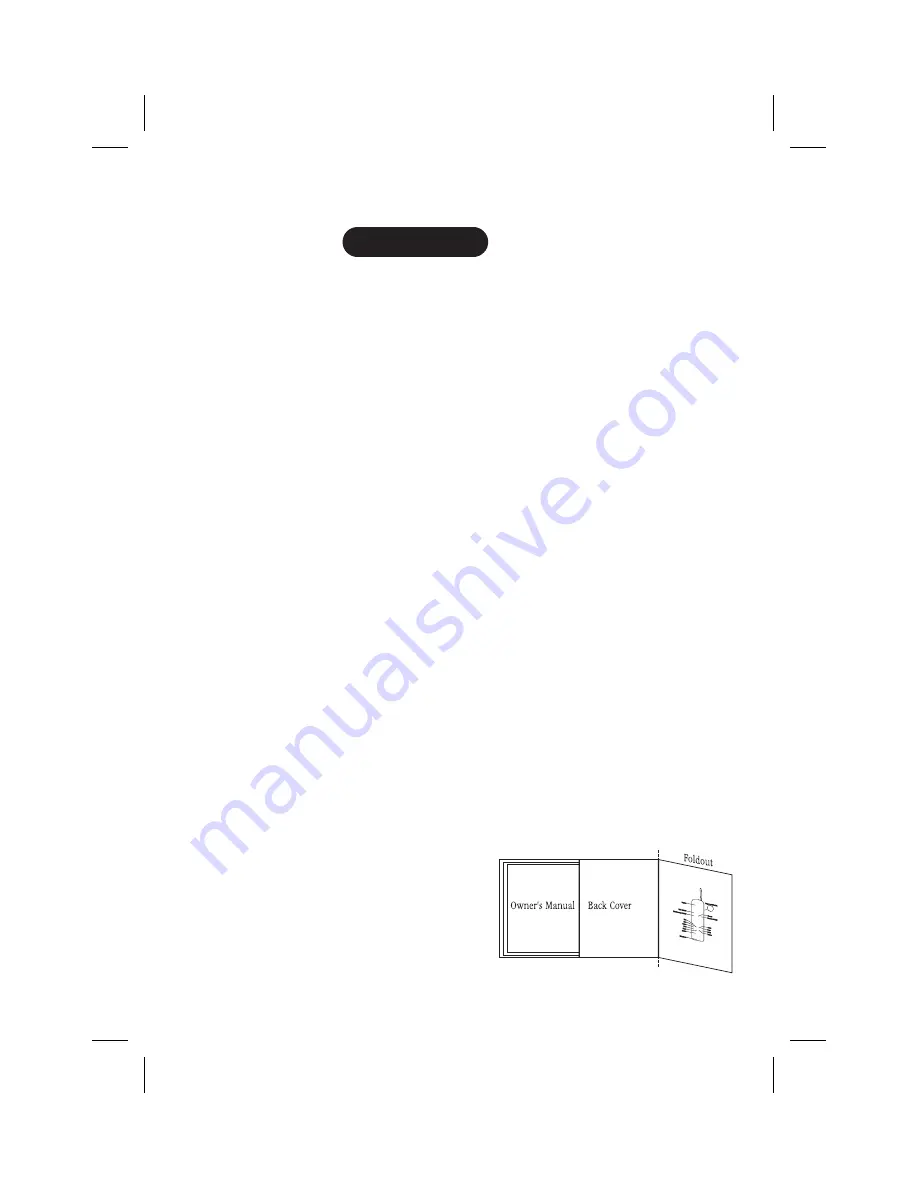
Fold out the back cover of this
owner’s manual to use the handy
“Controls and Functions” page
for reference.

C:\LaDonna\Exs9600\EXS9600.vp

Tue Dec 01 11:27:58 1998

Color profile: Disabled

Composite  Default screen

Summary of Contents for EXS9600

Page 1: ...Automatic Digital Code Security 15 Using Your New Phone 16 Making and Receiving Calls 16 Flash and Call Waiting 16 Storing a Phone Number in Memory 17 Editing a Phone Number in Memory 18 Erasing a Number from Memory 19 Using Memory Dialing 20 Traveling Out of Range 20 Using Caller ID 21 Using Redial 25 Using the Tone Feature 25 Using the Page Feature 26 Troubleshooting 27 Quick Reference Chart 27 ...

Page 2: ...ttery Time 4 Hour Talk Time Handset Earpiece and Ringer Volume Control Hearing Aid Compatible Digital Spread Spectrum Technology utilizes a wider frequency band vs a single narrow band used in standard digital trans missions The result is a more secure conversation with the clarity of digital sound extended range and minimal interference from other cordless phones Random Code TM digital security a...

Page 3: ...stration form NOTE If any of these items are missing or damaged contact the Uniden Parts Department at 800 554 3988 Hours are from 8 00 a m to 5 00 p m Central Time Monday through Friday We can also be reached on the web at www uniden com Handset Base AC Adapter Rechargeable Battery Long Telephone Cord Short Telephone Cord Beltclip Desktop Wall Mount Adapter C LaDonna Exs9600 EXS9600 vp Tue Dec 01...

Page 4: ... of the cord into your telephone jack on the wall 3 AND ADJUSTING YOUR PHONE INSTALLIN G I N S T A L L I N G A N D A D J U S T I N G TIP Before choosing a location for your phone read the Installation Considerations included in the Precautions and Important Safety Instructions brochure Place the power cord so that it does not create a trip hazard or where it could become chafed and create a fire o...

Page 5: ...move the mounting adapter from the notches at the top of the base 2 Rotate the mounting adapter 180 and snap it into place at the bottom of the base 4 HINT Before using your phone fully charge the Nickel Cadmium battery pack for 15 20 hours Place the power cord so that it does not create a trip hazard or where it could become chafed and create a fire or electrical hazard C LaDonna Exs9600 EXS9600 ...

Page 6: ...en plug the other end into a standard telephone jack 6 Line up the mounting slots on the base with the mounting posts on the wall then push in and down until the phone is firmly seated 5 DO NOT use an outlet controlled by a wall switch I N S T A L L I N G A N D A D J U S T I N G Before you plug the other end of the telephone cord into the modular jack on the wall charge the battery refer to Chargi...

Page 7: ...ip the retainer from front to back then slide it back into the slot so that the lip of the retainer faces up and the oval is at the bottom of the retainer This will hold the handset in place 6 C LaDonna Exs9600 EXS9600 vp Tue Dec 01 11 28 23 1998 Color profile Disabled Composite Default screen ...

Page 8: ...he selected mounting area has no wooden support beams directly behind it you will need the appropriate anchoring devices in order for the wall to properly support your phone 1 Insert two mounting screws into the wall with their appropriate anchoring device 3 15 16 inches apart Allow about 3 16 of an inch between the wall and screw heads for mounting the phone 2 Remove the mounting adapter from the...

Page 9: ...ord inside the molded wiring channel then wrap it around the strain relief notch Plug the AC adapter into a standard 120 VAC wall outlet 6 Plug one end of the long telephone cord into the TEL LINE jack on the back of the base then plug the other end into a standard telephone jack 8 C LaDonna Exs9600 EXS9600 vp Tue Dec 01 11 28 30 1998 Color profile Disabled Composite Default screen ...

Page 10: ...ut of the slot and rotate it clockwise 180 9 Flip the retainer from front to back then slide it into the slot so that the lip of the retainer faces up and the oval is at the bottom of the retainer This will hold the handset in place 9 I N S T A L L I N G A N D A D J U S T I N G C LaDonna Exs9600 EXS9600 vp Tue Dec 01 11 28 32 1998 Color profile Disabled Composite Default screen ...

Page 11: ...ntil it comes off 2 Install the nickel cadmium battery with the label facing down 3 Slide the battery cover on until it snaps into place 10 Use only Uniden battery model BT 990 supplied with your phone C LaDonna Exs9600 EXS9600 vp Tue Dec 01 11 28 36 1998 Color profile Disabled Composite Default screen ...

Page 12: ...sition the battery pack so the inner side with contacts is facing up 2 Slide the battery pack into the charging compartment until it clicks into place 3 Charge the battery for 24 hours When charging is complete pull up on the latch to remove the battery pack To install the charged battery into the handset refer to Installing the Handset Battery Pack page 10 11 I N S T A L L I N G A N D A D J U S T...

Page 13: ...ACTS To maintain a good charge clean all charging contacts on the handset and base about once a month with a pencil eraser or other contact cleaner DO NOT use liquids or solvents you may damage your phone SETTING THE PULSE TONE SWITCH Be sure the PULSE TONE switch is in the TONE position unless your local phone system uses pulse dialing 12 TIP Most phone systems use tone dialing Check with your lo...

Page 14: ...l The handset displays Ringer Low Handset earpiece volume There are three volume settings for the handset earpiece high normal and low The handset earpiece volume can only be adjusted during a call To lower the volume press vol and to raise the volume press vol The handset will display Volume High Volume Normal or Volume Low indicating the current volume setting 13 I N S T A L L I N G A N D A D J ...

Page 15: ...ore either the beltclip or slot cover on the bottom of the base 14 IMPORTANT Use only the Uniden HS910 headset specifically designed for Spread Spectrum phones You will hear a buzz or hum on other headsets IMPORTANT Keep headset wire away from base antenna NOTE If you are using an optional headset you must still use the handset keypad for phone operations C LaDonna Exs9600 EXS9600 vp Tue Dec 01 11...

Page 16: ...dded to the EXS9600 Your phone s handset and base share this code which is randomly set each time you place the handset in the charging cradle If the phone experiences a power failure you must reset the digital security code To reset the digital security code 1 Restore power to the base 2 Place the handset on the base The status LED blinks to indicate that the digital security code is reset 15 U S...

Page 17: ...mber then press talk To hang up Press talk or return the handset to the base AutoStandby To redial 1 Pick up the handset 2 Press talk 3 Listen for the dial tone 4 Press redial 1 Press talk 2 Listen for the dial tone 3 Press redial FLASH AND CALL WAITING If you have call waiting service and a call waiting tone sounds while you are on a call press flash to accept the waiting call There is a short pa...

Page 18: ... For example if you store a name and number into memory location number one the display shows Memory 1 Stored 9 Press memory or return the handset to the charging cradle to exit store mode Or wait 20 seconds for the phone to return to standby 17 U S I N G Y O U R P H O N E NOTE Whenever you are using a menu screen you must press a key within 20 seconds or the phone will return to standby You may a...

Page 19: ...Press select The following screen appears and a cursor flashes indicating that the display is ready for the number to be edited 8 Enter the phone number with the number keypad direct entry or the and keys Use the and keys to enter symbols such as dashes Use the and keys to move the cursor to the desired location and enter the number 18 Memory Store 1 KAYSIE SCHLITZ 2 UNIDEN NOTE If you select Go B...

Page 20: ...o select the memory location you would like to delete The and keys toggle between the names display and the numbers display 4 Press select The following screen appears with the memory location number that you have selected in the display 5 Use the key to move the cursor down to the Delete Memory command 6 Press select The following confirmation screen appears 7 Use the key to move the cursor to th...

Page 21: ... Press talk and the number dials TRAVELING OUT OF RANGE As you begin to move too far from your base unit you will first hear a clicking sound As you travel further out of range the voice transmission will begin to break up If you pass the range limits of the base unit your call will terminate 20 Memory 1 Deleted HINT Use the and keys to toggle between the names and the numbers displayed in memory ...

Page 22: ...are dialed directly without the area code If you will be programming numbers within your area code that require all ten digits to be dialed it is recommended that you do not program this feature To change your Caller ID options 1 Press setup The following screen appears 2 Use the and keys to move the cursor to the selection that you would like to change Press the select key to toggle between On an...

Page 23: ...age appears first with the date time call count name and phone number Press to scan backwards through the list 3 Once you have reviewed your oldest message the following screen appears Press call id to return to standby 22 12 21 12 30PM 01 Schlitz Kaysie 817 555 1212 NOTE If you have no New Caller ID Messages then the New display is blank Only the Total display appears New 01 Total 02 NOTE Once a ...

Page 24: ...to select a blank memory location where you would like to store the number If you want to replace an existing number with the Caller ID number skip to step 5 4 Press select A confirmation tone sounds and the number is programmed Do not complete steps 5 and 6 5 If you choose to replace an existing number with the Caller ID number press select and the following screen appears 6 Use the key to move t...

Page 25: ... you have deleted the oldest Caller ID messages the display shows End Press call id to return to standby Deleting all Caller ID messages To delete all of your Caller ID messages follow the steps below 1 Press call id and the Caller ID summary screen appears The screen shows the number of new messages and total messages 2 Press delete and the following screen appears 3 Use the key to move the curso...

Page 26: ...USING THE TONE FEATURE If you are dialing in the pulse mode and need to enter tone digits press tone to enter the digits Once the call has ended the tone mode is canceled and pulse dialing resumes 25 U S I N G Y O U R P H O N E NOTE The tone feature applies only when the base unit is set to pulse Total 00 C LaDonna Exs9600 EXS9600 vp Tue Dec 01 11 29 17 1998 Color profile Disabled Composite Defaul...

Page 27: ...se press page on the base The handset beeps for 60 seconds and displays Paging Press talk on the handset to end paging Press talk again to return to standby 26 Paging C LaDonna Exs9600 EXS9600 vp Tue Dec 01 11 29 19 1998 Color profile Disabled Composite Default screen ...

Page 28: ...acts on the handset and base are clean The audio sounds weak and or scratchy Make sure that the base antenna is in a vertical position Move the handset and or base to a different location away from metal objects or appliances and try again Can t make or receive calls Check both ends of the base telephone line cord Make sure the AC adapter is plugged into the base and wall outlet Disconnect the AC ...

Page 29: ...dset may be too far away from the base unit Place the base unit away from appliances or metal objects Place the handset back on the charging cradle for a few seconds The status LED will blink indicating that the phone has been reset 28 T R O U B L E S H O O T I N G C LaDonna Exs9600 EXS9600 vp Tue Dec 01 11 29 22 1998 Color profile Disabled Composite Default screen ...

Page 30: ...ng optional battery HANDSET Frequency 904 2 to 925 8 MHz 20 channels Power requirements Rechargeable Nickel Cadmium battery pack Size without antenna 2 1 4in W x 1 3 4in D x 7 1 4in H Weight Approx 9 3oz including battery Battery BT 990 Capacity 600 mAH 3 6V Talk mode 4 hours Standby mode 7 days Specifications features and availability of optional accessories are all subject to change without prio...

Page 31: ...AND FUNCTIONS CONTROLS ...

Reviews: