Uniden DRX100 User Manual Download Page 9

9

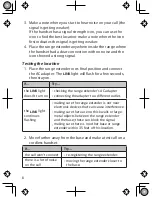
Wall mounting the range extender

Insert two #10 screws into the wall, 2¼ inches ( mm) 

apart. Leave the heads of the screws about ¼ inch away 

from the wall. (For best results, use a level to ensure the 

screws are even.)

Remember to use appropriate anchors for the wall material.

Place the wall 

mount holes 

over the screw 

heads and 

slide the unit 

down into 

place.

To remove the unit from the wall, just slide it up and lift it off 

the screw heads. 

Compliance Information

Any changes or modifications to this product not expressly approved by 

the manufacturer or other party responsible for compliance could void 

your authority to operate this product.

FCC Part 15 information

This device complies with part 1 of the FCC rules. Operation is subject 

to the following two conditions: (1) This device may not cause harmful 

interference, and (2) This device must accept any interference received, 

including interference that may cause undesired operation. Privacy of 

communications may not be ensured when using this phone. 

FCC PART 15.105(b)

Note: This equipment has been tested and found to comply with the 

limits for a Class B digital device, pursuant to part 1 of the FCC Rules. 

1.

2.

Wall-mount 

holes

Registration 

button

Power connector

Wall-mount 

holes

Registration 

button

Power connector

Summary of Contents for DRX100

Page 1: ...ustomer Care Line 817 858 2929 or 800 297 1023 need a part or accessory Parts Department 800 554 3988 need special assistance due to a disability Accessibility Help Line 800 874 9314 voice or TTY Duri...

Page 2: ...ltage 120V AC 60 Hz Output voltage 6 5V AC 350mA Do not place the power cord where it creates a trip hazard or where it could become chafed and create a fire or electrical hazard Do not place the unit...

Page 3: ...ge extender in the middle of a call but sometimes you might notice a brief pause in your conversation DRX100 Hand off area Handsets in this area can connect to either unit Extended coverage area The r...

Page 4: ...me base has a stronger signal the unit connects to that range extender Range Extender 1 Hand off area Base to Range Extender 1 Base Base coverage area Range Extender 2 Hand off area Base to Range Exte...

Page 5: ...Accy No display on the base D1680 D2280 D3280 With the base in standby press and hold the Find HS key Your handsets will beep when you do this just ignore them If your phone model number has a dash in...

Page 6: ...seconds Release the button and wait for the Link light to turn on and steady this can take about 90 seconds If Try the Link light doesn t turn on at all checking the range extender s AC adapter conne...

Page 7: ...ss handset that is registered to that base Continue the call and carry the handset away from the base Make sure you go at least 35 feet about 10 meters 1 2 Place the range extender inside the strong s...

Page 8: ...a few seconds then stay on If Try the Link light doesn t turn on checking the range extender s AC adapter connecting the adapter to a different outlet the link light continues flashing making sure th...

Page 9: ...manufacturer or other party responsible for compliance could void your authority to operate this product FCC Part 15 information This device complies with part 15 of the FCC rules Operation is subjec...

Page 10: ...ected Consult the dealer or an experienced radio TV technician for help RF exposure information This product complies with FCC radiation exposure limits under the following conditions The base must be...

Page 11: ...oduct to be free from defects in materials and craftsmanship with only the limitations or exclusions set out below WARRANTY DURATION This warranty to the original user shall terminate and be of no fur...

Page 12: ...ca and Canada PROCEDURE FOR OBTAINING PERFORMANCE OF WARRANTY If after following the instructions in the owner s manual you are certain that the Product is defective pack the Product carefully prefera...

Reviews: