background image

21

Format Storage

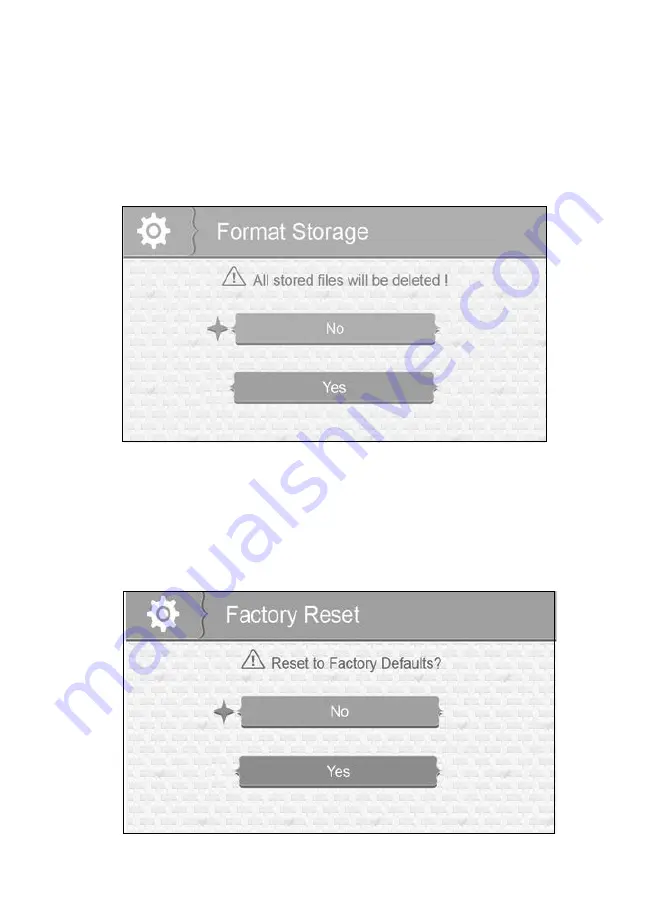
Turning on Format Storage allows you to delete the files on your microSD card. 

(Default = No)
1.  From the System menu, select 

Format Storage

 and press 

JOY STICK (OK).

 The 

Format Storage

 screen displays. 

2.  Press ▲Vol or ▼Vol to toggle between accepting or canceling the microSD card 

reformat.

3.  Press 

JOY STICK (OK)

 to save the setting and return to the main System 

options.

Factory Reset

This option allows you to restore your system to factory setting. (Default = No)
1.  From the System menu, select 

Factory Reset

 and press 

JOY STICK (OK)

. The 

Factory Reset

 screen displays.

2.  Press ▲Vol or ▼Vol to select or cancel a reset to factory defaults.
3.  Press 

JOY STICK (OK) 

to save the setting and return to the main System 

options.


#

All menu settings, except Camera Pairing, WILL be affected by a reset. 

Cameras will remain paired with the monitor.

Summary of Contents for BW3451R+1

Page 1: ...1 BW3451R 1 For more exciting new products please visit our website Australia www uniden com au 4 3 LCD Portable Wireless Baby Monitoring System...

Page 2: ...ectric shock from lightning avoid handling any electronic devices except battery powered ones during an electrical storm Use only the power cord and or batteries indicated in this manual Never dispose...

Page 3: ...und or interfere with the normal flow of air Warning to Parents and Other Users To avoid damage to your equipment follow these simple precautions Do not drop puncture or disassemble any part of the eq...

Page 4: ...y 16 USING THE BW3451R 1 18 Viewing Modes 18 SYSTEM MENUS 19 SYSTEM 19 Date Time 20 Brightness 20 Format Storage 21 Factory Reset 21 Language 22 Temperature Display Unit 22 Temperature Alert Range 23...

Page 5: ...ideo Files 36 Viewing Recorded Video on your Computer 37 ZOOM 37 NIGHT LIGHT 37 LULLABIES 37 USING THE INTERCOM 38 CAMERA PAIRING 38 MAINTAINING YOUR SYSTEM 38 TROUBLESHOOTING 39 SPECIFICATION 40 ONE...

Page 6: ...p Get answers at our website www uniden com au for Australian model WHAT S IN THE BOX All trademarks are registered trademarks of their respective owners Monitor Charge Ethernet Cradle BW31PTZ Camera...

Page 7: ...n the camera and monitor is best Walls especially brick and concrete can affect reception quality Avoid having a direct light source in view of the camera ceiling or floor lamps Carefully plan where a...

Page 8: ...n of the screw holes on the wall 2 Drill holes and insert the anchors and screws provided Be sure to leave room for the mounting bracket to fit over the screw heads 3 Place the mounting bracket over t...

Page 9: ...g LED turns on 3 Press POWER The green power LED turns on and the monitor now displays camera video If it doesn t try reconnecting the AC adaptor making sure the power outlet is switched on Suctions w...

Page 10: ...10 BASIC OPERATION BW31PTZ 1 2 3 7 4 6 8 9 5 10...

Page 11: ...OFF 6 Volume Switch Turn to increase or decrease volume 7 Camera Antenna Sends and receives signals to or from the monitor 8 DC 5V Power Connects the DC 5V power adaptor to the camera Please ensure th...

Page 12: ...ht light bars 11 IR LEDs Covered Infrared LEDs provide viewing in no low light conditions 12 Light sensor Measures light intensity on the camera side 13 Lens Camera lens 14 Microphone Receives sounds...

Page 13: ...ernet cradle the monitor cannot be powered off using the POWER switch You will have to disconnect the AC adaptor from the cradle 3 LED light bar The bottom LED indicates power and the remaining LEDs i...

Page 14: ...Video Playback Stop playback CH In Menus Scroll right In Zoom Scroll right In Live view Switch between available cameras In Video Playback Fast forward Joy Stick Press To select a menu or accept a set...

Page 15: ...e next lullaby in the series See page 37 for details 13 LULLABY PLAY STOP Press this button to remotely play lullabies See page 37 for details 14 TALK Activate Intercom function see page 38 15 MANUAL...

Page 16: ...ates the signal is poor and 4 bars indicate a very strong signal Signal Strength Indicator Warning Perfect None Good None Fair None Low None No Signal Out of range 2 Camera Indicator Indicates which c...

Page 17: ...enabled the video monitor will overwrite old video files when the microSD card is full 11 Auto recording indicator This icon indicates that the recording time has been set 12 REC 063020 1 AVI Recordi...

Page 18: ...t the monitor volume Press Vol increase volume or Vol decrease volume on the monitor or turn the volume switch on the camera Use the Intercom 1 Press and hold TALK on the monitor 2 Speak into the micr...

Page 19: ...ss JOY STICK OK to confirm a setting Use CH or CH to focus on the 5 different system menu selections on the clothesline System Power Save Camera Record Alert SYSTEM Move the focus to the System option...

Page 20: ...STICK OK to save the completed date and time setting and return to the main System options Press MENU BACK to step backwards one level until you are out of the menu system Brightness This option allow...

Page 21: ...K OK to save the setting and return to the main System options Factory Reset This option allows you to restore your system to factory setting Default No 1 From the System menu select Factory Reset and...

Page 22: ...lect a language 3 Press JOY STICK OK to save the setting and return to the main System options This option allows you to set the temperature to display in Celsius C or Fahrenheit F Default C 1 From th...

Page 23: ...emp alert range screen displays 2 Press CH or CH to select Low temperature or High temperature 3 Press Vol or Vol to increase or decrease the temperature value 4 After setting the temperature range pr...

Page 24: ...lows you to set the alert volume There are 6 levels available Default Zero Mute 1 From the main menu selections select Alert and press JOY STICK OK The Alert Volume screen displays 2 Press CH or CH to...

Page 25: ...e Quality This option allows you to choose between a high or low resolution recording quality Default Low 320 x 240 1 From the Record menu select Quality and press JOY STICK OK The Quality screen disp...

Page 26: ...e selection and return to the main RECORD options VOX VOX Voice Activation allows you to set the sound sensitivity for the camera Default High In Power Save mode this function will turn on the LCD scr...

Page 27: ...verwrite and press JOY STICK OK The Overwrite screen displays Default No 2 Press Vol or Vol to toggle between Yes and No to activate or deactivate this feature 3 Press JOY STICK OK to save the selecti...

Page 28: ...STICK OK 2 The Camera options screen displays Two options display Pair and On Off Default Pair Pair Pairing allows you to introduce additional cameras to the monitor The monitor can then recognize an...

Page 29: ...the cameras to the monitor before mounting them On Off This option allows you to turn individual cameras on off so their video is not visible through the monitor Default Camera 1 On Cameras 2 4 Off 1...

Page 30: ...ption allows you to enable or disable this function Default Off Voice Activation VOX will turn the LCD back on Even with the LCD off the LED light bar is still active 1 From the main menu selections s...

Page 31: ...he router using the ethernet cable provided 3 Place the monitor on the cradle 4 Download the Uniden BabyWatch app from the AppStore or Google Play The Baby Watch app supports iPhone iPad iOS v 7 0 and...

Page 32: ...displays Position the QR Code found on the side of the cradle within the viewfinder rectangle to scan 13 The Add Device screen displays with the UID code in the field Enter the default password 00000...

Page 33: ...Option Function Tap on this icon to view the saved snapshots Tap to take a snapshot in Live View Tap to turn off audio Tap to turn on audio Channel Tap to view from a different camera channel Back Ta...

Page 34: ...re personalised one After your device displays on your Device List screen tap on the icon to access the Edit Device screen Tap on the Advanced Setting option to display the Advanced Setting screen bel...

Page 35: ...screen tap the option Video Quality to select the resolution of the video The option available are Max High Medium Low Min About Device On the Advanced Setting screen tap the option About Device to v...

Page 36: ...recorded at 12 30 30 and from camera 1 5 Select the video you want to view and press JOY STICK OK The video plays on the LCD screen 6 Use the following buttons to manage the video Vol Pause resume vi...

Page 37: ...to control it from the monitor you must place that camera in full screen mode 1 To turn the night light on from the monitor place the night light camera in full screen mode 2 Press NIGHT LIGHT on the...

Page 38: ...air your first camera if needed Pair the cameras to the monitor before mounting the cameras 1 Verify that the monitor is powered on see page 13 2 Install and power on the accessory cameras according t...

Page 39: ...Go to the Alert screen to turn the alert volume down or off see page 24 The picture has become choppy The picture may become choppy when experiencing a lower frame rate Try moving the camera closer to...

Page 40: ...GENERAL SPECIFICATION BW31PTZ Effective Pixel 640 x 480 Image Processing MJPEG Lens 3 0mm F2 8 Exposure Auto White Balance Auto Power Requirement 5 0VDC 1 0mA Power Consumption 300mA Max IR OFF 450mA...

Page 41: ...up to 3 hours Housing Material Plastic BW3000 Effective Pixel 640 x 480 Image Processing MJPEG Lens 3 0mm F2 8 Exposure Auto White Balance Auto Power Requirement 5 0VDC 1 0 mA Power Consumption 150mA...

Page 42: ...se for a Product first purchased either in Australia or New Zealand and will expire as indicated below from the date of original retail sale Product 1 Year Accessories 90 Days If a warranty claim is m...

Page 43: ...goods fail to be of acceptable quality and the failure does not amount to a major failure This warranty is in addition to and sits alongside your rights under either the COMPETITION AND CONSUMER ACT 2...

Page 44: ...44 2016 Uniden Australia Pty Ltd Printed in PRC...

Reviews: