


Deleting Messages
Deleting individual messages:
1. Press to review your message.
2. If you decide to delete a message, press
anytime during the message. The system beeps
and immediately goes to the next
message.
Deleting all messages:
Press and hold while the system is
in standby. A tone sounds when all messages are deleted.
If there are any messages you have not reviewed, you
cannot delete all messages at once. An error tone
occurs.
Voice memo:
The voice memo function allows the user to record a
message (up to 10 minutes) on the base.
1. Press and hold until you hear a
tone, the message counter LED blinks.
2. Speak into the microphone.
3. When you have finished, press
or to stop recording.
The system returns to standby.
4. To play voice memo, press
.
Repeating a message
1. Press to review the message. The
number of stored messages is announced.
2.
After a message has played for a few seconds,
press to repeat the message.
3. Press at any time to stop reviewing
messages and return to standby. The
message counter LED shows the total number
of messages still on the system.
Skipping a message:
1. Press to review the message. The
number messages is announced.
2. Press at anytime to skip to the next
message.
3. Press at any time to stop reviewing
your messages and return to standby.
The message counter LED shows the total number
of messages on the system.
21
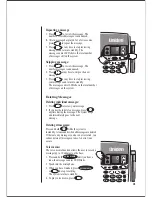
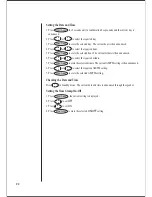
volume
voice memo
greeting
speaker
in use/
charge
delete
play
1
2
3
abc
def
4
5
6
ghi
jkl
mno
pin
time/3-way
ans off
memory
volume
voice memo
greeting
speaker
in use/
charge
delete
play
1
2
3
abc
def
4
5
6
ghi
jkl
mno
pin
time/3-way
ans on/off
mute
voice memo
voice memo