background image


38 

WiFi Phone(U-Phone) 
User

s Manual 


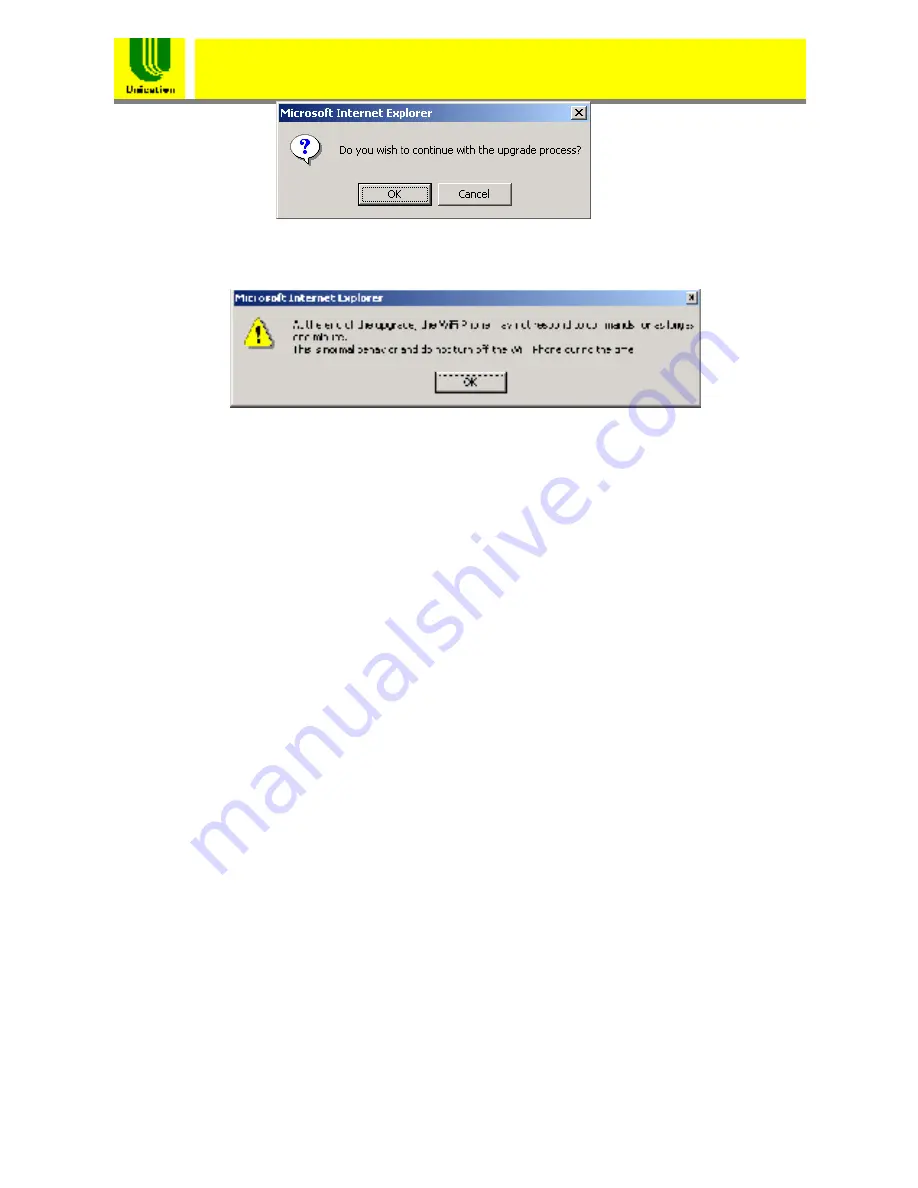
Figure 12.3.3.2 Confirmation Window 


Figure 12.3.3.3 Warning Window 


12.3.4 Configuration Tools 

Clicking the 

Configuration Tools

 option will bring you to the 

Configuration Tools page. You can set WIFI PHONE back to its factory 
default settings in this option. 


12.3.5 Status 

Clicking the 

Status

 option will bring you to the Status page. This page 

shows current status of the WIFI PHONE. 


12.3.6 Reset 

Clicking the 

Reset

 option will reset the WIFI PHONE. 


12.4 LAN Setting


Clicking the 

LAN

 item on the left side of the main page will bring you to 

the LAN Setting page as shown in Figure 12.4.0.1. There are three 
options under the LAN item: Dynamic IP, Static IP and DNS. 
 

Summary of Contents for U-Phone

Page 1: ...WiFi Phone U Phone User s Manual Version V 1 0 DCC NO Unication Co Ltd 5F NO 6 Wu Kung 5Rd Hsin Chuang City Taipei Taiwan...

Page 2: ...iting text 10 1 7 Making a Phone Call 10 1 7 1 Enter the phone number manually 10 1 7 2 Using the Phonebook 10 1 7 3 Using the Call History 10 1 7 4 Redial a number 10 1 8 Answering a Call 11 1 9 Hang...

Page 3: ...xy Status 22 6 13 Codec Order 22 6 14 VAD Status 22 Chapter 7 IP Settings 23 7 1 DHCP 24 7 2 System name 24 7 3 Static IP Address 24 7 4 Subnet Mask 24 7 5 Default Gateway 24 7 6 DNS Server Pri 24 7 7...

Page 4: ...11 5 Speaker Volume 33 Chapter 12 Web based Management Interface 34 12 1 Login the Management Interface 34 12 2 Main Page of the Management Interface 34 12 3 System Setting 35 12 3 1 System Date Time...

Page 5: ...WIFI PHONE enhances productivity and bring mobility to people at home in hot spots offices hospitals warehouses retail stores universities hotels resorts and other environments The easy to use WIFI P...

Page 6: ...atus information and press to access the list of placed calls 2 Right soft key Used to perform functions displayed in the tab shown above it 3 End key Used to end or reject a call or return to standby...

Page 7: ...to Figure 1 2 1 Figure 1 2 1 Remove the battery To install the battery First carefully slide the bottom battery pack tabs into open slot at the back of the phone as shown in Figure 1 2 2 The bottom of...

Page 8: ...steps to charge the WIFI PHONE 1 Plug the travel charger to a wall outlet 2 Plug the travel charger s connector to the jack at the bottom of the WIFI PHONE to start charging Please refer to Figure 1...

Page 9: ...key tab 4 Left soft key tab 5 Entering Information line i Entering phone number SIP URL here or ii showing information at standby mode using to switch between WLAN SSID and current IP address informat...

Page 10: ...1 Enter the phone number manually You can enter phone number needing SIP Proxy Server and Registrar or SIP URL at the entering line Then press to make a phone call Please refer to Figure 1 7 1 1 Figur...

Page 11: ...g you can use and to adjust the volume To reject a call press Please refer to Figure 1 8 1 Figure 1 8 1 Answer or reject a call 1 9 Hangup a Call When talking press to hang up the call Please refer to...

Page 12: ...hapter 3 Phonebook The main Menu architecture is shown below and will be discussed through Chapter 4 to Chapter 10 Figure 2 0 2 Main Menu Architecture In standby mode press to select the main Menu The...

Page 13: ...13 WiFi Phone U Phone User s Manual Figure 2 0 3 Main Menu 1 Call History 2 Phone Settings 3 SIP Settings Select Back...

Page 14: ...ecture of the Phonebook menu Figure 3 0 1 Phonebook menu architecture In standby mode press The Phonebook menu is displayed as shown in Figure 3 0 2 Figure 3 0 2 Phonebook menu 3 1 Browse the Phoneboo...

Page 15: ...ey and then make a call Please refer to Figure 3 1 1 Figure 3 1 1 Recall a phone number SIP URL from Phonebook 3 2 Create a new record 1 In the Phonebook menu press or to scroll to Create Then press t...

Page 16: ...roll to Call History Then press to select it The Call History menu is displayed as shown in Figure 4 0 2 Figure 4 0 2 Call History menu 4 1 Outgoing Calls In the Call History menu select Outgoing Call...

Page 17: ...ough the last 10 incoming phone numbers and press to make a call of that number 4 3 Missed Calls In the Call History menu select Missed Calls The Missed Calls menu is displayed You can press or to scr...

Page 18: ...cture In the main Menu press or to scroll to Phone Settings and press to select it The Phone Settings menu is displayed as shown in Figure 5 0 2 Figure 5 0 2 Phone Settings menu 5 1 Ringer Melody The...

Page 19: ...Key Tone This feature allows users to decide if there is key tone when keypad is pressed 5 4 Vibrator Vibrator can be turned on or off for incoming calls 5 5 Speaker Volume Speaker Receiver volume ca...

Page 20: ...rchitecture of the SIP Settings menu Figure 6 0 1 SIP Settings menu architecture SIP Settings Proxy Registrar Status Password Realmname Display Name Codec Order Outbound Proxy SIP User Name Auth Name...

Page 21: ...me Enter the authentication name here 6 5 Password Enter the password here 6 6 Registrar Enter the Registrar s IP address and port number here For example 160 23 12 5 5060 6 7 Registrar Status You can...

Page 22: ...s sitting behind NAT Firewall equipments Enter the outbound proxy server s IP address and port number here For example 160 23 12 8 9090 6 12 Out Proxy Status You can enable or disable the WIFI PHONE t...

Page 23: ...enu Figure 7 0 1 IP Settings menu architecture In the main Menu press or to scroll to IP Settings and press to select it The IP Settings menu is displayed as shown in Figure 7 0 2 Figure 7 0 2 IP Sett...

Page 24: ...function If you want to configure these settings manually please disable this DHCP function 7 2 System name Enter the system name here 7 3 Static IP Address If you disable the DHCP function please en...

Page 25: ...architecture of the WLAN Settings menu Figure 8 0 1 WLAN Settings menu architecture WLAN Settings Auth Type Roaming Site Survey Tx Rate SSID QoS WEP Key Settings Channel Mode Roaming Setup SSID 1 to...

Page 26: ...et the current channel number information 8 3 Tx Rate Select WLAN Tx rate here 8 4 Mode Only infrastructure mode is available 8 5 Site Survey This WIFI PHONE can do WLAN site survey You can browse the...

Page 27: ...d key as the authentication type 8 7 2 Encryption You can disable it or you can enable it with 64 or 128 bit key 8 7 3 Used Key You can choose any key from key 1 to key 4 for WEP encryption 8 7 4 WEP...

Page 28: ...em Time and press to select it The System Time menu is displayed as shown in Figure 9 0 2 Figure 9 0 2 System Time menu 9 1 Time Setting You can set time and date in this submenu The time can be set i...

Page 29: ...If you want to use daylight saving function you also need to set the daylight saving duration from the start month date to the end month date in this submenu 9 2 2 SNTP Status You can disable or enabl...

Page 30: ...e In the main Menu press or to scroll to Information Then press to select it The Information menu is displayed as shown in Figure 10 0 2 Figure 10 0 2 Information menu 10 1 SIP Information You can get...

Page 31: ...hone U Phone User s Manual 10 2 Network Information Network and WLAN status can be shown here 10 3 System Information You can get information about the Firmware Version Serial Number and Hardware Vers...

Page 32: ...he Profile menu Figure 11 0 1 Profile menu architecture In the main Menu press or to scroll to Profile and press to select it The Profile menu is displayed as shown in Figure 11 0 2 Figure 11 0 2 Prof...

Page 33: ...peed Dial menu allows users to dial a number from the list of placed calls 11 3 Ringer Melody This menu allows users to turn on or off the ringer 11 4 Vibrator This menu allows users to turn on or off...

Page 34: ...rs to navigate WIFI PHONE web management interface by entering the IP address 192 168 3 20 in the below example of the WIFI PHONE in the browser s URL field The LOGIN window will display Username and...

Page 35: ...onfiguration items will be described in the following sections Figure 12 2 1 Main Page of the Management Interface 12 3 System Setting Clicking the System item on the left side of the main page will b...

Page 36: ...ng the configuration click the Apply icon at the bottom of this page to active the settings or click the Cancel icon to cancel the settings 12 3 2 Administrator Settings Clicking the Administrator Set...

Page 37: ...ly icon at the bottom of this page to start the firmware upgrading A confirmation window Figure 12 3 3 2 will pop up asking Do you wish to continue with the upgrade process You can click OK to continu...

Page 38: ...o its factory default settings in this option 12 3 5 Status Clicking the Status option will bring you to the Status page This page shows current status of the WIFI PHONE 12 3 6 Reset Clicking the Rese...

Page 39: ...the Static IP page This option allows you to set the static IP address subnet mask and default gateway of the WIFI PHONE 12 4 3 DNS Clicking the DNS option will bring you to the DNS page This option a...

Page 40: ...ess Settings page This option allows you to set all the WLAN related settings including General Advanced Settings Authentication and 802 1x of the WIFI PHONE 12 6 SIP Setting Clicking the SIP item on...

Page 41: ...llows you to set all the SIP related settings including User Information Proxy Server Outbound Proxy Registrar and codec used by the WIFI PHONE 12 7 Phone Settings Clicking the Phone Settings item on...

Page 42: ...age This option allows you to set all the phone related settings including Ringer Melody Melody Select Key Tone Vibrator and Speaker Volume 12 8 Phone Book Clicking the Phone Book item on the left sid...

Page 43: ...the Phbook Edit option will bring you to the Phone Book Edit page This option allows you to create delete and browse items in the phone book 12 8 2 Call History Clicking the Call History option will b...

Reviews: