background image

16

EQUIPMENT CARE

QUESTIONS, COMMENTS OR SERVICE REQUESTS

Care of upholstery 

The upholstery material used on the top, leg rest, and headrest is 
resistant to most medical stains.

For light cleaning:

1

  A solution of 10% liquid soap and clean water applied with 

a soft damp cloth will remove disinfection cleaner build-up.

2

  If necessary, a solution of liquid cleanser and water can be 

applied with a soft bristle brush. Wipe away residue with a 
water-dampened cloth.

For disinfection:

1

  Dampen a soft white cloth with a solution of standard 

bleach (sodium hypochlorite) or other chlorine-based 
cleaner*** and water; 10% bleach, 90% water.

2

  Rub gently.

3

  If necessary, allow the 1:10 diluted bleach (sodium 

hypochlorite) solution to puddle on the affected area or 
apply with a clean, soaked cloth for approximately 30 
minutes. Rinse with a water-dampened cloth to remove any 
remaining bleach concentration.

4

  Rinse with a water-dampened cloth to remove cleaner 

solution and allow thorough drying of material.

***See current CDC Guidline for Disinfection & Sterilization in 
Healthcare Facilities for bleach alternative cleaners.

Note: Immediately remove any fluid spilled on upholstery 
surface.

Antimicrobial: UMF Medical Upholstery providers outstanding 
protection in difficult medical and healthcare environments 
and contains an agent effective against bacterial and fungal 
microorganisms.

Contact: 

UMF Medical Customer Service


1316 Eisenhower Blvd


Johnstown, PA 15904

Toll Free: 1(800) 638-5322


Email: [email protected]


Fax: 1(814) 266-1870

* For service requests, please have model & serial number available.

WHEN THE USE OF STRONG 
CLEANING SOLUTIONS IS NECESSARY, 
TEST AN INCONSPICUOUS AREA 
TO ASSURE THAT DAMAGE TO 
UPHOLSTERY OR PAINTED SURFACES 
WILL NOT OCCUR.

CAUTION:

Care of painted surfaces 

A chemical acid-resistant paint is used, but extreme care 
must be taken not to use ammonia-based cleaners or 
discoloration of paint may occur. A damp cloth or mild 
liquid soap solution should be sufficient.

Care of bright metal surfaces 

All non-painted surfaces, chrome plated, or stainless steel 
should be wiped weekly with a clean damp cloth then 
buffed to a lustrous shine with a soft dry cloth.

Care of base 

The protective base is easily washable with mild liquid soap 
and water. A soft bristle brush may be used on scuffed or 
stained areas.

Summary of Contents for 4010-650

Page 1: ...ACTURE MAXIMUM PATIENT WEIGHT 650 LBS 295 KG OWNER S MANUAL POWER PROCEDURE CHAIR 4010 650 4011 650 5016 650 UMFmedical com Ph 814 266 8726 Fax 814 266 1870 1316 Eisenhower Blvd Johnstown PA 15904 cus...

Page 2: ...ent loading 1 minute on 9 minutes off or 2 minutes on 18 minutes off This product has been evaluated with respect to electrical shock fire mechanical hazards only in accordance with UL60601 1 and CAN...

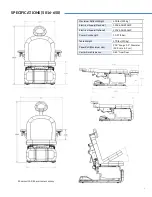
Page 3: ...60HZ 9AMP Electrical Supply Optional 220V 60HZ 5AMP Power Cord Length 10 FT 3 0m Table Weight 450 lbs 204kg Paper Roll Maximum size 21 0 Long x 3 5 Diameter 53 3 cm x 8 9 cm Caster Base Clearance 0 2...

Page 4: ...cal Supply Standard 120V 60HZ 9AMP Electrical Supply Optional 220V 60HZ 5AMP Power Cord Length 10 FT 3 0m Table Weight 470 lbs 213kg Paper Roll Maximum size 21 0 Long x 3 5 Diameter 53 3 cm x 8 9 cm C...

Page 5: ...cal Supply Standard 120V 60HZ 9AMP Electrical Supply Optional 220V 60HZ 5AMP Power Cord Length 10 FT 3 0m Table Weight 470 lbs 213kg Paper Roll Maximum size 21 0 Long x 3 5 Diameter 53 3 cm x 8 9 cm C...

Page 6: ...n order to prevent misuse when staff is not present Patient Safety Table Lockout To lock and unlock FOR MAXIMUM PATIENT SAFETY LOCK TABLE IMMEDIATELY AFTER EACH USE WARNING Procedure Chair Four Functi...

Page 7: ...Control FEATURES AND OPERATION Hand Foot Control Table Operation DO NOT USE BACKREST AS A SEAT WARNING Height Adjustment Backrest Adjustment Pelvic Tilt Adjustment Legrest Adjustment Home Shown with...

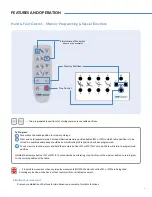
Page 8: ...functions Simultaneous Movement shown as an example To Program 1 Move table to desired position for memory storage 2 Press and hold approximately 3 seconds desired memory position button M1 or M2 in w...

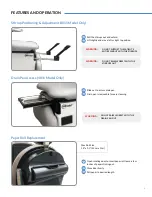
Page 9: ...paper to desired length 1 Pull the stirrups out and unfold 2 Lift slightly and move left or right to position DO NOT SUPPORT THE PATIENT S ENTIRE WEIGHT WITH THE STIRRUPS WARNING DO NOT RAISE LEGREST...

Page 10: ...d Rest 1 Squeeze adjustment button 2 Position the Headrest 3 Release adjustment button to lock headrest in desired place 4 Adjust friction knob so headrest slides smoothly or to lock into position FEA...

Page 11: ...ature 1 Plug into the hand control port 2 Turn the union nut clockwise until fully threaded Back Left to Right 1 Foot control port 2 False Port 3 Hand control port 4 Power on LED 5 Power cord port Fro...

Page 12: ...E IS NOT TO BE USED FOR PATIENT TRANSPORT ENSURE WHEELS ARE IN PATIENT READY POSITION PRIOR TO A PATIENT ACCESSING TABLE TABLE IS NOT TO BE USED FOR PATIENT TRANSPORT CASTERS ARE TO BE USED SOLELY WHE...

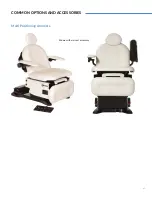
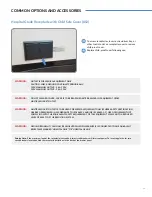
Page 13: ...13 Multi Positioning Armrests COMMON OPTIONS AND ACCESSORIES Shown with arm rest accessory...

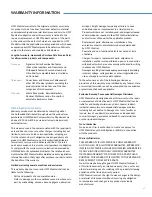
Page 14: ...MAY LEAD TO A REDUCED LEVEL OF SAFETY OF THE RESULTING SYSTEM OUTLET IS FOR MEDICAL EQUIPMENT ONLY CAUTION CHECK GROUND CONTINUITY PERIODICALLY 120V MAXIMUM OUTPUT 5 0A 120V 220V MAXIMUM OUTPUT 2 5A 2...

Page 15: ...otrol BirexSE Bleach 1 5 20 bleach Bleach 1 9 10 bleach Bleach Rite Disinfecting Spray CaviCide CaviCide1 CaviCide AF Diversey Accel INTERVention Wipes Diversey Avert Sporicidal Disinfectant Cleaner E...

Page 16: ...Facilities for bleach alternative cleaners Note Immediately remove any fluid spilled on upholstery surface Antimicrobial UMF Medical Upholstery providers outstanding protection in difficult medical a...

Page 17: ...in whole or in part by mishandling misuse abuse negligence alteration accident freight damage tampering or failure to seek and obtain repair or replacement in a timely manner Products which are not i...

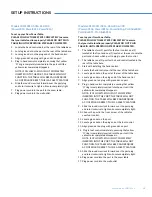
Page 18: ...the ports and choose which port to plug in your foot control 2 The table has one 1 port for the hand control located in the rear of the table base 3 Start with installing the hand control 4 Locate th...

Reviews: