


19
TV MENU OPERATION
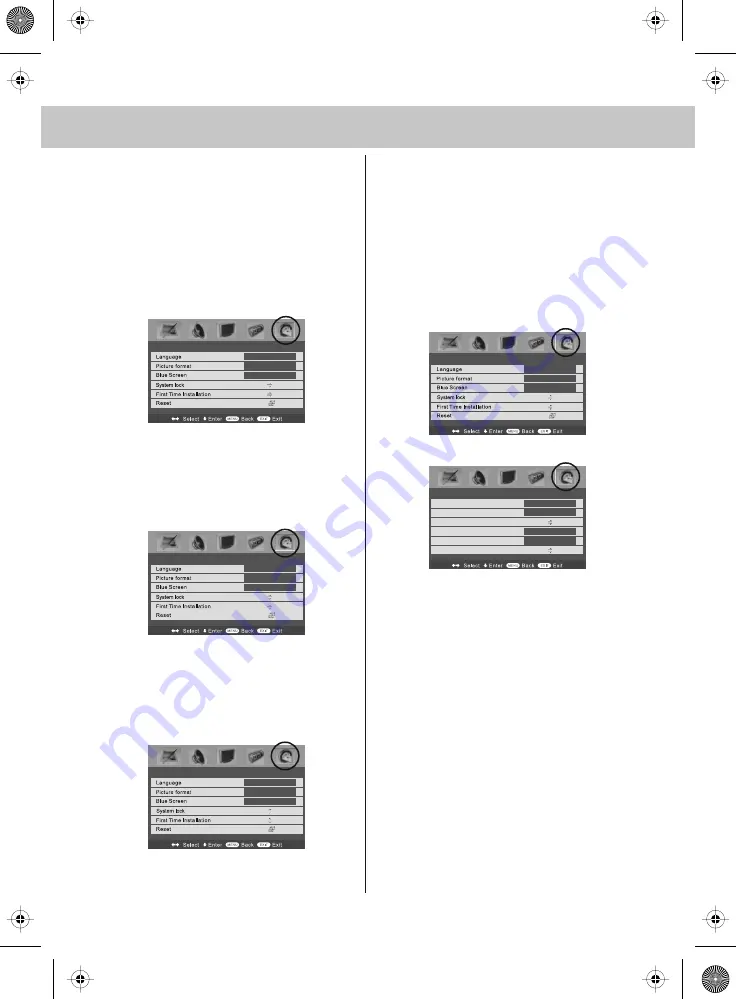
GENERAL SETTINGS MENU
Lets you adjust the language, picture size,
blue screen, add child lock, complete first
time installation and reset the television.
On Screen Menu Language
Lets you change the on screen menu language.
1) Press [LCD-MENU] to enter menu
2) Press [>] to move to General Settings
Menu
3) Press [\/] to highlight Language
4) Press [>] to change the language
5) Press [EXIT] to exit
Picture Format
Lets you adjust the picture format
1) Press [LCD-MENU] to enter menu
2) Press [>] to move to General Settings Menu
3) Press [\/] to highlight Picture Format
4) Press [>] to change the picture
format
5) Press [EXIT] to exit
Blue Screen
Changes the background when there is
no input between clear and a blue background
1) Press [LCD-MENU] to enter menu
2) Press [>] to move to General Settings Menu
3) Press [\/] to highlight Blue Screen
4) Press [>] to switch between on and off
5) Press [EXIT] to exit
System Lock
This menu allows you to lock certain features of the
television so that they can not be used or viewed. For
example if you don’t want certain channels viewed by
children or if the television is to be used in a hotel and
you want to limit the volume.
You can lock any of the following - TV buttons,
TV source, set default start up source and limit the
maximum volume.
1) Press [LCD-MENU] to enter menu
2) Press [>] to move to General Settings Menu
3) Press [\/] to highlight System Lock
4) Press [>] to enter System Lock menu
5) To enter this menu you will be asked for your pin code
(Default is blank so you just need to press [OK]).
6) To set locks you first need to switch System Lock to
ON, this will un grey the options.
You can now select the following:
Key Lock – Off/On – This stops the buttons on the
television working.
Source Lock – Press [>] to enter then apply On to lock
the source so it can’t be used
Default Source – You can set the default start up source,
so when the television is turned on it goes to this source.
Maximum Volume – You can limit the maximum volume
Change Pin Code – Press [>] to enter, first enter the
current code (default is blank so just press OK), then
enter your new code.
7) Once you happy with the settings press [EXIT] to exit
menu.
Channel Lock – please refer to Program Edit section to
select the channels that you require to lock. Once locked
you can temporarily unlock a channel by entering the pin
code, the lock will be re-applied by switching off the TV
to standby and then back on.
GENERAL SETTINGS MENU
English
Auto
Off
GENERAL SETTINGS MENU
English
Auto
Off
GENERAL SETTINGS MENU
English
Auto
Off
GENERAL SETTINGS MENU
English
Auto
Off
SYSTEM LOCK
System Lock
Key Lock
Source Lock
Default Source
Max Volume
Change PIN Code
Off
On
ATV
99
23_39 english manual 19.pdf 28. 5. 2009 12:29:29
Summary of Contents for X23/39C-FTCD-UK
Page 1: ...X23 39C FTCD UK Full HD LCD TV with Freeview DVD Model No User Guide...
Page 2: ...2 19_22_37 english manual 02 pdf 12 2 2009 14 50 23...
Page 6: ...blank pdf 19 12 2008 11 10 05...
Page 31: ...blank pdf 12 2 2009 15 42 54...
Page 32: ...blank pdf 12 2 2009 15 42 54...
Page 33: ...blank pdf 12 2 2009 15 42 54...


