6
w
w
w
.ul
tral
u
x.bg
6
w
w
w
.ul
tral
u
x.b
g
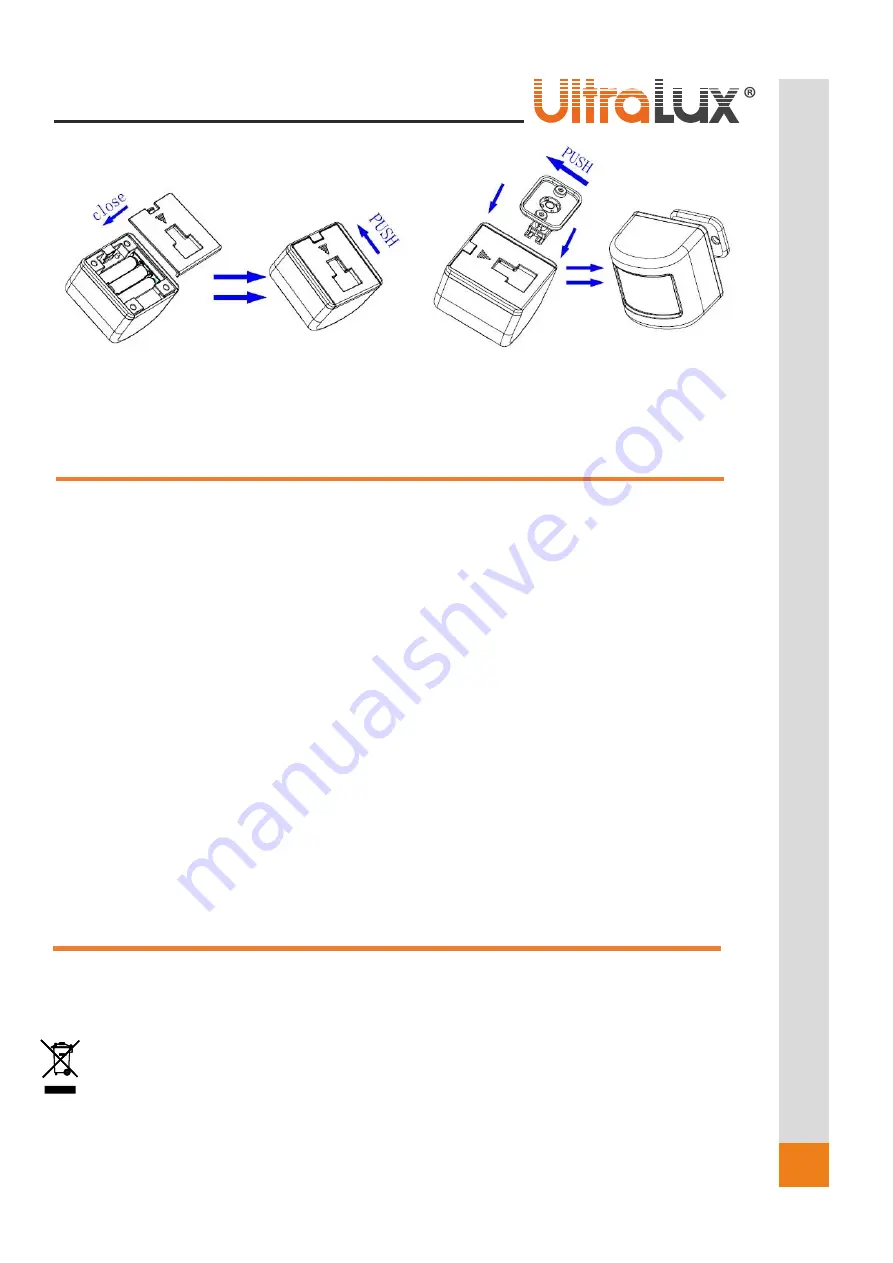
Connect the sensor with the app. Close the back lid of the
sensor by sliding it, as shown on the picture.
Assemble the rotatable holder and mount the
sensor on the desired surface.
CONNECTION with TuyaSmart:
1.
Download the app TuyaSmart from Google Play (for Android) or from APP STORE (for iOS).
2.
Install the app.
3.
Start the app.
4.
If you do not have a profile you would be required to register.
5.
Enter your profile.
6.
Press the
„
+
“
button located in the top right corner of the screen (pic. 1). You could also use the
„
Add
device
” button
.
7.
In the section “
S
ensors” choose “Sensor
(WI-FI)
” (pic. 2).
8.
Choose the Wi-
Fi network you are using. Enter the password for accessing the network. Press “Next” (pic. 3).
9.
Reset the sensor. Press the push button located above the batteries until the indicator light flashes.
10.
Select the checkbox “Confirm the indicator is blinking rapidly” and press the “Next” button
(pic. 4).
11.
Wait until the sensor is being added (pic. 5)
12.
After successfully adding the sensor you could change its name
. Press the button “
Done
” (p
ic. 6).
13.
The device’s menu is going to open auto
matically (pic 7).
14.
In the
“
Record
”
section you could check the events record (pic 8).
15.
In the
“
Smart
”
section you could create and edit lighting scenes (automatizations)
–
in this case, switching
on/off a SMART lighting whenever a motion is being detected (pic. 9).
16.
In the
“
Set
”
section you could check the battery life status, set an alert whenever the battery runs low and in
case of a motion (pic. 10).
17.
Whenever a motion is detected you will receive a notification from the app with information about the
device, place, and time of the detection (pic. 12).
18.
The main menu of the app will visualize all the connected devices (pic. 11).
TAKING CARE OF THE NATURAL ENVIRONMENT CLEANLINESS
•
The product and its components are not harmful to the environment.
•
Please dispose the package elements separately in containers for the corresponding material.
•
Please dispose the broken product separately in containers for out of usage electrical equipment.
Summary of Contents for WI-FI SMART
Page 3: ...3 www ultralux bg 3 www ultralux bg 1 2 3 4 5 6...
Page 4: ...4 www ultralux bg 4 www ultralux bg 7 8 9 10 11 12...
Page 7: ...7 www ultralux bg 7 www ultralux bg Pic 1 Pic 2 Pic 3 Pic 4 Pic 5 Pic 6...
Page 8: ...8 www ultralux bg 8 www ultralux bg Pic 7 Pic 8 Pic 9 Pic 10 Pic 11 Pic 12...


