


13
KCMU000004
06/08/01
BASIC INSTALLATION
, continued
Adjusting
AGC
1. If the auto-iris has a gain adjustment, perform the
following steps:
a. If the lens oscillates between open and
closed under bright lights, slowly turn the gain
adjustment counterclockwise until the
oscillating stops.
b. Increase the light getting to the camera by
adjusting the level control and readjusting the
gain control as necessary.
c. Reset the level control as illustrated in Step 6.
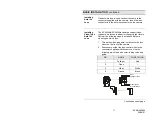
Installing
DC-Type
Auto-Iris
Lens
The KC452xMx/KC652xMx cameras support DC auto-
iris lenses. Perform the following steps to install and
adjust a DC-type auto-iris lens.
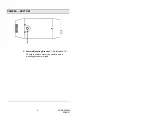
1. Thread the DC iris lens onto the lens mount on
the front of the camera.
2. If using an Ultrak lens, skip to step 4.
3. If using a non-Ultrak lens, use the manufacturer’s
instructions to solder the connector that comes
supplied with the camera to the lens control wires.
The pin-out and wire color-coding for DC-type
auto-iris lenses can vary from one manufacturer to
another.
4. Plug the connector into the DC iris jack on the
front of the camera. The connector is keyed and
can only be inserted into the jack one way.
5. Make sure that the E/I switch located on the back
of the camera is set to OFF.
6. Apply power to the camera.
7. Adjust the DC-type auto-iris lens for an optimum
picture using the IRIS LEVEL control on the back
of the camera.


