Ultra electronics HYPERSPIKE HS-14 Operation And Maintenance Manual Download Page 7

HyperSpike

® 

HS-14 RAHD Operation and Maintenance Manual 

Copyright © "RSB Group", Moscow, Krzhizhanovskogo str., 14/2


90169A-MAN-HS14RAHD 

Rev A 

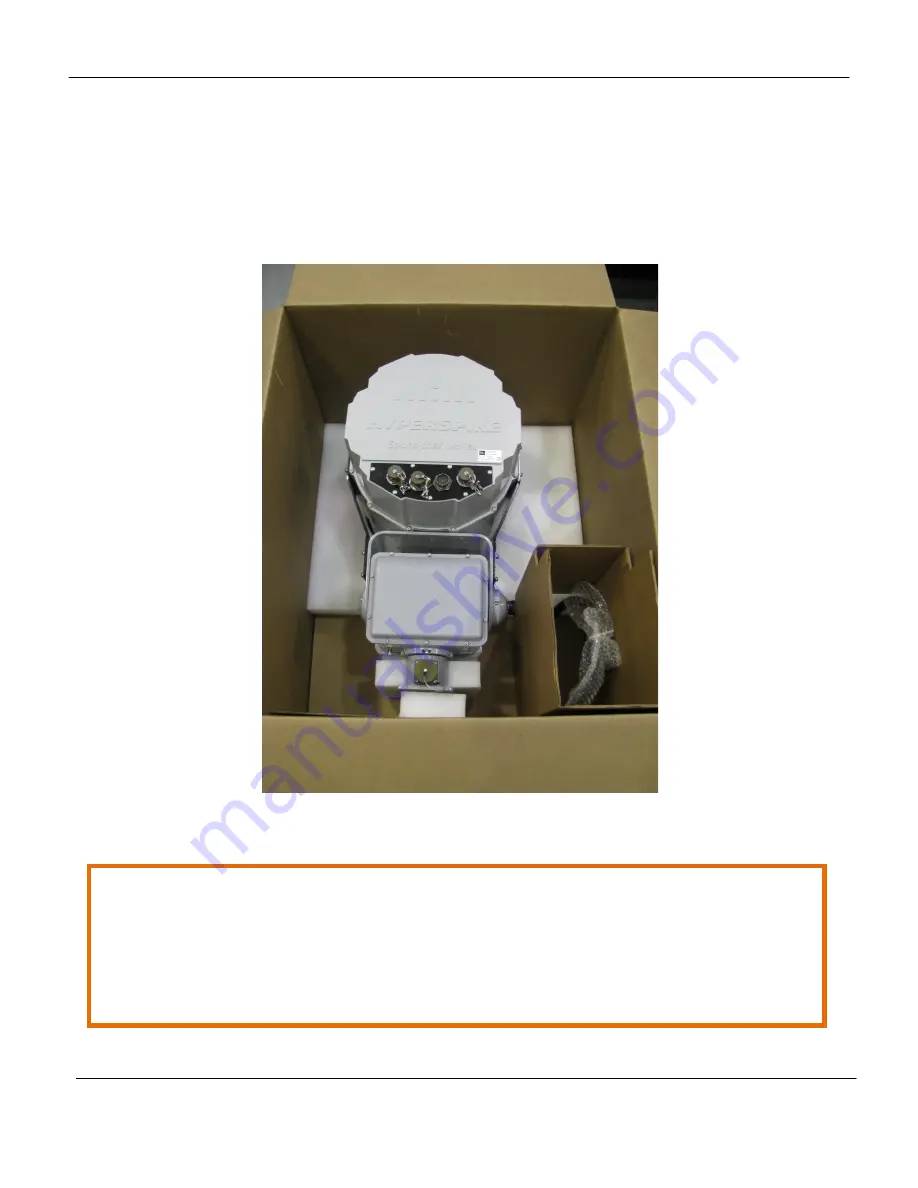
1.2. Included in Box 

Included Items are: 

1x HS-14 RAHD Assembly, P/N 90169A-801-XX 
1x Power/Data Cable, P/N 42222A-801 
1x Interconnect Cable, P/N 42206A-801 

Figure 1.2-1  HS-14 RAHD – In Packaging 

CAUTION: 

The HS-14 RAHD ASSEMBLY IS A MINIMUM TWO PERSON LIFT 

HEAVY OBJECT - OVER 50 lbs 

Straps connected to the mounting bracket and pan/tilt base may be used to assist lifting 

Summary of Contents for HYPERSPIKE HS-14

Page 1: ...OPERATION AND MAINTENANCE MANUAL HYPERSPIKE MODEL HS 14 RAHD ...

Page 2: ......

Page 3: ...orking and Device Setup 10 4 1 Initial Setup 10 5 Controls and Operations 11 5 1 First Time Setup 11 5 2 Login Page 12 5 3 Simultaneously Controlling Multiple RAHDs 13 5 4 Removing a Device 15 5 5 Volume Panel 16 5 6 Pre Recorded Tracks 16 5 6 1 Uploading Audio Files 17 5 6 2 Stopping a Playing Track 17 5 6 3 Editing or Deleting a Track 18 5 7 Live Microphone 18 5 8 Points of Interest POI 19 5 9 T...

Page 4: ...Spike HS 14 RAHD Operation and Maintenance Manual Copyright RSB Group Moscow Krzhizhanovskogo str 14 2 90169A MAN HS14RAHD Rev A ii 8 2 Limitation of Implied Warranties 35 8 3 Exclusion of Certain Damages 35 ...

Page 5: ...from an outlet by pulling on the cord Never override any of the HS 14 RAHD s electrical safety features Sound Safety Measures The National Institute for Occupational Safety and Health NIOSH recognizes 120 dB as the threshold of pain for unprotected hearing Operators should wear hearing protection and ensure that personnel are not directly in front of the device at close range when the power is ON ...

Page 6: ... RAHD Remote Acoustic Hailing Device is designed for ease of assembly It is suitable for both static and mobile applications The RAHD unit can be equipped with optional accessories including but not limited to cameras spotlights and laser dazzlers per customer requirements Figure 1 1 1 HS 14 RAHD Note Full physical electrical and acoustic specifications are contained in Section 2 ...

Page 7: ...in Box Included Items are 1x HS 14 RAHD Assembly P N 90169A 801 XX 1x Power Data Cable P N 42222A 801 1x Interconnect Cable P N 42206A 801 Figure 1 2 1 HS 14 RAHD In Packaging CAUTION The HS 14 RAHD ASSEMBLY IS A MINIMUM TWO PERSON LIFT HEAVY OBJECT OVER 50 lbs Straps connected to the mounting bracket and pan tilt base may be used to assist lifting ...

Page 8: ...DC Output Current 12 VDC Aux Supply Fused at 1 A shared by connectors A B D Output Current 24 VDC Aux Supply Fused at 7 5 A shared by connectors A B D 2 3 Acoustic Specifications HS 14 RAHD WEIGHT Complete System 83 6 lbs 37 9 kg HS 14 RAHD DIMENSIONS System Width 15 4 in 39 1 cm System Height 27 1 in 68 8 cm System Depth 18 6 in 47 2 cm Front Wind Load Area 260 in2 1677 cm2 Side Wind Load Area 35...

Page 9: ...ipped to a stable surface To maximize water protection the recommended orientation of the transformer box is with connectors facing down Refer to mounting details in Figure 3 1 2 and Figure 3 1 3 Figure 1 1 1 Ensure that mounting locations account for the cable length available The standard length of cable between the emitter and transformer box is 5 feet Optional lengths are available at customer...

Page 10: ...peration and Maintenance Manual Copyright RSB Group Moscow Krzhizhanovskogo str 14 2 90169A MAN HS14RAHD Rev A 5 Figure 3 1 2 HS 14 RAHD Interface Mounting Dimensions Figure 3 1 3 Transformer Box Interface Mounting Dimensions ...

Page 11: ...e interested in connecting an auxiliary device other than a standard accessory to the HS 14 RAHD We will work with you to ensure a smooth integration of your accessory devices For proper operation only use the connectors in accordance with the following list of designated purposes Connector A Camera Auxiliary Connector B Auxiliary Connector C Pan Tilt Out Connector D Searchlight Auxiliary Connecto...

Page 12: ...nnect the Power Data Cable P N 42222A 801 to connector F Tighten the cable firmly to ensure a weather tight seal While the HS 14 RAHD is designed for direct operation on a 20 Amp 110 VAC circuit a step down transformer is available for locations that have only 220 VAC An isolation transformer is also available for locations with non standard or unreliable AC power Follow the wiring diagrams provid...

Page 13: ...HyperSpike HS 14 RAHD Operation and Maintenance Manual Copyright RSB Group Moscow Krzhizhanovskogo str 14 2 90169A MAN HS14RAHD Rev A 8 3 3 Wiring Diagram for 110 VAC Installation With Transformer ...

Page 14: ...s can be powered and controlled via connectors A B and D Some accessories require unique interfaces with the HS 14 RAHD therefore please connect your accessories according to the following recommendations Accessory Assigned Connector Daytime Camera A Searchlight D Other Accessories B If accessory connectors are to be used in permanent installations weather sealing caps can be removed by cutting th...

Page 15: ...lt your network manager 4 1 Initial Setup The HS 14 RAHD is designed to be operated through the use of its built in web based Command and Control Interface CCI To access this interface Power on your access device Desktop or Laptop Computer Open the web browser on your access device Enter the IP address of your HS 14 RAHD into the URL entry field in the same fashion you would type in the name of an...

Page 16: ...es to write custom control software a Software Development Kit SDK is also available Figure 5 1 Command and Control Home Page 5 1 First Time Setup When connecting to an HS 14 RAHD for the first time the Setup Popup window will be presented To configure the device enter an identifying name for your HS 14 RAHD in the Device Name field a username in the Username field and a password in the password f...

Page 17: ...ce one HS 14 RAHD has been configured follow the procedure listed in section 5 3 to setup any additional HS 14 RAHDs 5 2 Login Page After initial setup or after connecting to the IP address of the HS 14 RAHD through your web browser enter your username and password in the text fields of the popup window Remember this USERNAME and PASSWORD as they will be needed the next time that you need to login...

Page 18: ...l number is listed on the white label placed on the back of the system New Username If you d like to reset the master username enter it here New Password The new password for the device Confirm Password The new password for the device Figure 5 2 2 Forgot Password Page 5 3 Simultaneously Controlling Multiple RAHDs The CCI is designed to allow the user to control multiple acoustic hailing devices si...

Page 19: ...device has not already been configured the CCI will automatically copy the master Username and Password to it After completing this step for every HS 14 RAHD on your network all of the devices will share a common username and password Figure 5 3 2 Add Device Popup Window Once IP Address and Name information is supplied the new device should appear on the Home Screen After appearing on the screen i...

Page 20: ... Devices After adding a new HS 14 RAHD inspect the Status Indicator If it is not green refresh your browser page If the indicator remains red refer to Section 7 Troubleshooting 5 4 Removing a Device To remove a device click on the device settings gear as shown in Figure 5 1 Click on Remove Device on the bottom right of the popup window Figure 5 4 1 Edit Device Window ...

Page 21: ...m volume Click on the blue volume button to vary the individual volumes of each connected device To mute a device click on the mute speaker icon Figure 5 5 2 Individual Volume Drop Down 5 6 Pre Recorded Tracks Pre recorded tracks can conveniently be accessed from the Tracks group in the Side Panel To play a track simply select the button to the right of the track name Figure 5 6 1 Playing a File N...

Page 22: ...the popup window or use the file browser to select desired files Figure 5 6 3 Add Track Popup Window If the track upload is successful the filename will appear with a 100 completion rate To change the name of the track click Edit To cancel the upload of an unwanted track click Delete When you are finished selecting tracks for upload click Done 5 6 2 Stopping a Playing Track When a track is activel...

Page 23: ...e capability the access device must have a microphone installed To stream a live microphone through the acoustic hailing device s select the microphone icon located above the Tracks Pane as shown in Figure 5 1 Some web browsers may display a popup warning requesting access to the installed microphone Navigate through the popup window and allow the browser microphone access Figure 5 7 1 Example Bro...

Page 24: ...may use this feature of the CCI to quickly position the acoustic hailing device to a frequently targeted area Points of Interest can be designated by selecting the button in the POI Pane as shown in Figure 5 1 Figure 5 8 1 Add POI Popup Window To begin creating a POI click on the button in the popup window Enter the desired Pan and Tilt coordinates in the text fields displayed within the popup win...

Page 25: ...as If multiple devices are connected you will have the option to define POI coordinates for each device To edit or remove an existing POI from the home page click on the Information circle next to the POI s name This will bring up the Edit POI menu Figure 5 8 3 Edit POI Popup Window From this menu the name and position of a POI can be altered To remove a POI from one device click on the button nea...

Page 26: ...lect the button to the right of the POI name Figure 5 8 5 POI Start Button 5 9 Tours When desired an HS 14 RAHD can execute automated pre designated tours The user has the ability to define movements in the pan and tilt axes audio output and accessory controls To create a tour select the button in the Tour pane of the Side Panel as shown in Figure 5 1 This will bring up the Add Tour Popup Window ...

Page 27: ... tour you are about to create If you have multiple RAHDs connected you can create a tour with the same name but different actions for each device This means that with one key press you can trigger multiple devices to do independent designated routines Clicking on the button will bring up the Tour Editor which allows independent routines to be defined for each device Figure 5 9 2 Edit Tour Popup A ...

Page 28: ... by a destination position To set this destination enter coordinates in the Pan and Tilt fields Angles can be defined in the following ways o Absolute The coordinates entered will be the destination position o Relative The destination position will be the sum of the entered coordinates and the previous destination o POI A predefined POI can be selected as the destination position o Delay The RAHD ...

Page 29: ...MAN HS14RAHD Rev A 24 Figure 5 9 4 Edit Tour Popup C To complete the leg a leg time duration must be specified or a travel velocity supplied The direction in which the HS 14 RAHD will travel to reach its destination can also be set as clockwise counterclockwise or the fastest direction Figure 5 9 5 Edit Tour Popup D ...

Page 30: ...me To stop a tour click on the button Figure 5 9 6 Tour Start Button 5 10 Dead Zones The CCI allows the user to easily define physical locations where device functionality should be restricted For example if an HS 14 RAHD was installed on a ship a user can restrict the system from playing high volume audio directly at the bridge This feature is especially useful when training new operators to use ...

Page 31: ... you would like to restrict within the Dead Zone Restricting movement will prevent the HS 14 RAHD from entering the Dead Zone at all while restricting audio will only disable audio while traveling through the Dead Zone Note A Dead Zone s included angles will always be interpreted as follows The range of Pan angles beginning at the Min angle progressing in the clockwise direction and ending at the ...

Page 32: ...reen with an independent set of controls and status indicators The current angular position volume level and connection status of each device are all displayed on screen Figure 5 11 1 Control and Status Pane To move a unit simply press the on screen arrow buttons Clicking on an arrow button will cause the system to move a variable distance selectable through the Move By drop down Clicking and hold...

Page 33: ...accomplished by clicking anywhere on the page s grey background Figure 5 11 3 Keyboard Control Enabled 5 12 All Select Mode A convenient feature of the CCI is the ability to toggle between All and Select modes When the system is in All Mode starting track playback live mic tours or POIs will affect every connected RAHD In select mode a popover menu will appear when the user attempts to send a comm...

Page 34: ... A 29 Figure 5 12 1 Playing a Track in Select Mode 5 13 Account Options and Logout To change the current master Username or Password click on the gear System Settings icon as shown in Figure 5 1 to pull up the Settings menu Figure 5 13 1 Settings Menu Clicking on Account will allow the user to change the master username or password ...

Page 35: ...ame Password Menu To log out of the system click on the Logout button 5 14 Factory Reset If at any point it is desired to completely remove all tracks tours POI s dead zones and user information from a device a factory reset can be performed To do this open the gear Device Settings menu as shown in Figure 5 1 At the bottom of the popup menu click on Factory Reset ...

Page 36: ...he HS 14 RAHD is a multi environment device As a result maintenance should be performed based upon the conditions that exist where the unit is in use The following preventive maintenance actions are the minimum methods needed to keep the unit functioning at optimal capacity WARNING LIFE THREATENING ELECTRIC SHOCK OR DEATH BY ELECTROCUTION 100 250 VAC IS PRESENT WHEN ENERGIZED TEMPORARY OR PERMANEN...

Page 37: ...ces and canon plugs connectors with a lint free cloth soaked in clean water Perform this task weekly and after inclement weather 6 3 To prepare for storage Remove and wipe down the HS 14 RAHD all cables and accessories with a lint free cloth soaked in clean water Dry thoroughly Ensure all connector covers are in place Cover the HS 14 with a Maritime cover or place in a protective case Store the un...

Page 38: ...be configured properly 7 3 Troubleshooting Software If you are experiencing issues when connecting to an HS 14 RAHD the following troubleshooting plan may help to resolve your problems Case 1 Indicator light Next to the device name is Red Verify the device is not already being accessed by another user Ensure the IP address listed when clicking on the Device Settings gear icon as shown in Figure 5 ...

Page 39: ...hen service is requested under warranty If your product should require service write phone fax or e mail Ultra Electronics USSI at RSB Group Moscow Krzhizhanovskogo str 14 2 Phone 7 495 984 04 16 Email office rsb group ru URL www hyperspike ru We will either direct you to a local service agency or provide you with a Return Material Authorization RMA number so that you can ship the product to our f...

Page 40: ...his warranty such as conversations with service personnel or sales representatives 8 2 Limitation of Implied Warranties All implied warranties including warranties of merchantability are limited in duration to a period of one 1 year from the date of shipment from Ultra Electronics USSI 8 3 Exclusion of Certain Damages Ultra s liability is limited to the repair or replacement at our option of any d...

Page 41: ......

Reviews: