background image

12

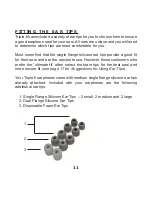
ATTACHING THE EAR TIPS

The ear tips can be attached or removed by using a gentle grasping and
twisting motion. The ear tip should fit securely over the ear conductor and
once the ear tip is in place, the ear conductor should not be exposed.

CARE AND CLEANING OF FLANGED
SILICONE EAR TIPS

The silicone ear flanges are reusable and need to be cleaned with an
antiseptic wipe after each use. They should also be removed and
cleaned regularly with mild soap and water. The ear tip should be
completely dry before placing on the ear conductor.

CARE OF FOAM EAR TIPS

The foam ear tips are designed to be used only a few times then should
be disposed of when they appear discolored.

CONNECTING TO A LISTENING DEVICE

Triple.fi earphones come with a 1/8 inch input plug that is compatible with
most personal listening devices. In addition, a 1/4 inch adapter has been
included which allows you to connect to a variety of other consumer
electronic equipment. 

Summary of Contents for Triple.FI 10 Pro

Page 1: ...T R I P L E F I 1 0 P r o user user guide guide...

Page 2: ......

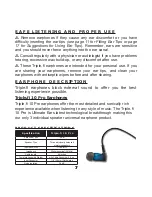
Page 3: ...best consumer earphone products available on the market today our Triple fi 10 Pro We hope that you will enjoy your Ultimate Ear monitors and the professional sounding audio experience In our industry...

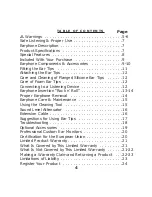
Page 4: ...ice 12 Earphone Insertion Rock n Roll 13 14 Proper Earphone Removal 14 Earphone Care Maintenance 15 Using the Cleaning Tool 15 Sound Level Attenuator 16 Extension Cable 16 Suggestions for Using Ear Ti...

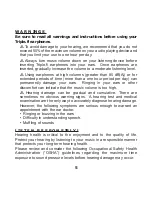
Page 5: ...rs or other discomfort can indicate that the music volume is too high Hearing damage can be gradual and cumulative There are sometimes no obvious warning signs A hearing test and medical examination a...

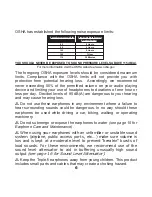
Page 6: ...ailure to hear surrounding sounds could be dangerous In no way should these earphones be used while driving a car biking walking or operating machinery Do not submerge or expose the earphones to water...

Page 7: ...r Cable length 46 inches Impedance 32ohms nominal 1kHz Complete Assembly Weight with Cable Assembly 0 6 oz Input Connector 1 8 3 5mm Gold plated Noise Isolation 26 dB SAFE LISTENING AND PROPER USE Rem...

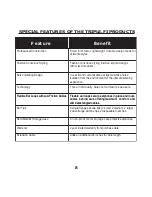
Page 8: ...loops secure earphones in place and route cables behind ears offering maximum comfort and eliminates tangled cables Flexible Ear Loops with Low Friction Cables Flexible ear loops secure earphones in...

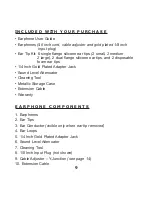
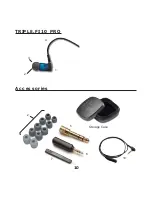
Page 9: ...ps and 2 disposable foam ear tips 1 4 Inch Gold Plated Adapter Jack Sound Level Attenuator Cleaning Tool Metallic Storage Case Extension Cable Warranty EARPHONE COMPONENTS 1 Earphones 2 Ear Tips 3 Ear...

Page 10: ...TRIPLE FI 10 PRO Accessories 4 2 6 7 5 Storage Case 3 2 10 1 10...

Page 11: ...fit for their ears and are the easiest to use However those customers who prefer the ultimate fit often select the foam tips for the best seal and more secure fit see page 17 for Suggestions for Usin...

Page 12: ...e after each use They should also be removed and cleaned regularly with mild soap and water The ear tip should be completely dry before placing on the ear conductor CARE OF FOAM EAR TIPS The foam ear...

Page 13: ...e using an unstable sound device please see page 16 for Using the Sound Level Attenuator STEP 1 Identify the left earphone marked with an L and the right earphone marked with an R Holding each earphon...

Page 14: ...of the cables Now you are ready to gradually increase the volume on your listening device and to begin your Ultimate Ears experience PROPER EARPHONE REMOVAL REVERSE ROCK N ROLL To remove grasp the ear...

Page 15: ...r striking the ear phones may damage components or compromise sound Do not pull on the cables to remove earphones from your ear Do not pull the cables to remove the input plug from a listening device...

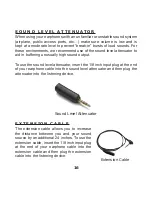
Page 16: ...tput To use the sound level attenuator insert the 1 8 inch input plug at the end of your earphone cable into the sound level attenuator and then plug the attenuator into the listening device Sound Lev...

Page 17: ...p to slide more easily into place and create a good seal DIFFICULTY INSERTING INTO THE EAR CANAL Identify the left earphone marked with an L and the right earphone marked with an R Inserting one earph...

Page 18: ...make certain that the jack is properly attached to your listening device and that the volume has been gradually increased If you are still not receiving sound confirm that the connections between the...

Page 19: ...s com for color selections and optional lengths 20 00 Tool Kit Sound Level Attenuator 1 4 Adapter Cleaning Tool AA M16 02 20 00 Dual Plug Adapter AA D17 02 10 00 Metallic Storage Case AA H01 02 15 00...

Page 20: ...sional product that fits your music genre and stylize the product with your favorite color scheme Then visit an audiologist to take impressions of your inner ear In less than two weeks you will receiv...

Page 21: ...erty THIS PARAGRAPH SETS FORTH THE SOLE AND EXCLUSIVE REMEDY FOR BREACH OF WARRANTY WITH RESPECT TO THE PRODUCT WHAT IS NOT COVERED BY THIS LIMITED WARRANTY As indicated above only the Product s earph...

Page 22: ...tab on the Company s website This process is fully automated and will give you an RMA number after you complete the necessary information fields accurately and the Company determines the defect falls...

Page 23: ...LY BE DISCLAIMED OR EXCLUDED UNDER APPLICABLE LAW THEN TO THE EXTENT POSSIBLE ANY CLAIMS UNDER SUCH IMPLIED WARRANTIES SHALL EXPIRE ON EXPIRATION OF THE WARRANTY PERIOD NEITHER THE COMPANY NOR ANY OF...

Page 24: ...unable to register please submit your name address email address the product model number and the date you purchased the product by mail to Ultimate Ears LLC Attn Product Registration Dept 5 Jenner St...

Page 25: ...25...

Page 26: ...26...

Page 27: ......

Page 28: ......

Reviews: