ACM6000-MAN
P. 7
DC voltage testing
Most electric/electronic devices in an automobile rely upon Direct
Current. Voltage will always have a direct relationship to current. It is
important that the voltage be appropriate for the need.
• When voltage is too low, insufficient power can cause problems -
Bulbs become dim, motors can slow down, and relays will
often malfunction
• When voltage is too high, devices are overpowered and bulbs
will burn out prematurely, motors can run too fast and fail early,
relays with fine wiring may overheat and fail
Use the DMM DC Voltage Testing capability of the ACM6000 to make
these important voltage tests.
NOTE:
Modern automotive engine management systems utilize
computers and pulsed electronic solenoids in order to achieve the
best combination of power, fuel efficiency and low emissions. Those
pulsed devices are often on for only a few thousandths of a second
at a time. In some situations the on pulse lasts only a few millionth
of a second. The tool of choice to test pulsed circuits is a high-
performance Labscope, like the ADL7000 or ADL7100. These
Labscopes sample the circuit millions of times per second.
Battery - state of charge
When conducting starting and charging system tests the first step is to
verify that the battery is fully charged.
1. Place the vehicle ignition switch in the OFF position.
2. Turn the headlights ON for 30 seconds to dissipate the battery
surface charge.
3. Slide the ACM6000 power switch to the ON position.
4. Turn the ACM6000 rotary function switch to V.
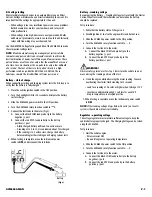
5. Connect the test leads to the meter (Fig 2).
A. Connect the black COM lead probe tip to the battery
negative (-) post
B. Connect the red VW˚F lead probe tip to the battery
positive (+) post
• A fully charged battery will read 12.6 volts or more
• A reading of 12.4 to 12.5 is considered about 75% charged
• If the reading is 12.3 volts or less, charge the battery
before making further starting and charging system tests
6. When testing is complete, move the instrument power
switch to
OFF
, and disconnect the test leads.
Battery - cranking voltage
By comparing the Battery – Cranking Voltage test result with the Starter
Current Draw test result, the technician can determine if a battery
should be replaced.
Test procedure:
1. Verify that the battery state of charge is ok.
2. Disable ignition or fuel so the engine will crank but not run.
3. Slide the ACM6000 power switch to the ON position.
4. Turn the ACM6000 rotary function switch to V.
5. Connect the test leads to the meter.
A. Connect the black COM lead probe tip to the
battery negative (-) post
B. Connect the red VW˚F lead probe tip to the
battery positive (+) post
WARNING!
Observe safety procedures for step 7. Be certain the vehicle can not
move during the cranking portion of the test.
6. Crank the engine while observing the meter reading. To avoid
overheating the starter, limit cranking to 15 seconds.
• Look for a reading of 9.6 volts or higher when testing at 70˚F
• In colder conditions allowing 0.1 volt less for each 10˚F
drop in temperature is accepted practice
7. When testing is complete, move the instrument power switch
to
OFF
.
NOTE:
If the cranking voltage drops below 9.0 volts (on 12 volts
systems) the vehicle will not start reliably.
Regulator - operating voltage
The voltage regulator must maintain sufficient voltage to keep the
vehicle battery properly charged. The Charging Voltage can be tested
using the ACM6000.
Test procedure:
1. Start the vehicle engine.
• All accessories OFF
• Run until engine is at operating temperature
2. Slide the ACM6000 power switch to the ON position.
3. Turn the ACM6000 rotary function switch to V.
4. Connect the test leads to the meter.
A. Connect the black COM lead probe tip to the battery
negative (-) post
B. Connect the red VW˚F lead probe tip to the battery
positive (+) post
Battery
(Fig 2)

