

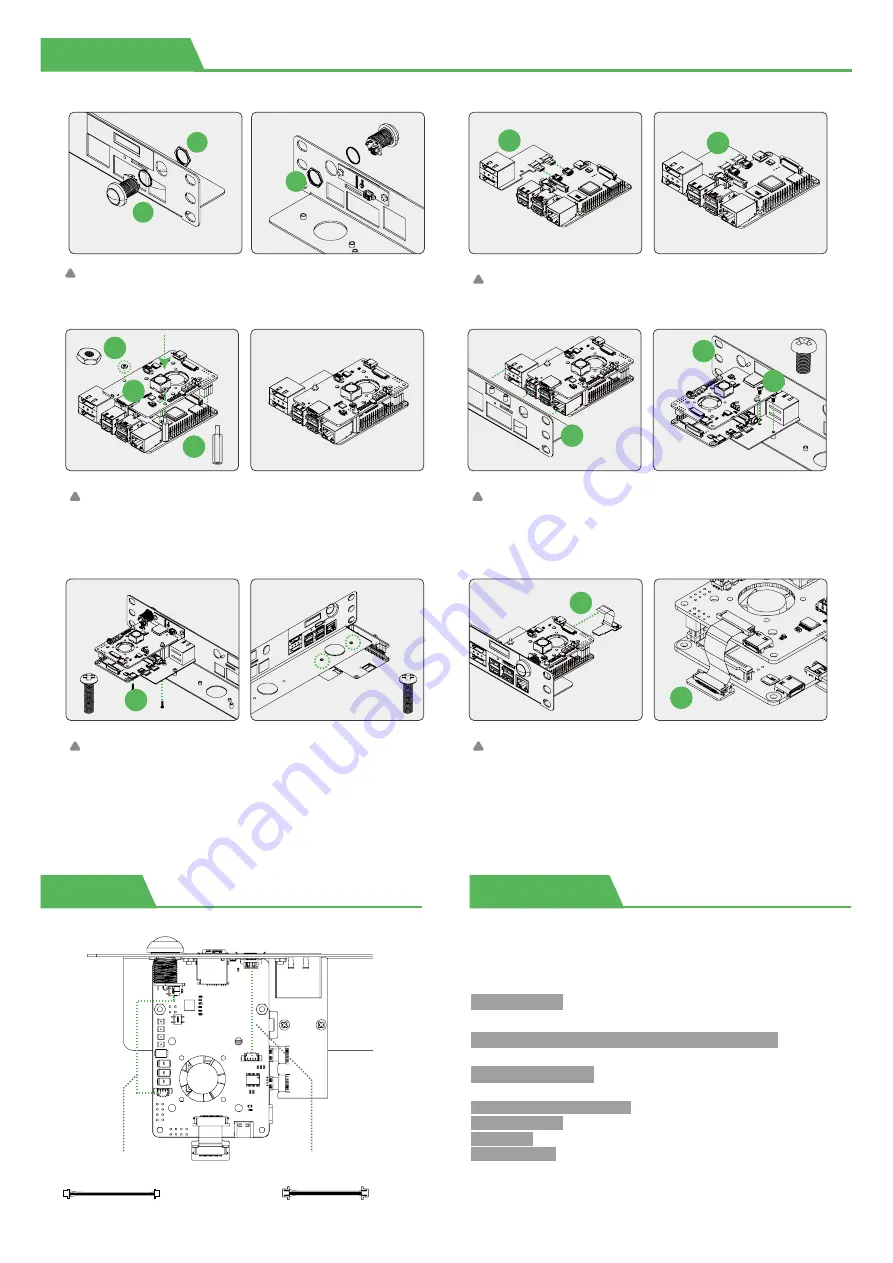
Installation
Demo Code
Wiring
1. Install the power button with the rubber washer and
nut, as shown above.
6
4
6
2. Plug the HDMI adapter board into the Raspberry Pi.
3
3
3. Attach the M2.5*18 standoffs on the HAT ,fix it with
M2.5 nuts, then simply sit the board right on top of the
pins and insert it vertically downward.
12
2
11
4. Insert the installed Raspberry Pi, pay attention to
align with the slot on the bracket, then fix the HDMI
board with M2.5*5 screws.
1
1
10
5. Flip the rackmount over and fix the Raspberry Pi
with M2.5*12 screws.
9
6. Stick the SD card adapter into the slot of the
Raspberry Pi and PoE HAT. Ribbon cable should be
attached to the connector with the silver facing
downwards the HAT
6
6
Wire for
OLED display
Wire for
Power button
OLED Usage
Step 1 Enable I2C
Step 2 Open the rc.local file
Plug in the OLED and power the Pi back up. Run the following command
from the terminal (also known as the shell or command-line interface).
NOTE:
This script is only available for Raspbian. For more scripts, check out
our GitHub page: https://github.com/UCTRONICS/U6143_ssd1306, and we
will keep online up-to-date continuously for other OSs.
Choose Interface Options Enable i2c
sudo raspi-config
sudo nano /etc/rc.local
Step 3 Add command to the rc.local file
Step 4 Reboot your system
cd /home/pi/U6143_ssd1306/C
sudo make clean
sudo make
sudo ./display &
Clone U6143_ssd1306 library
git clone https://github.com/UCTRONICS/U6143_ssd1306.git


