

Copyright © 2018, Ubisense Limited. All Rights Reserved.
2
Setting up your AngleID™ Reader
Setting up your AngleID™ Reader
Setting up your AngleID™ Reader
Setting up your AngleID™ Reader
Test your Setup
Test your Setup
Test your Setup
Test your Setup
Configure Zones
Configure Zones
Configure Zones
Configure Zones
Connect your Devices
Connect your Devices
Connect your Devices
Connect your Devices
1.
Unzip the AngleID package onto your PC, and then run the
AngleIDConfig.exe
program to launch the Config Client.
The Config Client has three tabs. All readers that you are
licensed for are listed on the
Readers
tab.
2.
On the
Readers
tab, assign an IP address and gateway for
the reader.
After the IP address is assigned successfully, the reader
goes through a firmware download and boot process. This
process can take a few minutes on first boot.
After the reader has booted successfully, the status
changes to
reader is running
.
Run the Config Client
Run the Config Client
Run the Config Client
Run the Config Client
Define the detection zone, connected device, and tag(s) that you want to detect. The following
procedure explains how set up a detection zone, using a single reader.
1.
On the
Recipes
tab, click
Create Recipe
. A new blank recipe is added.
2.
Specify the following details:
•
IP/Port details for the external control system for this recipe.
•
Full Tag ID, with colons, for example
00:11:CE:00:00:00:1B:DF
.
•
Preferred protocol.
3.
Click
Update Recipe
. The device and tag details on the recipe are updated. You can now
tune your recipe.
4.
Click
Tune Recipe
. This opens the
Recipes
config interface.
5.
From the drop-down menu, select the MAC address of your reader.
6.
Place the tag at the bounds of your detection zone.
7.
Using your mouse, drag and adjust the horizontal and vertical bounds of the detection zone
for the tag. You can now test your setup.
1.
Move your tag into the horizontal and/or
vertical bounds that you have configured.
The Config tool shows that the tag is
within the detection zone.
2.
Move your tag outside the horizontal and/or
vertical bounds. The Config tool shows that
the tag is outside the detection zone.
3.
To save your settings, click
Finished Tuning
.
Mount your Reader
Mount your Reader
Mount your Reader
Mount your Reader
1.
Using suitable Ethernet cables, connect your devices.
•
Connect your reader to a PoE network switch. You can
also use a separate PoE source and network switch if
necessary.
•
Connect your Windows configuration PC to the same
network switch.
2.
Power on the PoE source and/or switch.
3.
Note down the following details:
•
IP address and subnet of your PC.
•
MAC address of your reader.
•
ID of your tag.
1.
Attach the mounting bracket to the back panel of your
reader.
2.
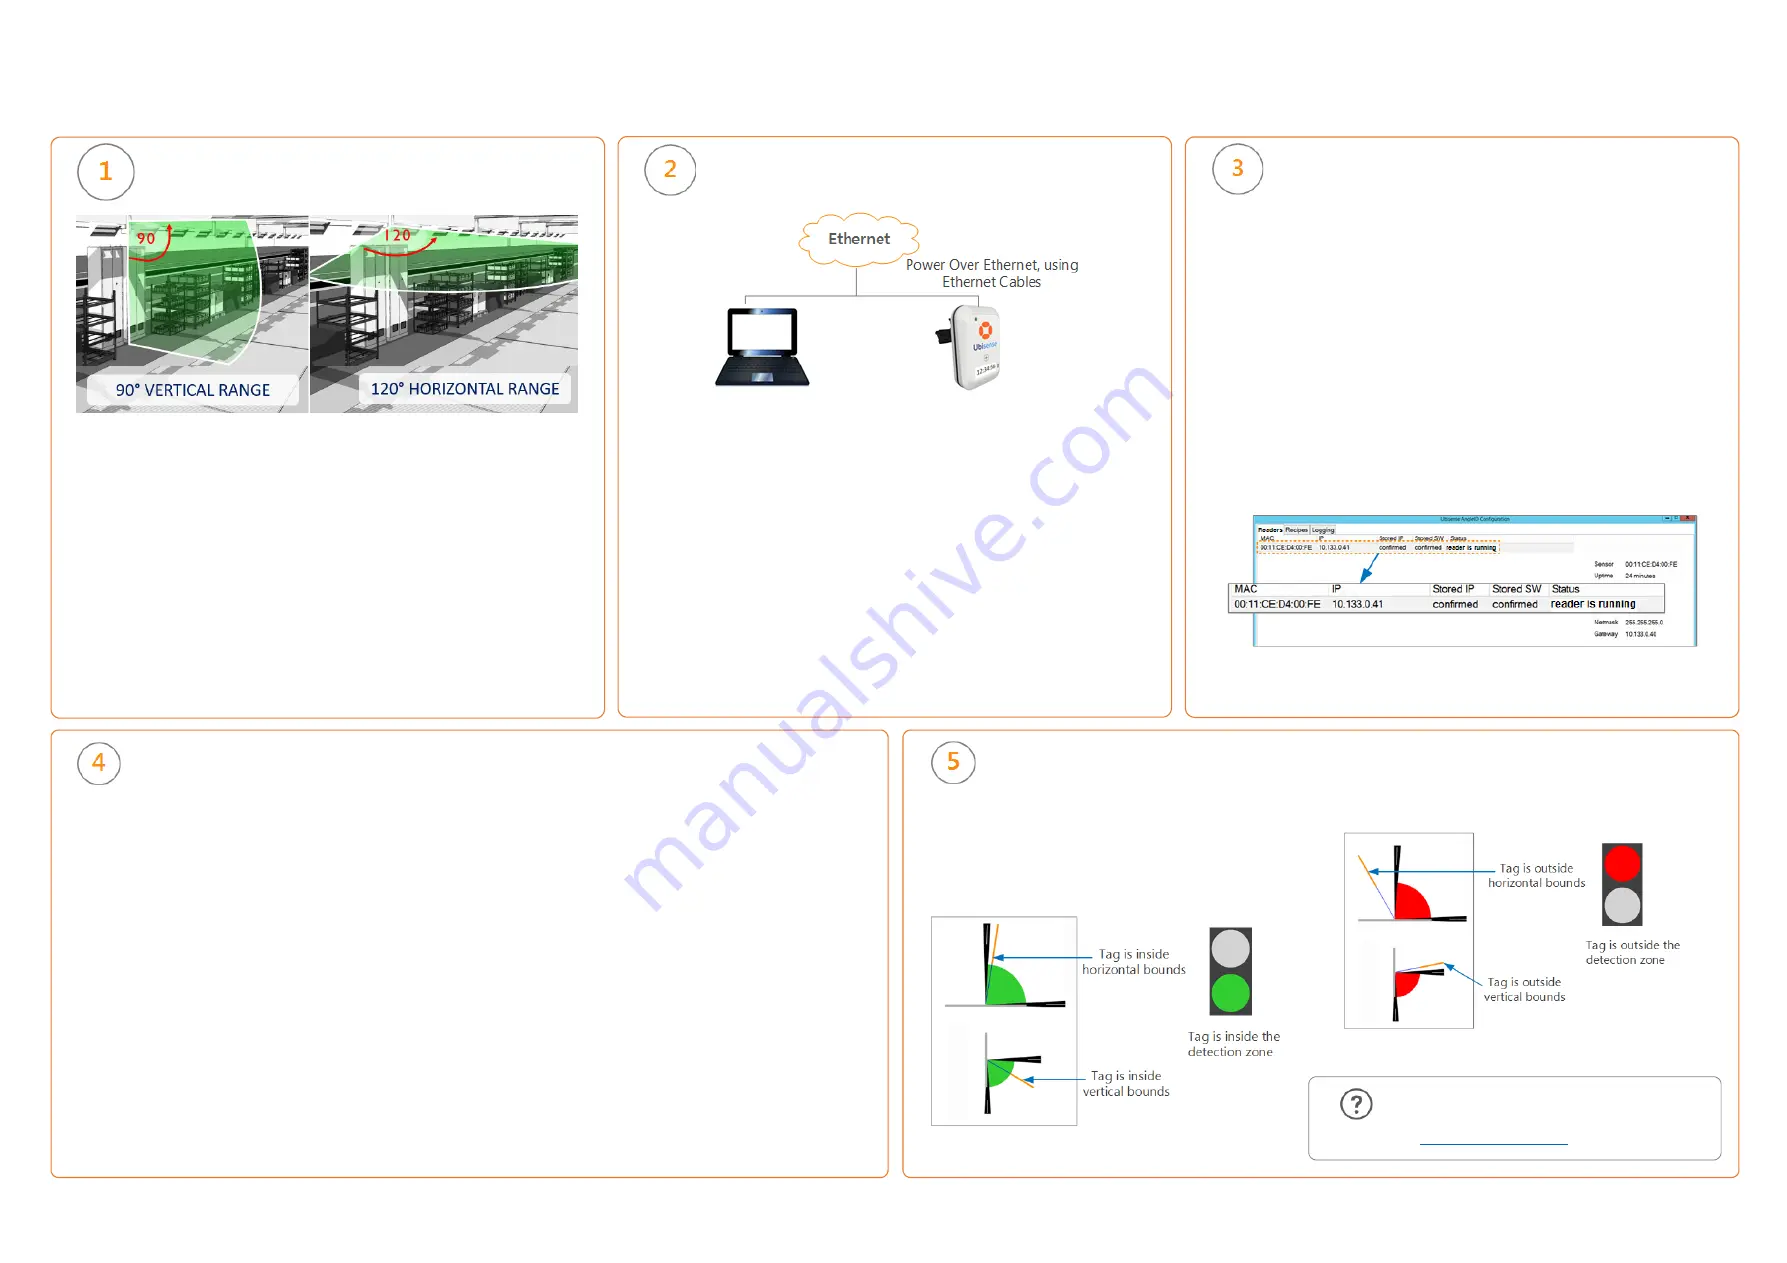
Fix the bracket to an appropriate surface.
3.
Position your reader at a suitable angle, covering the
detection zone where the tag must be tracked.
Note that your reader has 90° vertical and 120° horizontal
angular field of view.
For more information about mounting, see the
Installation
Support Kit Instruction Sheet
supplied with your mounting
bracket.
For further information or assistance, contact
your Ubisense Support Representative or email
us at:
.


