background image

Setting Up the G4 Doorbell

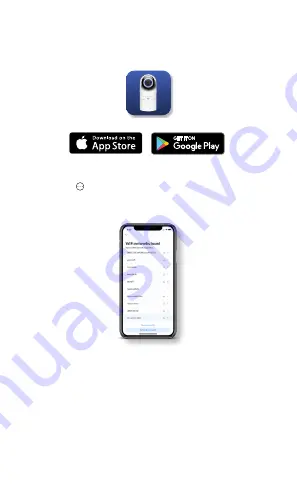
Download and install the UniFi Protect app to set up and 
configure the G4 Doorbell.

1.  Launch the UniFi Protect app.
2.  Click the   menu in the upper right and tap Add Camera 

and select G4 Doorbell.

3.  Select the wireless network to add the G4 Doorbell to.

4.  Enter the password for the wireless network and click OK.
5.  Enter a name for the G4 Doorbell and tap Next.
6.  The G4 Doorbell now appears in UniFi Protect.
7.  Installation complete.

Summary of Contents for UniFi Protect UVC-G4-Doorbell

Page 1: ...Video Doorbell with Two Way Audio Model UVC G4 Doorbell ...

Page 2: ...nts Before You Begin Hardware Overview Installation Setting Up the G4 Doorbell Sample Wiring Diagrams Specifications Safety Notices Electrical Safety Information Limited Warranty Compliance Declaration of Conformity Online Resources ...

Page 3: ...Package Contents G4 Doorbell Angled Mounting Bracket Flat Mounting Bracket Chime Power Kit Spade Wire Adapters Screw Kit Washers ...

Page 4: ...powerful IP video surveillance system that can manage UniFi Protect cameras and the UniFi Protect mobile app The software is free from all hosting and licensing fees and comes pre installed on UniFi s Cloud Key Gen2 Plus model UCK G2 PLUS UniFi Cloud Key Gen2 Plus model UCK G2 PLUS For more information on UniFi Protect visit us on the web at unifi protect ui com ...

Page 5: ... busy do not power off Breathing White Initialized Device not configured Flashing White System initializing Steady White Device configured and working Breathing Blue Device in use two way communication Flashing Blue Device is shutting down Steady Red Error or weak Wi Fi signal Alternating White Blue Firmware upgrading 4 Screen Display screen 5 Microphone Microphone for two way audio ...

Page 6: ... from its mounted location and disconnect all wires Using the Angled Mounting Bracket 1 Pull the existing wires through the center opening of the Angled Mounting Bracket 2 Pull the wires through the center opening of the Flat Mounting Bracket as you align it with the front of the Angled Mounting Bracket ...

Page 7: ...3 Align and place the Flat Mounting Bracket up against the Angled Mounting Bracket and mount them to the wall using the two longer screws from the included screw kit 4 ...

Page 8: ...a phillips screwdriver connect the Spade Wire Adapters to the back of the G4 Doorbell 6 Connect the copper wires to the Spade Wire Adapters by pressing down on the tabs and inserting one wire into each adapter ...

Page 9: ...7 Mount the G4 Doorbell onto the Flat Mounting Bracket 8 Turn on the electrical breaker to power the G4 Doorbell ...

Page 10: ...e center opening of the Flat Mounting Bracket 2 Secure the Flat Mounting Bracket to the wall using the two shorter screws from the screw kit If the bracket does not sit flush against the wall use the included washers to sit between the Flat Mounting Bracket and the wall ...

Page 11: ...a phillips screwdriver connect the Spade Wire Adapters to the back of the G4 Doorbell 4 Connect the copper wires to the Spade Wire Adapters by pressing down on the tabs and inserting one wire into each adapter ...

Page 12: ...5 Mount the G4 Doorbell onto the Flat Mounting Bracket 6 Turn on the electrical breaker that powers the G4 Doorbell ...

Page 13: ...iFi Protect app 2 Click the menu in the upper right and tap Add Camera and select G4 Doorbell 3 Select the wireless network to add the G4 Doorbell to 4 Enter the password for the wireless network and click OK 5 Enter a name for the G4 Doorbell and tap Next 6 The G4 Doorbell now appears in UniFi Protect 7 Installation complete ...

Page 14: ...ing Diagrams Installation with Chime Box Transformer 16V 24VAC Transformer 16V 24VAC TRANS FRONT REAR Chimebox Installation without Chime Box Transformer 16V 24VAC Transformer 16V 24VAC TRANS FRONT REAR Chimebox ...

Page 15: ...ace UniFi Protect Night Mode Built In IR LED Illumination IR Cut Filter View Angle 114 H 138 V 155 D Resolution 1600 x 1200 Max Frame Rate 30 FPS Microphone Yes High Sensitivity Speaker Yes Two Way Power Supply AC 16 24V Max Power Consumption 4W Operating Temperature 10 to 40 C 14 to 104 F Operating Humidity 0 to 90 RH Noncondensing Certifications CE FCC IC ...

Page 16: ... to voltage frequency and current requirements indicated on the manufacturer s label Connection to a different power source than those specified may result in improper operation damage to the equipment or pose a fire hazard if the limitations are not followed 2 There are no operator serviceable parts inside this equipment Service should be provided only by a qualified service technician Limited Wa...

Page 17: ...llation This equipment generates uses and can radiate radio frequency energy and if not installed and used in accordance with the instructions may cause harmful interference to radio communications However there is no guarantee that interference will not occur in a particular installation If this equipment does cause harmful interference to radio or television reception which can be determined by ...

Page 18: ...his radio transmitter IC 6545A UVCG4DB has been approved by ISED Canada CAN ICES 3 B NMB 3 B Le présent appareil est conforme aux CNR d ISDE Canada applicables aux appareils radio exempts de licence L exploitation est autorisée aux deux conditions suivantes 1 l appareil ne doit pas produire de brouillage 2 l appareil doit accepter tout brouillage radioélectrique subi même si le brouillage est susc...

Page 19: ...e l équipement assurez vous qu il y ait une distance minimale de 20 cm entre l élément rayonnant et vous Cet émetteur ne doit être installé à proximité d aucune autre antenne ni d aucun autre émetteur et ne doit être utilisé conjointement à aucun autre de ces appareils Australia and New Zealand Brazil Nota Este equipamento não tem direito à proteção contra interferência prejudicial e não pode caus...

Page 20: ...here you purchased the product Deutsch Die Europäische Richtlinie 2012 19 EU verlangt dass technische Ausrüstung die direkt am Gerät und oder an der Verpackung mit diesem Symbol versehen ist nicht zusammen mit unsortiertem Gemeindeabfall entsorgt werden darf Das Symbol weist darauf hin dass das Produkt von regulärem Haushaltmüll getrennt entsorgt werden sollte Es liegt in Ihrer Verantwortung diese...

Page 21: ...que tout autre matériel électrique ou électronique par les moyens de collecte indiqués par le gouvernement et les pouvoirs publics des collectivités territoriales L élimination et le recyclage en bonne et due forme ont pour but de lutter contre l impact néfaste potentiel de ce type de produits sur l environnement et la santé publique Pour plus d informations sur le mode d élimination de votre anci...

Page 22: ...nformity is available at the following internet address ui com compliance Eesti keel Estonian Käesolevaga UBIQUITI kinnitab et antud UVC G4 Doorbell seade on vastavus olulistele nõuetele ja teistele asjakohastele sätetele direktiivide 2014 53 EL 2014 30 EL 2014 35 EL ELi vastavusdeklaratsiooni täielik tekst on kättesaadav järgmisel internetiaadressil ui com compliance Suomi Finnish Täten UBIQUITI ...

Page 23: ...ymi postanowieniami Dyrektyw 2014 53 UE 2014 30 UE 2014 35 UE Pełny tekst deklaracji zgodności UE jest dostępny pod następującym adresem internetowym ui com compliance Português Portuguese UBIQUITI declara que este dispositivo UVC G4 Doorbell está conforme com os requisitos essenciais e outras disposições das Directivas 2014 53 UE 2014 30 UE 2014 35 UE O texto integral da declaração de conformidad...

Page 24: ...rademarks of Ubiquiti Networks Inc in the United States and in other countries All other trademarks are the property of their respective owners Apple and the Apple logo are trademarks of Apple Inc registered in the U S and other countries App Store is a service mark of Apple Inc registered in the U S and other countries Android Google Google Play the Google Play logo and other marks are trademarks...

Reviews: