


8
Chapter 2: Cameras
UniFi Video User Guide
Ubiquiti Networks, Inc.
Live Feed
Click
LIVE FEED
to view a live feed of the
selected camera.
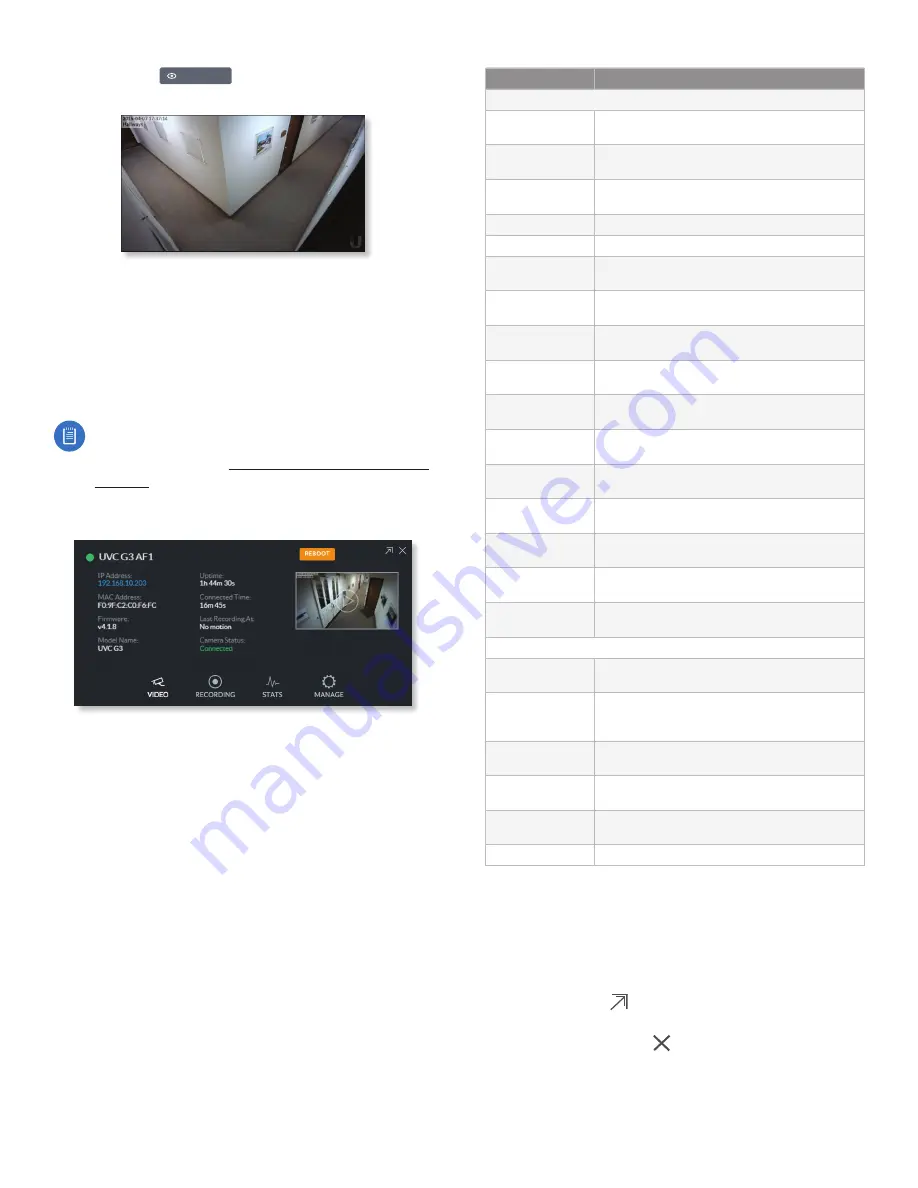
Camera Details Window
Click a camera to view the details window and display its
IP Address
,
MAC Address
,
Model Name
,
Uptime
,
Connected
Time
,
Last Motion At
, and
Status
. To select more than one
camera, click the checkbox next to each camera. To select
a range of cameras, press and hold
Shift
, and then click the
first and last cameras in the range.
Note:
To select a camera, do not click the
Host
column (doing so brings up the camera’s standalone
web UI, described in
).
The
Camera Details
window also has four clickable tabs:
Video
,
Recording
,
Stats
, and
Manage
.
IP Address
Displays the local IP address of the camera.
MAC Address
Displays the MAC (Media Access Control)
Address of the camera. Each camera has its own unique
hardware address.
Firmware
Displays the version of the firmware currently
installed on the camera.
Model Name
Displays the model name of the camera.
Uptime
Displays the amount of time that a camera has
been running without interruption or since last reboot.
Connected Time
Displays the amount of the time the
camera has been connected.
Last Recording At
Displays the last date and time that
a recording took place for the camera you are currently
viewing.
Status
Displays the current status of the camera.
Indicators are
Connected, Disconnected, or Rebooting
.
If
Disconnected
is displayed, a message summarizing
the reason for the disconnection is also displayed. The
following table describes these messages in detail:
Message
Detailed Description
Error Conditions
Camera Database
Failure
UniFi Video database corruption was detected
during a camera firmware upgrade.
Unauthorized
Access
The camera username and/or password were
rejected when attempting to manage a camera.
Authentication
Failed
The camera and/or the controller failed during
their mutual authentication process.
Upgrade Failed
The camera firmware upgrade failed.
Connection Lost
The controller lost its connection with the camera.
Provisioning
Failed
The controller failed to provision the camera
during the camera management process.
Video Settings
Failed
The controller failed while applying video settings
during the camera management process.
Password Sync
Failed
The controller failed while updating the camera
password.
Analytics Settings
Failed
The controller failed while applying analytics
settings during the camera management settings.
Network Status
Settings Failed
The controller failed while applying network
settings during the camera management settings.
Controller Bad
Request
The controller sent a bad request to the camera.
Connection
Timeout
The connection timed out while the controller
was trying to send the camera a message.
Camera Error
An internal camera error was reported back to the
controller.
Firmware Not
Supported
The controller detected an unsupported firmware
installed on a camera it is trying to manage.
No Route To Host
The controller is unable to reach the camera from
its IP address.
Certificate
Mismatch
The controller has detected a certificate mismatch
during the authentication process.
Informational
Upgrade In
Progress
The controller disconnected the camera due to
the camera firmware upgrade being initiated.
Rebooting
The controller disconnected the camera due to
the user rebooting the camera from the UniFi
Video web application.
Updating
Password
The controller has requested a password update
to the camera.
Camera
Umanaged
The controller un-managed the camera.
Camera
Discovered
The controller discovered a camera.
Camera Initialized
The controller is initialized and can be managed.
Reboot
(Functional for administrators only.) Click
Reboot
to reboot the camera. The camera’s status
will temporarily change from
Connected
to
Rebooting
,
and then
Disconnected
before coming back online as
Connected
. Rebooting a camera will also reset the
Uptime
and
Connected Time
fields in the details window.
Hide Details
Click
to hide the camera details. Click it
again to reveal the camera details.
Exit Camera Detail
Click
to close and exit the
Camera
Details
window.
Live Stream
Click the image thumbnail in the upper-right
corner to display the live stream window of the selected
camera.
Summary of Contents for UniFi G3 Dome
Page 2: ......
Page 24: ...20 Chapter 5 Timeline UniFi Video User Guide Ubiquiti Networks Inc...
Page 28: ...24 Chapter 7 Alerts UniFi Video User Guide Ubiquiti Networks Inc...
Page 36: ...32 Chapter 9 Settings UniFi Video User Guide Ubiquiti Networks Inc...
Page 54: ...50 UniFi Video User Guide Ubiquiti Networks Inc...


