


1
Chapter 1: Overview
airFiber X User Guide
Ubiquiti Networks, Inc.
airFiber Configuration Interface
System Requirements
• Microsoft Windows 7, Windows 8; Linux; or Mac OS X
• Java Runtime Environment 1.6 (or above)
• Web Browser: Mozilla Firefox, Apple Safari,
Google Chrome, Microsoft Edge, or Microsoft Internet
Explorer 11
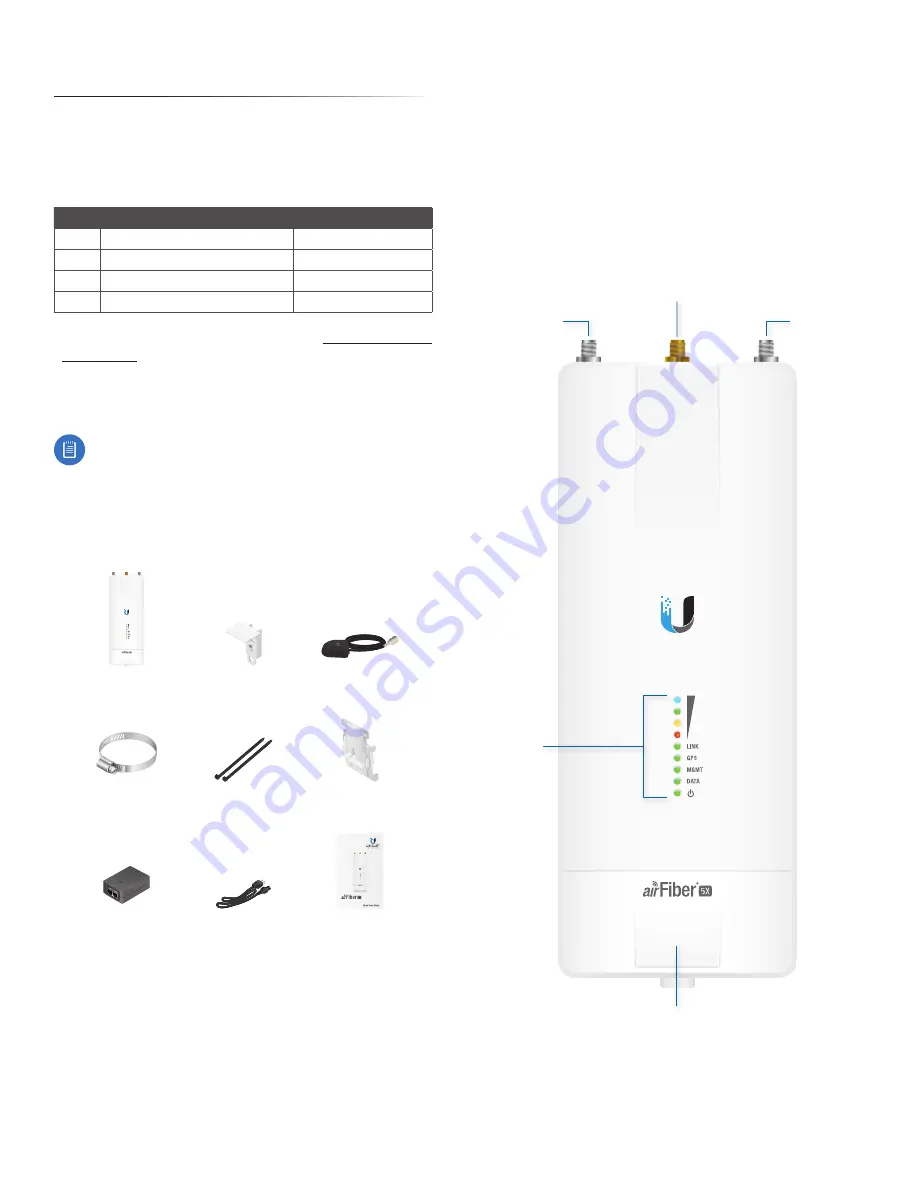
Hardware Overview
Port Cover
LED
Panel
Connects to
External GPS
Antenna
Chain 0:
Connects to
+45° on
airFiber Antenna
Chain 1:
Connects to
-45° on
airFiber Antenna
Chapter 1: Overview
Introduction
Thank you for purchasing the Ubiquiti Networks®
airFiber® X Carrier Backhaul Radio. This User Guide is for
use with the following models:
Model Description
Operating Frequency*
AF-2X
2.4 GHz Carrier Backhaul Radio
2400 - 2500 MHz
AF-3X
3 GHz Carrier Backhaul Radio
3300 - 3900 MHz
AF-4X
4 GHz Carrier Backhaul Radio
4940-4990 MHz
AF-5X
5 GHz Carrier Backhaul Radio
5150 - 5925 MHz
* Depends on Regulatory Region. Refer to
for more information.
This User Guide provides installation instructions, explains
how to set up an airFiber link, and shows how to access
and use the airFiber Configuration Interface.
Note:
Throughout this User Guide,
airFiber X radio
refers to all models listed above. Unless noted
otherwise, illustrations for a specific model are
applicable to all airFiber X radio models and
accessories.
Package Contents
airFiber AF-2X, AF-3X,
AF-4X, or AF-5X
GPS Antenna Mount
External GPS Antenna
Metal Strap
Cable Ties
(Qty. 2)
Universal Bracket
(AF-4X and AF-5X only)
5 GHz Carrier
Backhaul Radio
Model: AF-5X
DATA
MGMT
GPS
LINK
DATA
MGMT
GPS
LINK
airFiber PoE (24V, 1A)
with Mounting Bracket
Power Cord
Quick Start Guide
TERMS OF USE: Ubiquiti radio devices must be professionally installed. Shielded Ethernet cable and
earth grounding must be used as conditions of product warranty. TOUGHCable
™
is designed for
outdoor installations. It is the customer’s responsibility to follow local country regulations, including
operation within legal frequency channels, output power, and Dynamic Frequency Selection (DFS)
requirements.


