


SKU 92961
Page 5
Operation
WARNING:
Tires are usually pressurized. DO NOT break the bead on any tire
unless you have ensured that all pressure has been released from the tire. Do this
by relieving or removing the valve in the stem.
CAUTION:
Tires sometimes contain fluids such as leak sealers. Use caution
when breaking the bead to prevent any material in the tire from getting in your
face, on equipment or otherwise injuring any person or animal or causing property
damage.
CAUTION:
Do not force this tool if it is not compatible to the size of the tire being
worked on.
1. To inspect or repair a tire, first remove the wheel from the vehicle. Make sure
the tire is basically clean so you can see any damage.
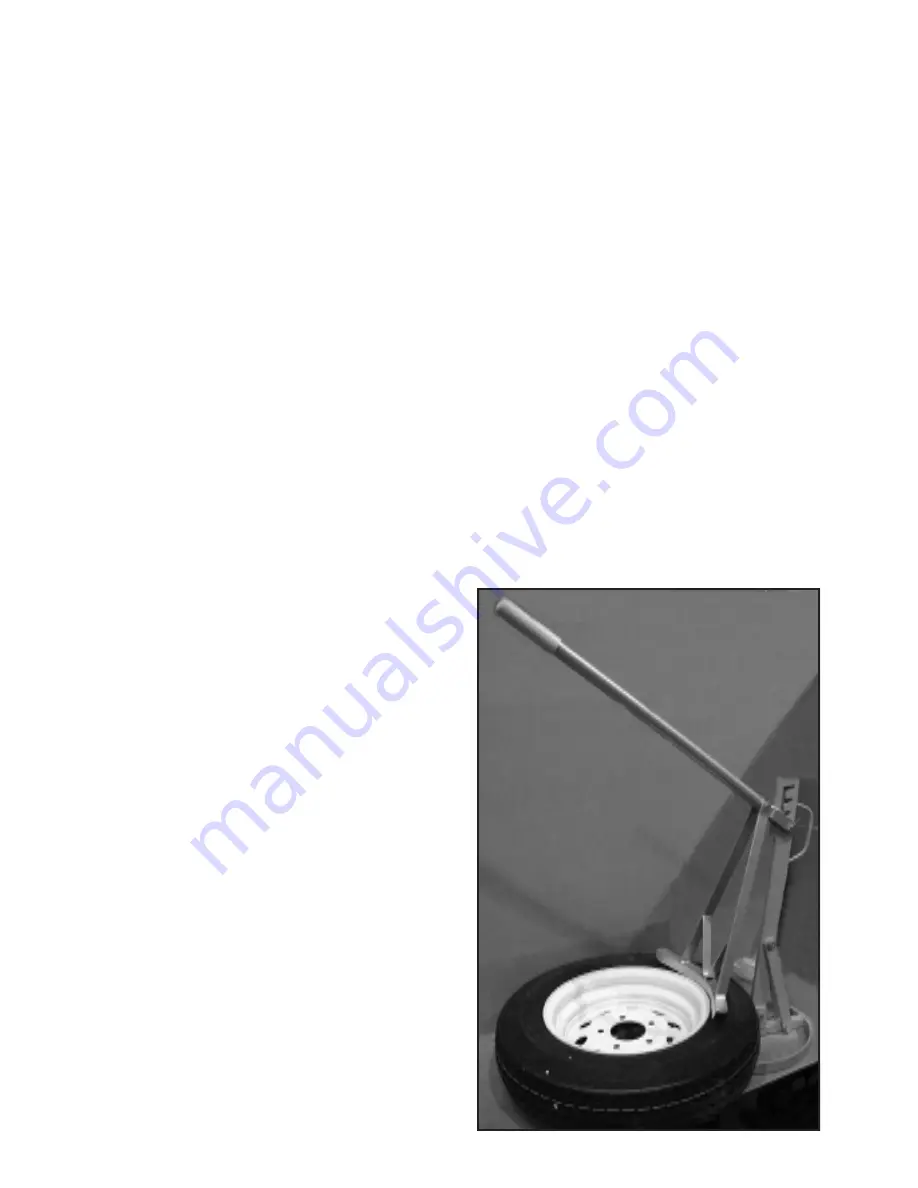
2. Place the tire flat on the Base (1).
3. Lift the Handle (11) up, and place the Breaker (10) on the tire bead.
NOTE:
This tool has four settings for different tire widths. Adjust the Pin (7) in the
slots at the top of the Column (6) as needed. Higher settings are for thicker tires.
Lower settings are for thinner tires. Select a setting that best fits the tire you are
working on.
4. Press the Handle (11) down to
break the bead. If necessary,
rotate the wheel to break the bead
around its edge.
5. Repeat this process on the reverse
side of the tire to completely
loosen the tire from the wheel.
Maintenance
1. Periodically inspect this machine
for loose bolts, bent or damaged
components.
2. Regularly wipe down and clean this
tool to keep it in best condition.
3. Occasionally lubricate the many
hinge points of this tool with a
medium weight oil.
4. When not in use, store this tool in a


