background image

Page 7

SKU 91960

For technical questions, please call 1-800-444-3353

NOTE: Some parts are listed and shown for illustration purposes only and are not available
individually as replacement parts.

PLEASE READ THE FOLLOWING CAREFULLY

THE MANUFACTURER AND/OR DISTRIBUTOR HAS PROVIDED THE PARTS DIAGRAM IN THIS
MANUAL AS A REFERENCE TOOL ONLY.  NEITHER THE MANUFACTURER NOR DISTRIBU-
TOR MAKES ANY REPRESENTATION OR WARRANTY OF ANY KIND TO THE BUYER THAT HE
OR SHE IS QUALIFIED TO MAKE ANY REPAIRS TO THE PRODUCT OR THAT HE OR SHE IS
QUALIFIED TO REPLACE ANY PARTS OF THE PRODUCT.  IN FACT, THE MANUFACTURER
AND/OR DISTRIBUTOR EXPRESSLY STATES THAT ALL REPAIRS AND PARTS REPLACEMENTS
SHOULD BE UNDERTAKEN BY CERTIFIED AND LICENSED TECHNICIANS AND NOT BY THE
BUYER. THE BUYER ASSUMES ALL RISK AND LIABILITY ARISING OUT OF HIS OR HER
REPAIRS TO THE ORIGINAL PRODUCT OR REPLACEMENT PARTS THERETO, OR ARISING
OUT OF HIS OR HER INSTALLATION OF REPLACEMENT PARTS THERETO.

Parts List

Part No.

Description

Qty.

Part No.

Description

Qty.

1

Front Wheel

2

24

Upper Handle

1

2

Washer

2

25

Spring

2

3

Shaft

1

26

Screw

2

4

Lock Washer

2

27

Pin

2

5

Nut M18

2

28

Bar

1

6

Shaft

1

29

Lift Arm

1

7

0-ring

12

30

Lock Washer

2

8

Link Rod

2

31

Shaft

1

9

Nut

2

32

Pull Rod Axis

2

10

Link Rod Shaft

2

33

Right Frame

1

11

Rear Wheel Set

2

34

Screw

4

12

Nut

2

35

Rubber Pad

2

13

Lock Washer

8

36

Nut

8

14

Bolt

8

37

Spring Washer

8

15

Left Frame

1

38

Link Rod Shaft

2

16

Arm Axle

1

39

Washer

8

17

Nut

2

40

Tie Down Loop

4

18

0-ring

4

41

Nut

4

19

Pull Rod

2

42

Handle Base Axis

2

20

Bolt

4

43

Handle Base

1

21

Rear Wheel Saddle

2

44

Case

2

22

Power Unit Assembly

1

45

Washer

2

23

Lower Handle

1

46

Bolt

2

47

Screw

1

Summary of Contents for 91960

Page 1: ...eb site at http www harborfreight com Copyright 2004 by Harbor Freight Tools All rights reserved No portion of this manual or any artwork contained herein may be reproduced in any shape or form withou...

Page 2: ...e stored in a dry location to inhibit rust Always lock up tools and keep out of reach of children 5 Use the right tool for the job Do not attempt to force a small tool or attachment to do the work of...

Page 3: ...nance should be performed regularly Warnings Specific To The Motorcycle Lift 1 Do not attempt to lift any load greater than the 1500 Lb maximum capacity 2 Always use good quality hydraulic oil Do not...

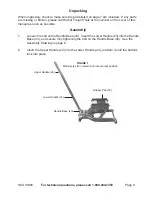
Page 4: ...f this manual as soon as possible Assembly 1 Loosen the bolt on the Handle Base 43 Insert the Lower Handle 23 into the Handle Base 43 and secure it by tightening the bolt on the Handle Base 43 See the...

Page 5: ...s secure continue pumping the Upper Handle 24 to raise the motorcycle to the desired height Immediately upon reaching the desired height insert the Bar 28 as shown in FIGURE 2 on page 4 to lock the Li...

Page 6: ...illing the Lift open the Oil Plug see FIGURE 3 on the Power Unit Assembly 22 and check the oil Fill to the top with a high quality hydraulic oil if necessary 3 If bleeding with the Oil Plug removed tu...

Page 7: ...OT BY THE BUYER THE BUYER ASSUMES ALL RISK AND LIABILITY ARISING OUT OF HIS OR HER REPAIRS TO THE ORIGINAL PRODUCT OR REPLACEMENT PARTS THERETO OR ARISING OUT OF HIS OR HER INSTALLATION OF REPLACEMENT...

Page 8: ...Page 8 SKU 91960 For technical questions please call 1 800 444 3353 Assembly Drawing...

Reviews: