U-Media WUB-310A User Manual Download Page 2


2

Federal Communication Commission Interference Statement 

 
This equipment has been tested and found to comply with the limits for a Class B digital device, 
pursuant to Part 15 of the FCC Rules.    These limits are designed to provide reasonable protection 
against harmful interference in a residential installation.    This equipment generates, uses and can 
radiate radio frequency energy and, if not installed and used in accordance with the instructions, 
may cause harmful interference to radio communications.  However, there is no guarantee that 
interference will not occur in a particular installation.  If this equipment does cause harmful 
interference to radio or television reception, which can be determined by turning the equipment off 
and on, the user is encouraged to try to correct the interference by one of the following measures: 
 

Reorient or relocate the receiving antenna. 

Increase the separation between the equipment and receiver. 

Connect the equipment into an outlet on a circuit different from that 
to which the receiver is connected. 

Consult the dealer or an experienced radio/TV technician for help. 

 
FCC Caution: Any changes or modifications not expressly approved by the party responsible for 
compliance could void the user's authority to operate this equipment. 
 
This device complies with Part 15 of the FCC Rules. Operation is subject to the following two 
conditions: (1) This device may not cause harmful interference, and (2) this device must accept any 
interference received, including interference that may cause undesired operation. 


IMPORTANT NOTE: 
FCC Radiation Exposure Statement: 


This device complies with FCC RF Exposure limits set forth for an uncontrolled environment, under 
47 CFR 2.1093 paragraph (d)(2). 
This transmitter must not be co-located or operating in conjunction with any other antenna or 
transmitter. 
 
This device was tested for typical by stander conditions that may occur during use. To comply with 
FCC RF exposure requirements a minimum separation distance of 1.5cm must be maintained 
between the user’s body and the device, including the antenna. 


Maximum average SAR (1g) (FOR DSSS) is 0.275W/kg.
Maximum average SAR (1g) (FOR OFDM) is 0.109W/kg.

U-MEDIA declares that WUB-310A,  ( FCC ID: SI5WUB310A ) is limited in CH1~CH11 for 2.4 

GHz by specified firmware controlled in U.S.A.

This equipment complies with FCC radiation exposure limits set forth for an uncontrolled 

environment. End users must follow the specific operating instructions for satisfying RF exposure 

compliance.

This transmitter must not be co-located or operating in conjunction with any other antenna or 

transmitter.

Summary of Contents for WUB-310A

Page 1: ...1 802 11b g Wireless USB Adapter User s Guide Version 1 0...

Page 2: ...e for compliance could void the user s authority to operate this equipment This device complies with Part 15 of the FCC Rules Operation is subject to the following two conditions 1 This device may not...

Page 3: ...ct In a domestic environment this product may cause radio interference in which case the user may be required to take adequate measures This transmitter must not be co located or operation in conjunct...

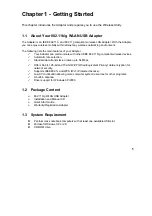
Page 4: ...11b g WLAN USB Adapter 5 1 2 Package Content 5 1 3 System Requirement 5 1 4 LED Definition 6 1 5 Adapter Hardware and Utility Installation 6 1 6 Using the Utility to Configure Your Network 14 Chapter...

Page 5: ...ireless devices 9 Automatic rate selection 9 Standard data transmission rates up to 54 Mbps 9 Offers 64 bit 128 bit and 152 bit WEP Wired Equivalent Privacy data encryption for network security 9 Supp...

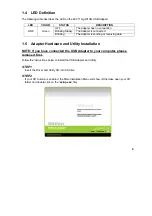
Page 6: ...er is sending or receiving data 1 5 Adapter Hardware and Utility Installation NOTE If you have connected the USB Adapter to your computer please remove it first Follow the instructions below to instal...

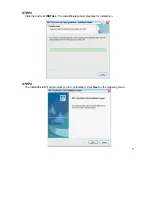
Page 7: ...7 STEP 3 Click the button of INSTALL The InstallShield wizard prepares for installation STEP 4 The InstallShield Wizard prompts you for confirmation Click Next on the following menu...

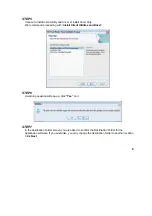
Page 8: ...with Install Client Utilities and Driver STEP 6 A warning question will pop up click Yes on it STEP 7 In the destination Folder screen you are asked to confirm the Destination Folder for the applicat...

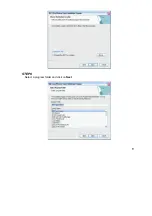
Page 9: ...9 STEP 8 Select a program folder and click on Next...

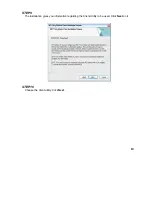
Page 10: ...10 STEP 9 The installation gives you information regarding the Client Utility to be used Click Next on it STEP 10 Choose the client utility Click Next...

Page 11: ...11 STEP 11 At this moment please insert your USB Adapter to your Laptop and click OK STEP 12 You will get the Found News Hardware Wizard menu click on Cancel...

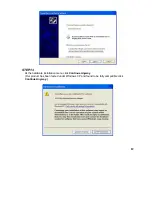
Page 12: ...12 STEP 13 At the hardware installation menu click Continue Anyway Our product has been tested under Windows XP and found to be fully compatible click Continue Anyway...

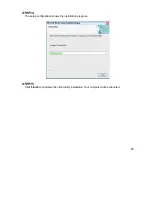
Page 13: ...13 STEP 14 The setup configuration shows the installation progress STEP 15 Click Finish to complete the client utility installation Your computer will be rebooted...

Page 14: ...work The following are explanations on how to configure and use the Utility program After completing the installation procedure a new icon as shown below will automatically appear in the lower right t...

Page 15: ...15 Press the right mouse button and click Open 802 11b g Client Utility The 802 11b g Client Utility window as shown below will appear...

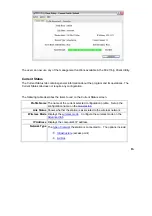
Page 16: ...the items found on the Current Status screen Profile Name The name of the current selected configuration profile Set up the configuration name on the General tab Link Status Shows whether the station...

Page 17: ...e Security tab Signal Strength Shows the strength of the signal Click the Advanced button to see the advanced status diagnostics Advanced Status Information Click the Advanced button on the Current St...

Page 18: ...e access point the wireless adapter is associated to Power Save Mode Shows the power save mode Power management is disabled in ad hoc mode Configure the power save mode on the Advanced tab Current Pow...

Page 19: ...he Profile list and click the Modify button The Profile Management dialog box displays the General tab Profile Management Edit the General tab Edit the Security tab Edit the Advanced tab To configure...

Page 20: ...move as appropriate The first profile in the Auto Selected Profiles box has highest priority and the last profile has lowest priority 3 Click OK 4 Check the Auto Select Profiles box 5 Save the modifie...

Page 21: ...fresh to refresh the list at any time Connecting to a different network Highlight a network name and click the Activate button to connect an available network If no configuration profile exists for th...

Page 22: ...ng password policy and wish to deploy an 802 1X EAP type that does not require digital certificates supports a variety of user and password database types supports password expiration and change and i...

Page 23: ...ghtweight and Efficient Application Protocol is the general framework for a set of high performance efficient protocols which are ideal for mobile and wireless applications LEAP is designed to address...

Page 24: ...24 allow association...

Page 25: ...stall the Driver Follow the steps below to remove or uninstall the USB Adapter driver from your computer Step 1 To remove the driver from the OS go to Start Control Panel Step 2 Double click System St...

Page 26: ...g the Wireless Utility To perform the upgrade follow the steps below Step 1 Download the latest version of the utility from the web site and save the file on your computer Step 2 Follow the steps in S...

Reviews: