U-Line Product Operation
5
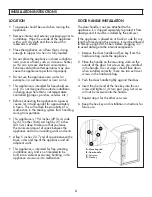
UPPER ZONE CONTROLS
LOWER ZONE CONTROLS
Light
Display
Power
Warmer
Warmer
Cooler
Cooler
Display
1
2
3
4
5
6
7
8
4 Product Operation
Air Flow
IMPORTANT
IMPORTANT
The unit requires proper air flow to perform at its highest
efficiency. Do not block the front grille or internal fans at
any time, or the unit will not perform as expected. Do not
install the unit behind a door.
To turn the unit on or off, press and hold the POWER icon (1) for
about ten seconds and release. The display will show the unit set-
point temperature when turned on and display OFF when the unit
is off.
Electronic Control Panel
Digital Display.
Dual Zone Wine Captain Models provide two
controlled temperature zones to satisfy the specific storage
requirements of your finest wines.
The electronic control with dual digital displays shows a single
continuous set-point temperature for each zone. This set point is a
base number used by the controller to maintain the multiple
temperature zones in the unit. The factory default set-point for
Wine Captain models is 50°F. The set-point temperature is a
gauge for further temperature adjustments.
Turning the Display Off.
Wine Captain Models have a DISPLAY
OFF mode available through the control panel. This allows you to
control if the display (4 & 5) will be ON or OFF with the door
closed. The icon sequence that follows will switch between both
modes, On or Off:
1. Press and hold the WARMER icon (2), and simultaneously
within five seconds press the ON OFF icon (1) three times.
2. The display will be either visible or dark with the door closed.
To return to the previous mode, repeat Step 1.
Dual Temperature Zones
To adjust the set point temperature:
Your unit has been designed to provide two temperature zones
(upper and lower) in the cabinet. Each zone can be adjusted within
the 4 following temperature ranges:
1. Press and release the desired zone Warmer (2 or 6) icon to
put the controller in the SET TEMPERATURE mode. The
current range symbol will show on the display. (4 or 5)
2. Within five seconds press the WARMER or COOLER icon to
scroll to the desired range (RW, WW, SW, BV).
3. When the desired range is displayed, press the LIGHT (8) icon
to display the current set-point temperature.
4. Press the WARMER (2 or 6) or COOLER (3 or 7) icon as
required to adjust the set-point temperature.
5. When the desired set-point is displayed, press the LIGHT (8)
icon. The new set-point will show in the display.
6. Repeat for other zone if desired.
Temperature °F °C Selection.
U-Line products supplied for
110 VAC have temperatures displayed (4 & 5) default in Fahrenheit
(°F). Models supplied for 220 VAC have temperatures displayed (3)
default in Celsius (°C).
Easily adjust the display for either type temperature display.
Press and hold the LIGHT icon (8) and simultaneously within
five seconds press the COOLER icon (5) three times to change
the display (3) as needed.
Temperature Display.
Under normal operating conditions the
temperatures will fluctuate based on a number of factors. On
passive cooled units the temperature will always be cool toward
the top and coolest toward the bottom.
To display actual temperature:
1. Press the desired zone WARMER icon (2 or 6) for five
seconds. The display (4 or 5) will indicate the actual
temperature.
2. After about 5 seconds, the set point temperature will return to
the display.
Wine Captain Temperature Ranges
Default
Range
RW (Red Wine)
55°F
60° - 50°F
WW (White Wine)
50°F
55°F - 45°F
SW (Sparkling Wine)
45°F
50° - 40°F
BV (Beverage)
38°F
60° - 34°F
Initial Startup
All U-Line controls are preset at the factory. Initial startup requires
no adjustments.
IMPORTANT
IMPORTANT
U-Line recommends allowing the unit to run overnight
before loading refrigerator or freezer with product.
Summary of Contents for Wine Captain 2275ZWCSSL
Page 5: ...U Line Use and Care Guide 3...
Page 16: ...14 U Line Use and Care Guide...
Page 22: ...20 U Line Use and Care Guide...